What's New
- Today
-
 DINGDONG77 joined the community
 - Yesterday
-
The last report of the season from Yosemite's winter rangers. Those snow rangers in Tuolumne Meadows are on their way down, but have posted one last report from the High Sierra. As usual, it's a great read, with both info and photos. Check it out--and be happy that spring is on its way! https://www.nps.gov/yose/blogs/update-for-april-17-2024.htm
-
7 Ways to Make Freeze Dried Backpacking Meals Better
Aaron Zagrodnick posted a blog entry in TrailGroove Blog
Even the best freeze dried backpacking meals that are out there tend to have some common drawbacks. The most common issue with ready to eat commercial meals is their lack of calories – with meals commonly containing calorie counts in the 400-500 range (or sometimes, even worse at 200-300 calories). Typically these meals will claim to feed 2 – when in fact they're pretty light on calories even for one person after a long hiking day, leaving us to dig through our food bag for anything we can find after dinner. Additionally, meal manufacturers tend to play it safe in an attempt to please palates across the board; meals can’t be too spicy for example, and other times a recipe will try to meet every dietary need all in one meal, resulting in meals that check a lot of boxes, but don’t really excel at anything in particular. Luckily, with a little extra thought at home, and with a few food bag additions we can still use even the average freeze dried meal as a convenient base, but boost calories to an acceptable level while tailoring tastes to our own preferences. Here are 7 easy ideas to help you take freeze dried meals to the next level. I view freeze dried backpacking meals as a great base to add to and customize out on the trail. Olive Oil An easy way to significantly raise calories and add a little flavor as well, olive oil is an ideal way to boost calories up in low calorie freeze dried meals. The best part is that olive oil goes with any meal. Packing olive oil along is only a little tricky – while packets are available, I prefer to pack along an ounce or two or few (depending on trip length) in small, screw top Nalgene bottles that I know will not leak. For shorter trips I like the 2 ounce bottle. For longer treks the 4 ounce Nalgene is a good size or you can take multiple smaller bottles. Either way you basically have calories in a bottle. Tortillas Wrap any meal in a tortilla, instantly boost calories. It’s about as simple as that, with tortillas being easy to pack, calorie dense, and for the most part (with only a little care), they’ll last in an acceptable manner on a trip of nearly any length. Alternatively you can also tear up a tortilla and add it right into your meal, but I find that scooping a freeze dried meal into a tortilla helps make things more of a meal rather than being relegated to eating from a bag. Tortillas are an excellent, backpacking-friendly way to add calories to nearly any meal. Spices An obvious one, packing spices along is a lightweight, easy way to spruce up an otherwise bland meal and to tailor any meal to your specific tastes. Unfortunately, this won’t help much in the calorie department, so I don’t like to go overboard when packing spices for a trip. I prefer to keep things simple: salt, pepper, and some sort of spicy component. Loving spicy food and looking for the most punch for my weight carried, I prefer to add habanero flakes to meals in moderation. As with olive oil, I’ve found spices (in even smaller) screw top Nalgene bottles to work best. More info on packing spices can be found in this Issue 38 article. Cheese Working equally well for lunch and breakfast as it does for dinner additions, cheese packs calories and flavor and adds an element of perceived freshness to any meal. While powdered cheeses exist, this doesn’t work so well for dual use purposes like snacks or lunches. Many types of hard cheeses work well on the trail and cooler non-summer weather helps keeps things fresh. I like to go with wax covered, individual cheese rounds which keep well on the trail in my experience (outside of summer heat), and I will add these right into many freeze dried meals as they are rehydrating to melt them right into the meal. Combine with tortillas for the optimal meal experience. Chips can be eaten by themselves or thinking outside the box, can be added directly to meals...and some brands work better in the backcountry than others. Chips This provides a convenient opportunity to boost the calories in a meal through both the carbohydrates of the chips you add along with the fat content of the various oils that the chips were cooked in, while adding the opportunity to modify the flavor of your meal with various flavor combinations. My current favorite is a bag of Fritos, which I’ll crumble and add to meals like the Chili Mac with Beef Meal from Mountain House. However, in the past I’ve packed along potato chips of various flavors as well – like cheddar and sour cream varieties which pair particularly well with Mexican dishes, for example. And of course, packing along a bag of chips has benefits for lunches and snacking as well. As an added bonus here – adding chips after rehydration of the meal adds crunch, which is nearly always lacking with freeze dried backpacking food. Dehydrated Vegetables An easy way to add flavor, a few calories, and nutrition to any meal is to boost up the vegetables that are likely already included in the meal, but may be on the sparse side. This is one category that you can make as complicated or as simple as you want. Dehydrated and dried vegetables can be found (or made yourself with a dehydrator). This obviously means you can pack along, if desired, any specific vegetable you’d like to go with various meals. I like to keep it simple however, and go with a blend of vegetables that do the job and that go with nearly any meal – and I’ll often throw in a 4 ounce, resealable bag of Karen’s Just Veggies blend that I can add to any meal. Make sure to add these in while rehydrating the meal or you’ll add some (unintended) crunch to your meal. Jerky might be one of the most original trail-ready foods. Beef Jerky / Freeze Dried Beef or Chicken There are a lot of good freeze dried meals that are out there that are vegetarian, but for me, I like a chicken or beef component to dinners. Obviously if you’re a vegetarian skip this section as you’re already all set, but for others taking along some beef jerky is one way to add a meat component to otherwise vegetarian freeze dried meals. On other meals, meat is often included but at near undetectable levels so adding jerky can help here while adding protein to the meal. Various flavors of beef jerky can also be used to add additional flavor to meals – I like to tear jerky into small pieces, and as with additional vegetables add to the meal during rehydration. For a splurge, Backpacker’s Pantry also has freeze dried chicken in single serving pouches that can be added to any meal (availability is intermittent) or you can buy Mountain House #10 cans of freeze dried beef / chicken and repackage, but you’ll then have the rest of the can of freeze dried meat that you’ll need to use in a couple weeks once opened. Final Thoughts While many freeze dried meals play it safe and end up a little on the bland side and / or low in the calorie count department, packing some of the freeze dried meal staples detailed in this article along will help take average meals to good, and good meals to great, even if you’re packing along a meal on our 10 Best Backpacking Meals list. Freeze dried meals make for a great (and especially convenient) base for your backcountry meals, and by taking along a few extra items in the food bag, we can keep things convenient and have the right items in our backcountry kitchen to add a boost in the calorie department, a flavor boost, or both. Need to stock up on meals? REI offers 10% off 8 or more meals here. - Within the Last week
-
Backpacking in the Needles District, Canyonlands National Park
Aaron Zagrodnick posted a blog entry in TrailGroove Blog
On this trip, I was able to return to Canyonlands National Park, but this time stayed on the opposite side of the river from the Maze to join up with Ted Ehrlich and Christy who drove in from Colorado to backpack through Salt Creek Canyon and the Needles. The Needles offer a near endless array of unique rock formations to find and routes to explore. Into the Needles Our respective drives late on a Thursday night resulted in a noon-ish start from the Cathedral Butte trailhead the next day after shuttling a vehicle. The weather was slightly sketchy, overcast with what looked like rain in the distance and a brisk wind reminded you that spring wasn’t yet in full swing. However, once we dropped off the top of the butte and into the Salt Creek drainage we escaped the wind and settled into hiking the easy 12 or so miles we’d planned for the day…or so we thought. This early in the season, the earliest signs of spring were just starting to show themselves, and at many points along the way it was fairly apparent that others had been here before, some not so recently. Following the drainage downstream it soon became apparent that we weren’t making the progress that we should have been making. Ted and I cross checked maps and found that there was a mileage discrepancy – with the map we’d been referencing underreporting the trail mileage. In the end it took us much longer than expected to reach our goal for the day, the Salt/Horse Zone for which we had obtained our backpacking permit. 6 hours of expected hiking ended up being more like 9, and headlamps on, we filtered water, found a spot to setup camp, and ate dinner before retiring for the night. I tried to stay up and read a while, but actually woke up in my tent some time later during the early morning hours, headlamp still on. We continued following the drainage downstream on day 2 to Peekaboo, where we turned west and started climbing to higher ground – sometimes via unexpected ladders. Here there was no trail, only cairns, and the views didn't disappoint. Sunset found us still a few miles from our reserved site, and once again we found and setup camp after dark. It would be our last night, and with long drives home the next day we planned to wake up early in hopes of squeezing in one last side trip prior to trip’s end. A cross country route through the Needles. Back to Civilization Soon after 7 A.M. the next day we all managed to pack up and put in a few extra miles, climbing to Druid Arch. After admiring the arch for a few minutes and snapping a few photos, we then reversed course on the out and back trail that leads to the arch and made it back to the other car…crowds increasing along the way…parked at Elephant Hill by noon. With 40+ miles down and a lot of it in soggy shoes from hiking through Salt Creek, it was nice to rest my feet. An hour later we parted ways back at Cathedral Butte, and I drove north anxious to make it home shortly after dark. A snowstorm near the border of Utah and Wyoming thwarted that attempt however, and at one point I found myself crawling along in a strange mix of fog and snow in the mountains after dark at 5mph. Great scenery and hiking, sand in my shoes and snow under the tires at some point – what's starting to seem like par for the course on a typical trip to Utah in spring. Need to Know Best Time to Go Spring and fall are the best times to explore Canyonlands to avoid summer heat and winter weather. Getting There From Moab, drive south on U.S. 191 39.7 miles to UT-211. Head mostly west towards Canyonlands National Park. The turn off for the dirt Beef Basin / 107 road leading to Cathedral Butte is 20.3 miles on the south side of the road. When we were there, the road to Cathedral Butte was easily passable for 2WD passenger cars but conditions may vary. The Cathedral Butte Trailhead and parking area will be about 17.2 miles down this road on your right. Continuing west on 211 past the turnoff for the road leading to Cathedral Butte 14.2 miles will get you to the visitor center, and another 6 miles, the last couple on a narrow dirt road, will get you to the Elephant Hill parking area. Information Permits start at $36 and can be reserved online here – individual designated sites as well as some zone camping is available. Effective May 1st, 2014, hard sided bear resistant food containers (check out our BearVault BV450 review if needed!) are required for backpackers in the Upper Salt Creek and Salt/Horse Zones. No fee is required to access Cathedral Butte, but the other end of our shuttle required entering Canyonlands National Park to access the Elephant Hill parking area and requires an entrance fee in addition to your backpacking permit. Be sure to stop by the visitor center for an update on water conditions. If you get in late like we did, camping is available just outside the park at Hamburger Rock. More information can be found on Canyonland's Needles Page. Maps We used Trails Illustrated Map #311 and 210, though be aware that the mileages shown on the map from Cathedral Butte to Peekaboo weren’t entirely accurate (per National Geographic, this will be updated in future versions). Delorme’s Utah Atlas and Gazetteer and this overview map can also be helpful. -
We used to do overnight trips when I was younger in Colorado, Washington and the Sierra in California. A winter outfit tends to weigh a little more so I used a small plastic sled for my dog to pull with a regular mushing harness. She carried close to half my outfit. I used PVC pipe so the sled did not run over her on downhills. Bring insulation for your dog to sleep in. In cold weather I just zipped her into a jacket. I have used 3 season tents, and 4 season tents but the best of all was a Whelen lean to with a fire in front. Find a dense forest or some rock outcrops for a wind break. We could dry out our clothes, stay warm, cook dinner and watch the moon and snow fall all at the same time. I hate being in a little tent for 14 hours a day in winter.
-
My Dad had a ranch on the Coconino NF for 30 years. Water can be hard to find. The North Rim is cooler and wetter.
-
So many great places in CO. Flat Tops, Mt Zirkel, Never Summer Range, Maroon Bells, Crystal River and Ragged Mountain and my favorite the Wimenuche Wilderness Area in the San Juan Mtns.
-
Good idea. I like Cedar Mesa, Escalante and the Grand Staircase. Finding and carrying water should be your concern all the time.
-
R2R is all the rage. My hiking partner of 40 years did it recently at age 68 I think it was. I have too many injuries for that kind of stuff, but I still love backpacking at 73.
-

Ideas for Overnight Backpacking in California With my Dog
ppine replied to mcbrant's topic in Pacific
Ten miles does not sound like much until you go out there and carry 30 pounds of stuff. I like to use a pack for my dog to carry her stuff and a couple of water bottles. Backpacking is a great idea. SoCal has some good place if you can get off the trails. -
I like to stay below the snow and go up in elevation as it melts. This year 2024 is still above average precip. Headed to Sierra Valley on Friday. There will be some snow around, April 20 even at 6,000 feet.
-
Gear item I liked: One Bottle Hydration system
ppine replied to a_gunslinger's topic in General Backpacking & Hiking
How far are you going to get with a one liter bottle? -
Jargon: What is Declination?
ppine replied to Aaron Zagrodnick's topic in General Backpacking & Hiking
Buy a compass that adjusts for declination and adjust it for your location. -
I teach emotionally challenged kids to ride horses. Horses can teach them things we can't. Trails are fine, but I don't have that much use for them so I don't build them.
-
I worked on the EIS for the proposed public transportation project in YNP in 1974. Here we are 49 years later getting around to the same topic. Americans like to bring a lot of stuff when they camp. They will not agree to bring their camping gear on a public conveyance and give up their cars or RVs. That means that over crowding can only really be alleviated by reducing the amount of visitors at any one time. I like the off season.
-
Backpacking in the Maze, Canyonlands National Park
Aaron Zagrodnick posted a blog entry in TrailGroove Blog
A few years ago and to follow up on a previous Utah hiking trip, Ted Ehrlich and I spent a few days backpacking in the Maze District of Canyonlands National Park. The Maze is frequently referred to as one of the most remote spots in the lower 48, and though I’m not sure how exactly it ranks on that scale, it did require some significant amounts of off-highway driving to reach. The Maze is located in southeastern Utah, west of the confluence of the Colorado and Green Rivers and bordered by the both to the east. Though bordered by water on one side, water is scarce. Springs are scattered to the south and within the canyons themselves, but can’t always be relied upon. We found the plateaus completely devoid of water, and found little water when dropping into the canyons / the Maze itself. Needless to say, views in the Maze don't disappoint. Getting to the Trailhead I’m no 4x4 enthusiast, so we elected to start our trip from the Golden Stairs Trailhead which avoids the roughest sections of 4 wheel drive roads in the Maze. A trail switchbacks down from this spot to the 4 wheel drive road that runs across the southern end of the area where we planned to hike, so a bit of road walking was involved. However, it’s definitely one of the best road walks I’ve ever encountered. From here we essentially route planned on the fly, including an out and back to the Chocolate Drops, a day hike loop past the Harvest Scene, and eventually made our way to the Doll House area and areas overlooking the Colorado River. If you’re carrying a lot of water like we were, the out and backs and day hike loops make things easy by allowing you to temporarily stash some of that weight, and with the way the trails / routes and the roads all seem to intersect in the Maze, many interesting routes can be devised. The Maze is desolate country – arrive prepared and with plenty of water. In the Maze The country is beautiful in a unique and desolate way. It’s also a land of contrasts. The plateaus – hot, windy, and dry, rarely a bird or rabbit to be seen. But the 12,000’ + peaks of the La Sal Mountains rise in the distance with snow-capped peaks and forests rising up their sides. Plunge into the canyons of the Maze and the winds die down, the sun disappears and you can feel the water in the air – but can’t always find it. Deer tracks run through the sand and each bend brings something new, and something ancient. Sunsets never seemed to disappoint and were some the best I can ever recall seeing. Rock holds it all together in an eclectic array of constantly unique shapes and colors. It’s definitely one of those spots that keeps calling you back – I can’t seem to put the map away and shake the idea of another trip. Or maybe it's the sand I'm still shaking out of my shoes that keeps reminding me. With summer heat on the way, hopefully that return trip happens soon. Things only get more interesting around sunset in the Maze. Need to Know Best Time to Go Spring and Fall. Winter can be quite cold and access difficult due to road closures / access. Summer brings very hot hiking and everything that goes with it. Getting There From Green River, Utah travel on Highway 24 south for 24 miles. Near the Goblin Valley turnoff you’ll see a signed dirt road leading East. Alternatively travel north from Hanskville. Travel on this 2wd road for 46 miles to the Hans Flat Ranger Station (open daily 8 AM – 4:30 PM). Continue 12 miles (High clearance 2WD / 4WD) to the top of the Flint Trail Switchbacks. Stop here at the overlook to ensure no vehicles are ascending the switchbacks; if any are wait until they get to the top. Uphill has the right of way and passing will be quite difficult on this section. From this point the roads will be high-clearance 4WD only. Descend the Flint Trail Switchbacks, travelling 3 miles to the fork and navigating 3 hairpin, multiple point turns where a spotter will be very helpful. Once at the bottom, taking the left fork will take you to the Maze Overlook (13 miles) or to the turn off for the Golden Stairs campsite / trailhead (1 mile to the turnoff, an additional mile to the parking area). From the base of the Flint Trail switchbacks, you can also take the right fork and drive directly to the Maze through Teapot Canyon, a much rougher route. One option is to park at the top of the Flint Trail Switchbacks and Hike in via Golden Stairs from there if you or your vehicle isn’t up for the rougher driving in the park. Trails can also be accessed via the Maze Overlook which may require some exposed climbing maneuvers / pack lowering via rope. An alternate dirt road leads north from Highway 95 at Hite. We didn’t explore this road, but at the time of this writing it’s reported to be smoother but requires a longer drive. From this road you can access the road into the Maze through Teapot Canyon or travel to the base of the Flint Trail Switchbacks / beyond. The Park Service has listed driving times here, and we found them to be surprisingly accurate in practice. Information Permits start at $36 and are required for camping and backpacking in the Maze. Check the calendar to reserve a spot. If backpacking permits are full, check for 4WD site availability – the sites are quite nice. Keep in mind however that visitors staying at 4WD sites are required to pack everything out, while those with backpacking permits are required to pack out T.P. only (and all other trash, of course). Cryptobiotic soil is prevalent in the Maze, avoid traveling across it and stick to established routes or slickrock / no impact areas. Check with the Hans Flat Ranger Station for water and road conditions prior to starting your trip. The area is remote, take extra water and leave extra in your vehicle. Take a filter and always carry enough water to get back to your last known source. The Colorado River can be accessed at Spanish Bottom if needed. We carried all the water we needed in a mix of everything from gallon jugs to Nalgene Cantenes, containers from Platypus, and MSR Dromedary Bags. Maps We used National Geographic Trails Illustrated Map 312 and 210. Delorme's Utah Atlas and Gazetteer and this overview map can also be helpful. -

Backpack Gear list for Camping / Outdoor Survival
Michael aka Mac replied to Michael aka Mac's topic in Gear
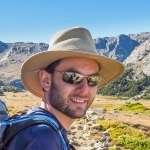
Finally hooked up my external hard drive to this computer where I had a photo of the SAK Swiss Champ, showed below
-
Over a decade ago now, Justin Lichter (also known by his trail name Trauma) released a collection of insights, tips, and stories detailed across more than 200 pages in his book Trail Tested. If you haven’t heard of Justin yet, he’s quite famous in the long distance backpacking and hiking community – having hiked over 35,000 miles in his career. Not only has he completed the Triple Crown of the Appalachian, Pacific Crest, and Continental Divide Trails – he’s done it twice. Throughout his travels his dog Yoni has often been a companion, and he’s no stranger to backpacking overseas either. Trail Tested includes insights on long distance hiking ranging from gear to technique and more. Trail Tested I received my copy of the book shortly after the release and at first was struck by just how visual Trail Tested is. Nearly every page is filled with great photos related to the subject at hand, and at the same time Justin’s descriptions are short and to the point – for a how to guide it’s everything that you need to know without being overdone. As such the book is easy to pick up and read in a relaxed manner, and the book doesn’t require too much commitment from the reader for Justin’s insight to come across. Trail Tested covers just about every backpacking and hiking topic that you can think of, ranging from gear to technique and general trail philosophy. The book is broken down into 3 main sections, the first section titled “For Starters” focuses mainly on things like gear and food selection. The book then moves into the “Getting the Groove” section (obviously our favorite), which details more advanced topics ranging from winter camping to first aid and photography. “Stepping it up” is the last section in the book, where Justin details practices for making your own gear, hiking cross country, and much more. Along the way quick “Trauma Tips” are included that really highlight some of the strategies that you only find by spending time on the trail – the book will definitely save anyone who is just getting on their feet in the backpacking world a lot of time, but is still a great read for the more experienced members of the community as well. The book covers an extensive range of topics and remains an interesting read for hikers of all experience levels. Conclusion Even after finishing the book, I found that I kept pulling it off the shelf just to see what Trauma had to say about various categories of gear as I continually work to refine and perfect my own gear list and approach to life on the trail. I read straight through the book over the course of a few days, and it will continue to remain in my collection as a quick reference for all things that are hiking and backpacking related. Best of all, the book includes a great index to find what you need fast, and with all the pictures that are included, the book is sure to keep you motivated when you’re just not able to make it to the trailhead. You can find Trail Tested at Amazon for about $20.
-
Bigger shoes and tighter laces. Your feet swell with exertion and gains in elevation.
-
If the USFS was serious about "protecting resources" they would thinning at about 4x their current rate.
-
Hi Balzaccom, The simple way is to go where others don't. Use trails for access, then find your own way off trail simple.
-
An American pick-up made by the Big 3. If you are going pull anything of any size a diesel. Just sold a 2002 Ford diesel. Best vehicle of my life. Now I have a 2022 Ram diesel. It is like a spaceship.
-
It might be good. Try it. What if it isn't and you need it?
-
Evernew Ultralight Titanium Review: 1.3 and .9 Liter Pots
Aaron Zagrodnick posted a blog entry in TrailGroove Blog
While the potential exists to makes one's backcountry cooking setup nearly as complex as the average home kitchen, albeit hopefully a bit more miniaturized and lighter, in most cases the average lightweight backpacker only needs to boil water for freeze-dried dinners, freezer bag style cooking, to heat and hydrate a basic meal within the pot, or to heat water for things like coffee and tea. For these backpackers – like myself – the Evernew Ultralight Titanium Series pots have been a fairly popular option on the trail and have been my go-to choice for many trips over more than the past decade. The Evernew ultralight titanium pots have offered me many years of backcountry service. Evernew Ultralight 900 and 1300ml Titanium Pots These 2 pots are from the Evernew's "All Purpose" lineup, which also includes a 600ml version (ECA251) not tested here. With a listed weight of just 4.6 ounces and 4.1 ounces for the 1300ml (model ECA253 – measured weight: 4.9 ounces) and the smaller 900ml (model ECA252 – measured weight: 3.85 ounces) options at my disposal, respectively, these Evernew pots are really quite tough despite being so light. I've downright abused the 1.3 liter, including dry baking (not suggested), cooking in campfires, melting lots of snow for a group, and it’s even suffered a few impacts in the outside pocket of my pack from dropping it off ledges while traversing class 3 terrain. These pots are more short and squat than tall and thin, and as such catch more heat, heating faster and saving a bit of fuel and are more stable on top of a stove. On the downside, the shape doesn't really lend itself to an effective or satisfying combo for an all in one pot / mug solution (such as something like the Snow Peak 700), although it would work if you're not too particular. The lids fit securely, and don’t seem to require constant re-bending of the pot every time you unpack it in an attempt to get things to line up like some other solutions I’ve used. At times I’ve used a large rubber band with a loop to loop to connection on the lid handle – this allows one to then wrap the rubber band all the way around the pot and lid for even more security in the pack (for example when trying to store too many things inside), but these days I don’t bother and store the pot in the outside mesh pocket of my ULA Circuit also helps to keep everything in place. The Evernew Ultralight Series is a great choice for a variety of average lightweight backpacking conditions and applications – although the pizza in the upper left was baked in the 1.3 liter proving it possible, the thin walls may not be best for more in-depth and advanced cooking techniques. The handles (which fold for packing) along with the handle on the lid both feature heat insulating silicone material so you can take care of cooking without having to find that bandanna to use as a pot holder. A small pour spout is integrated to minimize spills and to ease water transfer, and measurement graduations can be found on the sides. Evernew also offers the non-stick versions of these as well, but in my experience it's not needed, adds a little weight, and the coating requires care both in your choice of utensils and in your cooking technique to keep from scratching it. 3 sizes are offered – a .6 liter, a .9 liter, and the largest 1.3 liter version. The .9 liter has been a perfect size for me for either solo cooking in the pot or for two when heating water and rehydrating freeze-dried or freezer bag style meals is all that's required. I will step up to the larger 1.3 liter version when cooking in the pot for two, baking experiments, or when melting snow for water in the winter. I've used these with alcohol stoves and mostly in that case with a Trail Designs Sidewinder Ti-Tri, but most recently I’m usually using them with a canister stove and usually the Soto WindMaster. With this stove, I’m also able to fit a small MSR 110 gram fuel canister in either size, and I’m able to fit a larger 220 gram Snow Peak fuel canister in the 1.3 liter upside down while still being able to close the lid. If you like to store your fuel canister inside your pot, turning the canister upside down may help to make things fit. Conclusion While the thin, scorch-possible walls of the Evernew pots might not be the best choice for the gourmet backcountry chefs among us or for your next morning huevos rancheros experiment on the trail, if you mostly need to heat and boil water, melt snow, or cook the occasional basic pasta meal or beans and rice in the pot like me (low heat and keep stirring!) the Evernew Ultralight Series of pots are hard to beat. Throw in a long handled spoon (the Toaks is my current choice) and optionally some type of mug for coffee (my pick: the Snow Peak 450 – single wall) and you're set. Although the Evernew Ultralight pots are a bit on the pricey side, they're also light, effective, and durable – always a great combination for the outdoors. The Evernew Ultralight pots can at times be hard to track down, but you can usually find them in all 3 sizes for around $50-$70 depending on size here at Amazon.com. -
Hiking Buckskin Gulch: A Trip Report and Guide
Aaron Zagrodnick posted a blog entry in TrailGroove Blog
During an April trip several years ago, Ted Ehrlich and I spent a few days hiking and camping in southern Utah – one highlight of that trip had to be our hike through Buckskin Gulch, one of the longest and deepest slot canyons in the world. With a snowy drive through Wyoming and then a whiteout in Colorado, the drive wasn’t a fast one and I met Ted at a deserted trailhead near Grand Junction around 10pm. From here we’d carpool into Utah. We drove west in the night, eventually moving past the snowstorm and into Utah, where we caught a few hours of roadside sleep. We woke early the next day and were met with icy conditions through the higher elevations of Utah on the morning of day 2, but with assistance from ample amounts of gas station coffee we eventually made it, and descended into warmer weather near the Paria Canyon-Vermilion Cliffs Wilderness Area. The plan at least, was to self-shuttle by bike. Setting up the Hike With only one vehicle for this 20 mile point to point hike, our plan was to self-shuttle. Ted's mountain bike was in the bed of the truck, and that evening we left the bike at the White House Trailhead, our finish point the next day. Our starting point would be at the Wire Pass Trailhead, and after the hike one of us would then ride the bike 15 miles along a dirt road, a highway, then another dirt road back to our starting point. Retracing the ride by vehicle, the driver would return to White House Trailhead to pickup the other hiker. Ted had a shoulder injury and was actually due to have surgery as soon as the trip was over, so the bike ride would be in my hands. With an upcoming 20 mile hike of yet to be determined difficulty, capped with a 15 mile bike ride, I mentally prepared for a somewhat long next day. I knew we’d probably finish the hike late in the day, and I just hoped I didn’t get a flat in the dark halfway back to the truck as we’d both left our flat kits at home. We were already down a tire on the truck from our travels earlier that day along House Rock Valley Road. The night prior to the hike we camped at the appropriately named Stateline BLM Campground, located right on the border of Utah and Arizona. The weather forecast had called for nighttime lows in the 30’s, but I struggled to stay warm in my 30 degree Western Mountaineering Megalite. The next morning revealed frozen water bottles, and in the cold we got a later start than expected but managed to make it to the Wire Pass Trailhead by mid-morning. That might have been a good thing, with the sun now high in a cloudless sky temperatures had climbed. There was still a slight chill to the air, but it was perfect hiking weather. Signs of travelers past Into Buckskin Gulch After paying the day use fee, our hike began and we followed a sandy wash, heading east and slightly downhill. Quickly, things began to close in and we found ourselves in shade – we'd seen the last of the sun for the day. We soon found ourselves at the confluence of Wire Pass and Buckskin Gulch, (first photo in this post above) where we admired some rock art, cowboy signatures, and unfortunately, some very modern rock carvings. We didn't linger long with many miles left on the hike however, and quickly made a right and entered Buckskin Gulch proper. We tried to keep our feet dry for a while, but that didn't last long. And the water was cold. Though we'd cross through pool after pool of water throughout the hike, we lucked out and it was never more than around thigh deep. Bend after bend – we hiked onward, with our cameras getting a heavy workout along the way. The hiking was easy. Imperceptibly downhill / downstream with sand and gravel underfoot – an occasional rocky section. The main challenge was not falling over and receiving a dunk in one of the many pools encountered along the way – and the water didn't always smell that great. The scenery was hard to believe. And it just kept going. Sensory overload that brought a smile to your face with each turn of the canyon. Flood debris appeared out of reach high overhead; this isn't the place you want to be when a flash flood occurs. I was glad we checked the forecast and there was no chance of rain. After a few hours of hiking we ran into a pair of backpackers from Boston, and with our hiking paces at a near equal speed the 4 of us hiked through the canyon for a couple miles as a group. They had planned to overnight near the confluence with the Paria River, then a finish at White House the next day where their car lay in wait. They decided to take a break, and Ted and I pushed on at a quick pace since we wouldn't be stopping for the night. I hiked faster – I didn't want to be riding a bike in the middle of the night. Occasionally birds would fly in and out of the canyon from above, easily navigating in and out of the canyon as they wished. I was surprised to even find life close to the canyon floor, however, some of which was best avoided. Ted and I continued to try to maintain a steady pace, but Buckskin Gulch can be distracting. We found ourselves hiking with camera in hand, frequently stopping in an attempt to capture what we were seeing as a photograph. I'm not sure we realized it, but our pace was significantly slowed by scenery, and soon we heard the echo of footsteps approaching. The 2 women we'd met earlier approached from upstream. They'd changed their minds. Making the decision to skip the overnighter and hike through as we were, they offered to give us a ride back to our vehicle at the end of the hike. Not only that, but Ted and I were running low on water, and they'd brought enough for two days. They were looking to reduce their pack weight, and we refilled our supply. I was quite relieved to know I wouldn't be setting out on a 15 mile bike ride, already tired from hiking, as the sun set later that day. Life was good. Now able to slow our pace, we hiked together through the canyon in a leisurely style. Conversation ensued and miles flew by. Soon we found ourselves at the crux of the trip, the rockfall. Here, with the help of a rope we all down climbed the main obstacle in Buckskin Gulch. To the right an alternate route around the rockfall / jam existed, referred to as the "Rabbit Hole", but that route appeared to involve a bit of down climbing as well, then a claustrophobic crawl under a pile of huge rocks. We all elected to simply take the steeper, but more direct route down via the rope. The climb wasn't too bad, but you definitely don't want to let go of the rope. We were quickly on our way without incident. Soon we came to the end of Buckskin Gulch and the confluence with the Paria River. We started to trek upstream towards the White House Trailhead, still about half a dozen miles ahead. Gradually, the terrain began to open up. We crossed the river dozens of times, and peregrine falcons swooped overhead, then observed our trek from the rim above. Dry shoes are not an option when hiking Buckskin Gulch and the Paria River. Wrapping up the Hike We eventually made it to Whitehouse Trailhead as the sun was setting, with soggy feet and shoes full of sand. I was definitely glad for the ride and we soon found ourselves back at the Wire Pass Trailhead and our vehicle, and after many thanks we parted ways with our impromptu hiking companions for the day. Having just finished one of the more memorable day hikes I've ever completed, Ted & I pulled back into Stateline Campground just as darkness fell, ready for dinner, sleep, and a change of socks. Other than figuring out where to start and finish the hike, the rest is for the most part, just following the canyon and river bed. Need to Know Best Time to Go Buckskin Gulch is best hiked in late spring and fall. It stays cool within the canyon, so in colder weather the water could be quite chilly. Check with the BLM office in Kanab for current conditions and check the weather forecast for precipitation in the area, as well as the vast area upstream, before you enter. Getting There From Kanab, UT head east on Highway 89 for approximately 38 miles, then take a right / head south on the unpaved House Rock Valley Road. 8.4 miles later you'll reach the Wire Pass Trailhead. For a longer hike, start at the Buckskin Gulch Trailhead, 4.4 miles from the Highway 89 / House Rock Valley Road intersection. To reach White House Trailhead by car, drive east 4.9 miles from Highway 89 & House Rock Valley Road, take a right and head south on a dirt road. 2.1 miles later you'll arrive at the trailhead / campground – one spot towards the end could be tricky for low clearance vehicles. Stateline (1.6 miles south of the Wire Pass Trailhead) or White House Campgrounds offer good places to setup a staging point. Maps and Books I printed off USGS topos to cover the route, but never needed them (do however, take a map!). The route is shown on Trails Illustrated 859. For driving in the area I found Delorme's Utah Atlas and Gazetteer very useful. There are many hiking opportunities in the surrounding area. I found the Kelsey guides useful for exploring other destinations close by – you can find them here. Additionally, 50 Best Short Hikes Utah's National Parks, as well as Hiking Arizona are guidebooks that are worth a look for planning additional hikes in Utah and Arizona. Information For day use, permits are available at the self-serve pay station at the trailhead – $6 per person / dog per day. For overnight use, you'll need to get a permit, try to pick one up in advance as they tend to go fast. If you happen to pass through Kanab, consider getting there early and entering the lottery to visit The Wave. Most of the time a use at your own risk rope will be in place at the rockfall, but it's best to take a suitable rope for lowering packs and yourself over the edge. You could possibly sneak through the "Rabbit Hole" as well, but it can at times be blocked by flood debris. If you keep a close watch, a few seeps and springs may be available for water resupply along the way. Commercial shuttle services are also available if needed. -
Backpacker's Pantry Rocky Mountain Scramble Review
Aaron Zagrodnick posted a blog entry in TrailGroove Blog
While most breakfasts on the trail in my case are whatever gets me hiking the fastest – typically an energy bar or two and coffee – from time to time a more elaborate breakfast is called for. And of course, there’s always breakfast for dinner, which for me is the most likely time I’ll make such a breakfast meal. For this purpose I already have a couple go-to freeze dried backpacking breakfast meals including the Breakfast Skillet from Mountain House and their Spicy Southwest Style Skillet. Variety is always something I’m after as well however, and I recently decided to try out a hot breakfast meal that’s still easy to make – the Backpacker’s Pantry Rocky Mountain Scramble meal. The meal contains a mix of scrambled eggs and potatoes in something of a gravy with plenty of black pepper. Making the Meal and Impressions An easy combination to like on paper, this meal is a mix of scrambled eggs, potatoes (included as flakes and as freeze dried dices), cheese, a butter sauce, and with – as I’d find out – quite a bit of black pepper. This gluten-free meal is ready in 15 minutes after adding 1.25 cups of water. Each pouch contains 290 calories and 19 grams of protein. The meal retails for around $11 with an expiration date 3 years out, and is marketed as a 1 serving meal and is very compact for easy packing. Right off the bat the meal was different than I expected it to be – while I had come in thinking this would be something reminding one of cheesy scrambled eggs with perhaps some diced type hash browns all mixed together, the meal ends up all being contained within something of a gravy. Taste wise, the black pepper in this meal is strong and at the forefront, and if you’re not a big fan of black pepper some could say it’s overpowering. I didn’t get much cheese impact in the meal, and as such between a lack of cheese flavor and the black pepper plus the gravy, this oddly reminds me most of biscuits and gravy, substitute scrambled eggs for the biscuits. Not something I’d request in a restaurant, but nevertheless the meal is still pretty good. The meal is good, but due to its size it may be best to consider it something of a side dish. Conclusion That said, at 290 calories and $11, this one is pretty low in the calorie department and high on the price. In addition it would be tough to boost up the calories by using the meal as a tortilla filling because of the soupiness. However, if you’re after a diner type style meal as a breakfast in the backcountry, or as one part of a larger breakfast, you do get scrambled eggs and plenty of them – not something we always have the luxury of eating out on the trail. You can check out the Rocky Mountain Scramble meal from Backpacker’s Pantry here at Amazon.


-
Popular Contributors
-
1
 balzaccom
2 -
2
.jpg.b247ed4b913db5ff82fcb043892c9fca.thumb.jpg.3d872db3c824dd10508ef68affb4ee79.jpg) jay
jay
2 -
3
Aaron Zagrodnick
2 -
4
 TollerMom
1
-
-
Current Deals
Premium Members: Get a free Gaia GPS Premium Subscription for a year ($40 value) to use with the GaiaGPS smartphone app. Full details here on the Premium Gear Deals and Search Page
REI: Up to 50% Off Past-season Clothing, Gear & Footwear
Zpacks: Lightweight and roomy, the Duplex Tent weighs just 19 ounces and sleeps two people with two doors and two vestibules. Learn more here at Zpacks.com
Backcountry: New Customer Offer - Take 15% Off Your First Order at Backcountry.com!
Amazon: Click Here to View All Backpacking & Hiking Gear with Free Shipping (Over 10000 Items)
Subscribe and Follow
Join 10k+ Subscribers
Follow @TrailGrooveMember Statistics
-
Total Members5,307
-
Most Online809
Newest Member
DINGDONG77
Joined
.jpg.b247ed4b913db5ff82fcb043892c9fca.thumb.jpg.3d872db3c824dd10508ef68affb4ee79.jpg)
