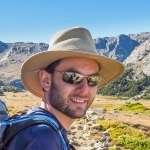
Jump to content


Blogs

Best Backpacking Sleeping Pads: A 2025 Categorical Guide

Finding a great backpacking sleeping pad is the next logical step in getting your backpacking gear all set once you’ve decided on the big 3 (tent, sleeping bag, backpack). The sleeping pad rounds out what’s known as the big 4 in backpacking – and this list makes up some of the most important gear you’ll carry, both in regards to its importance on the trail, and includes the most expensive and usually heaviest items where the most weight can be saved. In this guide, we’ll look at the b

Aaron Zagrodnick

Aaron Zagrodnick in Gear

Iceland Take Two: Hiking the Laugavegur Trail

Carpets of emerald green moss blanketing volcanic slopes; steam escaping through the earth’s crust, depositing hot water in natural pools; glaciers and colorful rhyolite mountains; lush growth in a stunted forest…the Laugavegur Trail through Iceland’s southern highlands offers a visual feast and an epic hike. I first hiked the popular thirty-four-mile trail in 2015 and had often thought of going back. The opportunity presented itself in 2022, when I learned of a new trekking route in

Susan Dragoo

Susan Dragoo in Trips

A Monumental Tour: Gold Butte & Grand Canyon-Parashunt

I love the wide open spaces and views of the American West. So, I arranged for another westward trek, this time to southern Nevada. My sister Melissa and I drove her Toyota 4Runner, an excellent vehicle for the narrow, rough roads on which we would be driving. We planned on going to the Buffington Pockets area, Gold Butte National Monument, both northeast of Las Vegas, and the Vermilion Cliffs in northern Arizona (the subject for another story). We added, on the fly, a visit to Grand

Steve Ancik

Steve Ancik in Trips

Best Backpacking Sleeping Bags by Temperature Rating

An important core backpacking gear item, your backpacking sleeping bag needs to be light enough to carry easily, pack small enough so as to not take over your entire pack, and most importantly keep you warm and comfortable at night. In this guide we’ll focus on the best backpacking sleeping bags currently on the market by temperature rating. As this is a backpacking focused article weight of the sleeping bag and warmth to weight ratio will be of a paramount focus here, with down bags

Aaron Zagrodnick

Aaron Zagrodnick in Gear

Backpacker's Pantry Fiesta Beef & Vegetable Bowl Review

On the trail my dinner requirements are simple: after a day of hiking and after setting up camp and filtering water for the night, I just want a meal that tastes good, doesn’t take long in the typical fading evening light, and meets some basic calorie and nutrition requirements. And all without too much clean up afterwards. With all these prerequisites in mind, freeze-dried meals can often be found in my food bag – and most of the time these meals will be a selection of staples I’ve come to find

Aaron Zagrodnick

Aaron Zagrodnick in Food

Thru-hiking the Ouachita Trail: Turning Back the Clock

For at least half an hour, the solar eclipse seemed like a total bust. Sure, I could glimpse a chipped-out corner of the Sun with my rinky-dink eclipse glasses, but its apparently-undaunted intensity continued to bounce off the surface of Fiddler Creek, searing my skin and melting the chocolate in my food bag. But as totality approached, the atmosphere finally changed. An eerie glow settled over the landscape, and birds began to chirp their evening songs. The Sun, even 99% covered, ha

Kevin DeVries

Kevin DeVries in Trips

Best Backpacking Tents by Application and Budget

As one of the most important decisions you can make when it comes to backpacking gear, your choice of a backpacking tent can have quite the impact in regards to your comfort in camp and protection from the elements. Additionally, choosing the best backpacking tent can also have an impact when it comes to weight carried on the trail (as one of, if not the heaviest items in your pack), and a tent decision can have quite the impact on your wallet, as well. With many factors to consider,

Aaron Zagrodnick

Aaron Zagrodnick in Gear

Choosing the Best Backpacking Sleeping Pad

A backpacking sleeping pad very importantly provides warmth by insulating us from the cold ground at night, and ideally a sleeping pad will also provide sufficient comfort to allow for a good night of rest. As an item that’s one of the heaviest and bulkiest core gear items you will carry on any backpacking trip, the sleeping pad requires some thought and consideration when it comes to selection and application. With a multitude of options available there's a sleeping pad to specifically sui

Aaron Zagrodnick

Aaron Zagrodnick in Gear

Best Backpacking Backpacks: From Overnight to Thru-hike

One of the big 3 of backpacking gear choices (backpack, tent or shelter, and sleeping bag), the backpacking backpack you choose will have a profound impact on your comfort during the hiking day. Your pack will also be one of the more expensive items you’ll purchase, and to get the best pack within your budget a little research will be needed as there are a myriad of packs out there on the market. In this guide, we’ll look at the best backpacking packs currently on the market based upo

Aaron Zagrodnick

Aaron Zagrodnick in Gear

Feathered Friends Eos Down Jacket Review

For backpackers in all but the most temperate and low elevation climates, a down jacket is an almost indispensable piece of gear. While fleece jackets, wool sweaters, or synthetic insulation pieces can provide warmth, their ability to do so at a comparable warmth-to-weight ratio as a down jacket is lacking. Although synthetic pieces are certainly catching up in the warmth-to-weight regard and their ability to insulate when wet provides a distinct advantage, there is a reason why the most common

Mark Wetherington

Mark Wetherington in Gear

How to Choose the Best Backpacking and Hiking Backpack

No matter your approach to backpacking – ultralight, comfort light, traditional, or whatever our own unique approaches may be in the gear department, backpacking in and of itself goes hand in hand with a gear list (whether on paper or simply in our heads), making a way to carry all that stuff one of the most important gear related items we need to consider. What follows is a guide to selecting an appropriate backpack for hiking and backpacking, including an overview of features, technologies, ma

Aaron Zagrodnick

Aaron Zagrodnick in Gear

How to Choose the Best Backpacking Stove

When it comes to backpacking stoves, there are several routes one can take and several different main categories of stoves exist – each with an array of pros and cons. Without a doubt however, no matter which way you go about it the backpacking stove is an important part of any overnight or multi-night gear ensemble. A backpacking stove provides hot meals and drinks, goes a long way towards keeping you warm on chilly mornings and evenings, and for backpacking and hiking a stove needs to be conve

Aaron Zagrodnick

Aaron Zagrodnick in Gear

Backpacking and Hiking Water Treatment Guide

On any hiking or backpacking trip, the ability to procure drinking water during the hike is one of the most important logistical considerations for both pre-trip planning as well as while we’re on the trail. Finding the water is of course the first step, and having the necessary gear to properly process the water so it’s suitable to drink is the second part of the equation. Here we’ll look at the main types of water filters and backcountry water treatment methods that are best suited for ba

Aaron Zagrodnick

Aaron Zagrodnick in Gear

Unbranded: The American West on Horseback Film Review

If there is an enduring archetype about the American West, it is the cowboy on his faithful horse riding through the wilderness and into the sunset. This archetype was formed by numerous books, songs and John Ford westerns and has passed into the collective American cultural mythos. Unfortunately, this romantic view of the old West sometimes clashes with reality. In the modern American West, these wilderness lands are bisected by private property, roads, different land agencies, and jurisdi

PaulMags

PaulMags in Reading

Dayhikes in Harriman and Bear Mountain State Park

Living in New Jersey, I’ve hiked all over my state: from the northwest region of the Water Gap, to the New Jersey Highlands (and their frequent view of New York City), to the majesty of the Pine Barrens in the south. I have made infrequent forays into the bordering states of Pennsylvania and New York, hiking a trail or two in both Harriman and Bear Mountain State parks. This past Fall, looking for something a little higher, different scenery, and a little bigger, I decided to explore both Harrim

Greg Jansky

Greg Jansky in Trips

Backpacking and Hiking Jargon: Down Fill Power (FP)

Fill Power is a grading system for goose / duck down. Often abbreviated as FP. Higher fill power will add more loft and warmth to an outdoor garment or sleeping bag at the same given amount of weight. Measured using a cubic inch per oz system. 500 fill power down will fill 500 cubic inches of space per ounce used. 900 will fill 900 cubic inches of space per ounce. A high fill power down cluster. What Fill Power is Best? It all depends on the application. For use off the trai

Aaron Zagrodnick

Aaron Zagrodnick in Technique

Backpacking in Bears Ears: Canyon Contemplation

In 1943 and after years of fruitless political wrangling, President Franklin D. Roosevelt finally used his unilateral authority under the Antiquities Act to establish Jackson Hole National Monument. The state challenged the monument declaration in court. Ranchers drove cattle across the Monument in direct defiance of Federal authority. On one side, there were accusations about rich outsiders interfering in local matters. On the other side, conservationists launched a campaign to convince the pub

Kevin DeVries

Kevin DeVries in Trips

Hiking in Winter: A Yearly Gift & Reflection on a Season

Unique among the seasons, winter wields the power to make many hiking destinations inaccessible. Roads are gated due to snow, mountain passes become snowbound and hazardous, and specific four-season gear is required in many regions for those venturing out in the winter months. Human-powered recreation is mostly left to snowshoers, skiers, snowboarders, and winter is also a good time to focus on cleaning gear, summer trip planning, fitness routines, racking up vacation time, and other hobbies. Ge

Mark Wetherington

Mark Wetherington in Trips

Savory Cranberry Nut Couscous Backpacking Recipe

Dishes that are a bit lighter tasting can be desirable at many times of the year and especially in warmer weather. The palette does not crave cream, cheese, and the other heavy foods associated with winter. Instead, a touch of citrus might be wanted. A bit of mint on the tongue. And perhaps something a bit tart and a little sweet to balance the flavors out? This recipe is a unique (and fresh!) take on couscous, and the brightness of the meal goes well with spring and summer seasons. T

PaulMags

PaulMags in Food

Tips for Photographing Mushrooms: The Flowers of Fall

Mushrooms are the flowers of fall, and photographing them may look easy but it’s not. Here are a few helpful tips to use when photographing them. First, you’ll want to correctly identify the mushrooms you shoot, so pick up a good mushroom book to help with identification. My favorite book on fungi is Mushrooms Demystified by David Arora. I also recommend his mushroom field-pocket guide. When I photograph mushrooms, I often begin with a document photograph. This helps me identify the m

David Cobb

David Cobb in Technique

2025 REI Reward / Dividend Release & Member Guide

The arrival of spring brings a lot of things for the outdoor enthusiast to get excited about, including longer days, warm temperatures, and melting snow for those of us in the north. However one additional perk that spring brings is the annual REI Member Reward (previously known as the REI Dividend) release. For REI members, this is the time of the year when REI Co-op members receive their rewards from REI purchases you made during the 2024 season. Gear-up with the help of REI Member

Aaron Zagrodnick

Aaron Zagrodnick in Gear

Backpacking & Hiking with Dogs: A Getting Started Guide

Backpacking can be a challenging endeavor in itself – at times in our effort to get back to basics and simplify life by hitting the trail we find ourselves poring over gear checklists, rushing to make the trailhead at a decent hour, or planning trips that just push the mileage a bit too far. With all this in mind, adding another component to the equation might not be the best idea. But once you find your rhythm, adding man’s best friend can be a great addition to any trip – and there aren’t many

Aaron Zagrodnick

Aaron Zagrodnick in Technique

Bryce Canyon National Park: A Quick Hiking Guide

Bryce Canyon National Park in southern Utah is a popular park and for good reason – its stunning rock spire formations (hoodoos) and the Bryce Amphitheater that can be seen from the canyon rim provide amazing views for those that visit. When it comes to hiking in Bryce Canyon, various trails provide a means for visitors to experience the canyon close up, while getting some good exercise and can offer a bit more solitude than the rim as well, if the timing is right. Bryce Canyon hoodoo

Aaron Zagrodnick

Aaron Zagrodnick in Trips

  • Blog Entries

    • Aaron Zagrodnick
      By Aaron Zagrodnick in TrailGroove Blog 0
      Finding a great backpacking sleeping pad is the next logical step in getting your backpacking gear all set once you’ve decided on the big 3 (tent, sleeping bag, backpack). The sleeping pad rounds out what’s known as the big 4 in backpacking – and this list makes up some of the most important gear you’ll carry, both in regards to its importance on the trail, and includes the most expensive and usually heaviest items where the most weight can be saved.

      In this guide, we’ll look at the best backpacking sleeping pads that you can find on the market today. Note that in this guide, we’ll list the specs for the regular size if possible (generally 72x20 inches) and list the r-value as well – the higher the value the warmer the pad.
      Best Summer & Ultralight Backpacking Sleeping Pads
      For those that are looking to focus on a summer season specific sleeping pad and / or are looking for an ultralight solution for warmer seasons, there are a few standout choices on the market that weigh less than a pound.
      First, if you’re a backpacker just looking for set and forget type reliability and if you’re the type of sleeper that can find comfort in just about any flat place, the venerable closed cell foam sleeping pad could work, and will save some cash as well. The Therm-a-Rest Z Lite SOL (14 ounces, $60, 2.0 r-value), is a folding foam pad that makes packing easier (but as a foam pad, still bulky). This pad is a little light on the r-value, but would be sufficient for summer trips with moderate lows well above freezing.

      The NEMO Switchback folding pad (15 ounces, $60, 2.0 r-value) is a competing option in this regard and worth equal consideration. For more, see our review of the NEMO Switchback. These foam pads are also great as a sit pad outside the tent and on breaks during the hiking day.
      Most backpackers will want more sleeping comfort than a foam pad can offer however. For the lightest of the ultralight insulated inflatable sleeping pads, look no further than to the NEMO Tensor Elite (9 ounces, $230, 2.4 r-value). This new for 2025 pad will offer warmth for summer trips above freezing for most people and offers inflatable comfort, albeit in a mummy shape – this pad is all about saving weight. It should be noted that this pad utilizes 10 denier shell fabrics; extra care will need to be exercised.
      NEMO also offers their Tensor Trail Ultralight (14 ounces, $180, 2.8 r-value) that doesn’t quite have the warmth to weight of some of their other pads that we’ll discuss later, but this pad is a bit lighter and makes this category.

      The NEMO valve system allows for easy inflation, deflation, and fine-tuning of comfort level.
      Exped has offered some of our favorite sleeping pads over the years, and in this category they offer their 1R and 3R pads, with both coming in either mummy or rectangular designs. The Exped Ultra 1R mummy sleeping pad (11 ounces, $120, 1.3 r-value) isn’t insulated, and with this low of an r-value this will only be suitable for the warmest of summer trips. The rectangular version hits the scales a couple ounces heavier.

      Ever since the Synmat series, Exped has offered value and all-around sleeping pad performance.
      To me, the Exped Ultra 3R insulated pad (13 ounces, 2.9 r-value, $140) is a much more interesting pad. I’ve taken predecessors of this pad down to freezing or just a bit below, and lower than that combined with a thin ultralight foam pad (1/8" CCF foam). Again, Exped makes a rectangular 3R as well, but at a pound we are perhaps delving into the category to follow.

      However for me the leader in this category would be the Therm-a-Rest NeoAir XLite NXT (13 ounces, $210, 4.5 r-value) and this is an interesting pad because it’s also a leader in our next category as well. This pad has the ultralight weight that puts it in this category, and with the 4.5 r-value you likely won’t need to worry about warmth on summer trips. Looking for an ultralight pad for fast and light summer trips but that also packs warmth for the shoulder seasons? It’s a tall task to beat this pad for that type of use case.
      Summary: Best Summer & Ultralight Backpacking Sleeping Pads
      Therm-a-Rest Z Lite SOL
      NEMO Switchback
      NEMO Tensor Elite
      NEMO Tensor Trail Ultralight
      Exped Ultra 1R
      Exped Ultra 3R
      Therm-a-Rest NeoAir XLite NXT
      Best 3-Season and All-Around Sleeping Pads
      This is your all-around, bread and butter sleeping pad category. While weights may not be the most ultralight due to the needed increase of r-value for 3-season and shoulder season temperatures, recent advances in sleeping pad technology (it all started with the original Therm-a-Rest NeoAir) have allowed for some very intriguing options to hit the market. Weights here are generally around a pound or just a little more, with insulation that should be good to freezing or a bit below.

      Choices in this category can be quickly narrowed down to just a few options. The best options include the NEMO Tensor All Season sleeping pad (around $200, 1lb) which is an excellent choice for 3-season use where warmth is appreciated, but it still might get chilly to below freezing at night with a possible cold snap taking things down to the 20s or below, or for cold sleepers any time of the year. With a 5.4 r-value and a rectangular sleeping shape, this pad has a warmth to weight to sleeping and packing space ratio that would have seemed impossible a decade ago. The NEMO Tensor All Season is my pick as the top overall sleeping pad currently on the market.

      For those looking to save more weight, the Therm-a-Rest NeoAir XLite NXT ($210, 13 ounces in the regular mummy, 4.5 r-value) again gets the weight down to an even more ultralight level with sufficient warmth for 3-season trips, and will save some space in the tent and pack if needed. This pad is also available in a rectangular shape – the NeoAir NXT MAX, which would be my choice if going with the NeoAir in this category, for the additional comfort. While the NeoAir line comes with an inflation bag that works well, it’s unfortunately not adequate to utilize as a dry sack for gear, as can be found in the Exped Schnozzel. That said it is included, and any inflatable pad these days should come with some type of inflation bag / solution.

      Inflation bag included with NEMO sleeping pads
      The great thing about these two pads is that they are light enough to be very justifiable for summer trips, have the warmth needed for shoulder season use, and can even be used for winter backpacking if you add in a foam pad to your system to boost the total r-value.
      Summary: Best 3-Season and All-Around Sleeping Pads
      NEMO Tensor All Season
      Therm-a-Rest NeoAir XLite NXT
      Therm-a-Rest NeoAir NXT MAX
      Best Winter Backpacking Sleeping Pads
      If you’re looking for a dedicated winter backpacking sleeping pad however, pads from NEMO and Therm-a-Rest again rise to the top. The NEMO Tensor Extreme Conditions Ultralight Insulated sleeping pad (18 ounces, $250, 8.5 r-value) isn’t the most lightweight in length of name but offers a very impressive weight to r-value specification and comes in multiple shapes and sizes.
      The NeoAir XTherm NXT sleeping pad (16 ounces, $240, 7.3 r-value in the regular mummy) from Therm-a-Rest is available in either a weight saving mummy shape (previous link) or in their XTherm MAX version in a larger, more comfortable rectangular version.

      These pads are very impressive on the spec sheet and in regards to warmth to weight ratio, achieving a warmth to weight to bulk combo that would have seemed impossible to achieve a couple decades ago. However, I prefer to use my all-around 3-season type sleeping pads combined with foam pads (Therm-a-Rest RidgeRest, etc.) for winter backpacking. The r-values add up, and the foam pad offers some redundancy in extremely cold conditions.
      Summary: Best Winter Backpacking Sleeping Pads
      Tensor Extreme Conditions UL Insulated
      NeoAir XTherm NXT
      XTherm MAX
      Add-on Closed Cell Foam Pads
      Most Comfortable Backpacking Sleeping Pads & Best Wide / Long Options
      When comfort is the most important consideration (although keep in mind no matter how cushy, you won’t be comfortable if you’re cold), the Therma-a-Rest NeoLoft sleeping pad ($240) will be hard to beat. This larger air mattress has nearly 5” of height, but is still reasonably backpackable at 25 ounces. With a 4.7 r-value this pad should still keep you warm in 3-season type conditions. If you’re backpacking in, but will then be setting up a basecamp for a few days, this pad might be up your alley.
      For me however, I don’t quite need to go up to NeoLoft level to find comfort on the trail and thus can save a bit of weight. I like to look for a pad long enough so my feet don’t hang off the end, and wide enough that as a toss and turn side-sleeper I don’t have to worry about falling off the side. The previously mentioned NEMO Tensor All Season sleeping pad – but in the long wide version, or the NeoAir XLite NXT MAX (in the large) are leading backpacking sleeping pad comfort contenders here. 25” wide pads are appreciated in this regard, along with a pad that is slightly longer than your height combined with a good backpacking pillow.

      Note that any inflatable sleeping pad will be made warmer and more comfortable if you add a closed cell foam pad underneath. If you’re only using an air pad, you’ll usually want to inflate fairly firmly for more warmth, but if using a foam pad under it you can deflate the pad to a softer firmness while still having sufficient warmth in typical conditions. And, if you toss and turn at night – instead of bottoming out the pad on hard ground, even a thin foam pad will add a surprising amount of cushion for your hips.
      It should also be noted that while a very niche item, if you’re looking for a 2 person backpacking sleeping pad the Exped Ultra 3R Duo (29-41 ounces, $250, 2.9 r-value) is an intriguing choice with separate inflation chambers for each person and in Exped fashion, is a compelling choice across the board.
      Summary: Most Comfortable Backpacking Sleeping Pads
      Therma-a-Rest NeoLoft
      NEMO Tensor All Season (in larger sizes)
      NeoAir XLite NXT MAX (size large)
      Add-on Closed Cell Foam Pads
      Exped Ultra 3R Duo (for two)
      Best Budget Backpacking Sleeping Pads
      If the latest greatest technology and spreadsheet leaders aren’t your thing, more budget-oriented sleeping pads in the $150 or less range are without a doubt quite workable. A venerable choice has been the Exped line – this line has a great valve system, vertical baffles that I find help keep you on the pad, and larger outer baffles to keep you centered. The Exped Ultra 3R insulated sleeping pad (16 ounces, $140, 2.9 r-value) is my choice in this category. This pad is warm enough for 3-season backpacking, can be used as part of a system with additional foam pads in winter, and won’t break the bank. The Ultra line from Exped and their predecessor from Exped (Synmat series) have been part of my backpacking gear repertoire for years, as they offer a nice blend of warmth, weight, comfort, ease of use, and price.

      If price however is of paramount importance, look to the Therm-a-Rest RidgeRest, the Therm-a-Rest Z Lite SOL, or the NEMO Switchback. These foam pads will not be the most comfortable, and depending on the sleeper may only be barely better than nothing in the comfort department, but they do add 3-season warmth and will get the job done for around $60 or less. That said, for deals on usually more expensive inflatable pads from time to time, it’s worth checking at the REI Co-op Outlet.
      Summary: Best Budget Backpacking Sleeping Pads
      Exped Ultra 3R
      Therm-a-Rest RidgeRest
      Therm-a-Rest Z Lite SOL
      NEMO Switchback
      REI Co-op Outlet Sleeping Pads
      In Conclusion
      Finding the right sleeping pad is important on the trail, both for warmth and for comfort. To some extent this all goes hand in hand – while comfort is more than just warmth, you can’t be comfortable no matter how cushy the sleeping pad if you’re cold. When I look for a sleeping pad I look for the lightest weight sleeping pad that will keep me comfortable and warm on backpacking trips, and one that is also sufficiently durable while meeting the budget while also being easy to use.
      You can find a complete selection of backpacking sleeping pads mentioned in this article along with additional choices here at REI Co-op. For more on sleeping pads take a look at our article: Choosing the Best Backpacking Sleeping Pad. For more on the “Big 3” of backpacking gear, see our articles: Best Backpacking Tents by Application and Budget and Best Backpacking Sleeping Bags, as well as our Best Backpacking Backpacks Guide.
    • Aaron Zagrodnick
      By Aaron Zagrodnick in TrailGroove Blog 6
      A backpacking sleeping pad very importantly provides warmth by insulating us from the cold ground at night, and ideally a sleeping pad will also provide sufficient comfort to allow for a good night of rest. As an item that’s one of the heaviest and bulkiest core gear items you will carry on any backpacking trip, the sleeping pad requires some thought and consideration when it comes to selection and application.
      With a multitude of options available there's a sleeping pad to specifically suit any season and backpacking trip, as well as those that offer a wide range of versatility across many situations. In this article we'll look at things to consider and features of some of the best sleeping pads on the market today.

      When considering a backpacking sleeping pad, weight, warmth, comfort, and durability should all be considered.
      R-Value and Warmth
      The most important function a sleeping pad serves is to keep you warm; although we all like to be comfortable we can’t be comfortable if we’re cold. Thus, consider a sleeping pad’s r-value when making a choice. However, there’s no free lunch; the warmer the pad the heavier and bulkier it will be. As such we have to seek a balance just like anything else. For general 3-season use here in the Rockies where it always gets a bit chilly at night, I target a sleeping pad with an r-value of at least 3. Combined with an appropriate sleeping bag for the forecasted lows of course, I’ve found this to provide sufficient warmth into the higher 20’s.
      When it will be colder, I combine this pad with the thinnest (1/4" or less) and lightest generic closed cell foam pad I can find particularly of the Evazote foam variety that can easily be cut down to a custom size or folded over to double up if needed. Options like the ULA Siesta pad or this option on Amazon, and foam pads sometimes carried by many cottage makers / vendors also work well. Essentially, you are looking for a thin 1/8" to 1/4" foam pad that will cover you width wise (depends on your main pad width of choice), and at least offer torso length coverage or more. This system will keep me comfortably warm to the high teens.
      If it will be colder than that I will combine my usual sleeping pad with a thick foam pad of nearly an equal r-value. As an example, the Exped Synmat UL7 – find our full review here – which is my choice for an inflatable pad – combined with something like the Z Lite Sol foam pad and the aforementioned thin foam pad will provide a total r-value approaching 6. A combo like this has kept me warm on winter trips well below 0.

      On this trip with a low for the night well below 0, I packed both this RidgeRest Solar plus an insulated inflatable.
      Some inflatable pads like the Exped Ultra 1R feature no insulation at all (r-value around 1) and basically provide mostly comfort from the ground, but not cold ground. These pads are lighter and cheaper, and might be useful for a dedicated summer sleeping pad in warm locales. On the flipside some winter sleeping pads, such as the Exped Dura 8R or the NeoAir X-Therm NXT MAX, are heavily insulated and would be sufficiently warm all on their own for cold winter camping and for cold sleepers.
      On both sides of the coin though each are on the specialized end of the spectrum; I prefer the adaptable approach of using one 3-season rated pad, and then adding in a thin, or thicker foam pad when needed for colder temperatures. For the 3-season pad I like an inflatable to provide the comfort and some baseline level of insulation, and when combined with the additional foam pad the foam pad protects the inflatable and will even serve as a fail-safe should the inflatable spring a leak.

      As a general starting guide an r-value of 2+ has been useful for me on summer trips in the mountains and for 3-season use in warmer locations; warm into the 30 degree range. I find an r-value of 3+ most useful all-around, providing sufficient warmth for most 3-season trips in the mountains and down to the 20 degree range. However if you're a cold sleeper or sleep warm, you can implement some respective addition or subtraction here. For winter trips I do not mess around and take a combination of pads totaling a 5-6+ r-value. Pads that feature an r-value under 2 I find useful only as part of a larger system (as a solution to boost warmth as part of an overall sleep system), but not on their own.
      Sleeping Pad Size
      Sleeping pads are usually offered in multiple lengths and depending on your height and use, an appropriate fit can be found. If you’re going with an ultralight approach a shorter pad can work that offers coverage for the most important part of your body – your torso and core, but your feet and legs will hang off the end. To insulate this area you can pile gear and your backpack – that might just have an insulating foam backpanel – at the bottom of the shorter sleeping pad. This will save the most weight, but still will not be as warm or as comfortable as a longer pad. My preference is to use a pad that’s at least close to my height. A few inches shorter is fine as we often sleep a bit shorter than our height with knees and back bent, etc., or longer than your height offers the most luxury. Either way, by getting your whole body on the pad you will sleep warmer.
      The standard width for most sleeping pads is 20 inches. Often a wide version (not really standardized, but usually 25”) is also offered and even up to double wide pads for two like the Exped Ultra 3R Duo sleeping pad are offered. Two one-person pads can always be strapped together – Sea to Summit makes the best solution for this I’ve used. Preference will of course depend on your size and sleeping style. A 20” pad works for me, but there’s not much wiggle room and I do sleep better on a wider pad that offers more room to bend your knees for side sleepers or for toss and turners. Many tents are based around this 20” width standard, so be sure your pad will fit in your shelter of choice and combined with whatever width pad your partner may have if you’re sharing a tent.
      Either way longer and wider pads offer more comfort but at the cost of an increase in weight and bulk. I’ve accumulated several sizes over the years, so on trips where I’ll be covering a lot of miles I take a standard 6’ pad; on more relaxed trips I like the comfort my Synmat LW (Long/Wide) offers. No matter the size, you will find sleeping pads available in both a traditional rectangular shape as well as in tapering, mummy shapes that narrow towards the feet. While tapered pads offer some weight savings, a rectangular sleeping pad offers more room.

      The lower section of a mummy-shaped sleeping pad. Weight is saved, but there's not as much toss and turn room.
      Weight
      A great target for an adequately warm and comfortable full length standard 3-season sleeping pad for most locations is around 1lb with the weight falling below that as we get into shorter and/or less warm pads, and above that as we get into longer, wider, and warmer pads. Save for a dedicated winter pad, approaching the 2lb mark is best reserved for sleeping pads in more of the super comfortable and warm, but heavy and bulky car camping variety. If you'll be focusing on car camping, weight shouldn't be a concern. The best car camping sleeping pads will be those that are warm, comfortable, and durable. That said, back to the trail...
      Closed Cell Foam Pads
      The simplest and cheapest option to go with is a closed cell foam sleeping pad. I’m much more comfortable on an inflatable pad, but as previously described, I still have an assortment of closed cell foam pads in my gear stash to combine with an inflatable pad for additional warmth on shoulder season and winter trips with my 3-season rated Exped Synmat UL7. However, the foam pad excels in the reliability department – it won’t leak and you don’t have to carry a patch kit. They are also usually cheaper.

      The downside is they pack bulky and you will probably have to carry it on the outside of your backpack. This can be a pro though, as the pad will be easily accessible to use as a sit pad on breaks and for lunch. Foam pads are usually just around an inch thick or a bit less, and then compress further when you’re on it. You will definitely feel the ground and any rocks or roots that might occupy your campsite, but if the comfort works for you the foam pad is a reliable and affordable choice. Note that you will want to avoid open cell foam pads, as they will absorb water and when they do they take a long time to dry. Reserve these for use on the futon at home.

      Foam pads are bulky to carry, but convenient for breaks.
      Most foam pads can be had for under $50. Some popular options include such venerable choices as the generic blue foam pad, the Therm-a-Rest RidgeRest (a classic), and the more conveniently packed Z Lite pad. And in recent years, you can now find that classic foam pads from Therm-a-Rest have been updated with an aluminized reflective (warmer) coating as seen in the Z Lite Sol pad for a small boost in warmth and durability. Overall a foam sleeping pad will above all be dependable, but not the most comfortable or easy to carry.
      Inflatable Pads
      Inflatable sleeping pads offer a few advantages and disadvantages compared to their closed cell foam cousins. Usually thicker than foam pads when inflated, an air pad can keep you totally off the ground and the inflation level can be adjusted to suit your own comfort preference. Thinner inflatables are better for back sleepers and the thicker variety better for side sleepers.
      If you toss and turn, look for a design that is raised around the sides a bit to help center you on the pad and keep you from falling off in the night. Inflatable pads also pack smaller, usually around the size of a Nalgene and even a long / wide inflatable will easily fit inside a backpack. Most air pads usually feature baffles arranged in a horizontal, vertical, or sometimes in a pod like arrangement like the Sea to Summit Ultralight – one of our tested sleeping pads we’ve previously reviewed. Preference varies; I like the lengthwise tubes that I find help me stay centered on the pad. Self-inflating pads usually have a flatter sleeping surface.

      The downside of inflatable pads is that they can be punctured, baffles can fail, you have to inflate it, and to be sufficiently warm inflatable pads will use insulation or special baffles that bump up the price. When I carry an inflatable, I also bring a patch kit along just in case, and use care where I put the pad. For inflation I prefer to not use my breath, not only can this be a little difficult at high altitudes after a long day, but it introduces moisture. Many manufacturers offer a pump bag solution – like the Exped Scnhozzel I use, and battery operated pumps are even available.

      The standard of inflatables a couple decades ago, some are still self-inflating, but the self-inflating pad has become rarer in recent times. Keeping air pads protected and inside your tent is ideal. Many people may also take a smaller foam pad to use as a dedicated sit pad in this situation. The texture of sleeping pad surfaces vary, and some inflatable pads can be a bit noisy and some can also have slick surfaces that can migrate around the tent, or have you migrating on top of them at night. Some strategic dots of Seam Grip SIL on your (especially if it’s silnylon) tent floor can help mitigate the slipping, and if you combine an inflatable with a foam pad of any type as I often do in colder weather it will mitigate this issue.
      For an inflatable lightweight insulated sleeping pad, you are probably looking at something in the $100-$200 range. Popular inflatable pads can be found in the Therm-a-Rest NeoAir series (view at REI) that utilize a combination of baffling and aluminized reflective features to provide warmth, options from Sea to Summit that use microfiber insulation, and many options of various insulation types exist from makers like Big Agnes and Nemo Equipment. The best backpacking sleeping pads will feature a blend of warmth, weight, packed size, and durability. If you choose the most extreme of any category, it will likely be at the cost of something else.
      My System
      Just like sleeping bags, selecting a backpacking sleeping pad is without a doubt, a huge balance between weight, comfort, price, reliability, and warmth – and while there’s no best sleeping pad and no free lunch, with so many options out there there’s no doubt the right sleeping pad that suits your style can be found. As a side sleeper who values all the above points fairly equally and has been testing sleeping pads for decades, I like a comfortable 3-season inflatable pad as the main cog in my sleeping pad system, and add in a thin foam pad for just a touch of additional warmth when it's needed and a thicker foam pad for winter conditions.
      For a full selection of lightweight sleeping pads that you can then narrow down by type, price, size, etc. take a look here at REI.com.
    • Steve Ancik
      By Steve Ancik in TrailGroove Blog 1
      I love the wide open spaces and views of the American West. So, I arranged for another westward trek, this time to southern Nevada. My sister Melissa and I drove her Toyota 4Runner, an excellent vehicle for the narrow, rough roads on which we would be driving. We planned on going to the Buffington Pockets area, Gold Butte National Monument, both northeast of Las Vegas, and the Vermilion Cliffs in northern Arizona (the subject for another story).

      We added, on the fly, a visit to Grand Canyon-Parashant National Monument, just across the border in northwestern Arizona. All of these locations are far from the often-crowded national parks, and far, far from the hustle and bustle of Las Vegas – my kind of places!
      A Desert Hiking Adventure Begins
      Our first stop was Buffington Pockets, which is a rugged and isolated area not too far off of Interstate 15 north of Las Vegas. Our first goal here was the historic Colorock Quarry. The roads to Colorock Quarry start out as graded gravel roads, which split to go to Valley of Fire State Park (which I had previously visited) and toward the quarry. The further you go the more the roads deteriorate into narrow one-lane tracks which require a high clearance 4-wheel drive vehicle, especially the very last part nearest the quarry.

      We climbed around this colorful and scenic area for a while, getting up high for good views. Once we finished here, we drove on toward Hidden Valley on the Bitter Springs Backcountry Byway, where we wanted to hike to an arch called Striped Arch, but we found that the road ended at a wilderness boundary a few miles from the arch. We didn’t have enough time before sunset to make it to the arch and back, so we gave up on that hike and drove back a ways along the byway and found an excellent camping site just off the road next to some colorful rocks with arches. Camping in this area is not at established campgrounds (there are none), but you can find many places just off the road to camp.
      Gold Butte National Monument
      The next morning, we headed back to the interstate and then northeastward toward Mesquite NV, and then south on Gold Butte Byway into Gold Butte National Monument (nearly 300,000 acres on the east side of Lake Mead). Melissa was driving, and at one point she applied the brakes, and I was asking “WHAT?! WHAT?!” She had seen a Gila monster crossing the road, and of course we stopped for photographs. Further down the road, we stopped at an area with an exceptional number of cacti and wildflowers (more pictures) and then continued on to Whitney Pocket. This is an area of outcrops of red and white Aztec Sandstone surrounded by desert vegetation, including many Joshua Trees.

      This area had several spots for camping, and had the largest number of people that we encountered on the entire trip. We wandered around the rocky outcrops for a while, and then continued our sightseeing tour. Our next stop, and it was a brief one, was at the Devil’s Throat, a large sinkhole surrounded by a chain link fence. Not much to see there, so we drove on to our next destination, The Grotto. Before we hiked we had sandwiches for lunch, and then took the short hike (a little over one-half mile round-trip) into the area. There were some interesting outcrops and a few petroglyphs here, but we didn’t spend a lot of time before moving on.
      Our next stop was at Seven Keyholes Slot Canyon. After another short hike (about one-half mile to the canyon), we arrived at the canyon, which has odd-shaped openings, almost round at the bottom with a slot at the top. There are several of these sections with open sections in between. After seeing the canyon, we explored the area a bit more, seeing lots and lots of “holey” rocks, small caves, and arches. We probably hiked an additional mile or more exploring the nearby canyons (and there was a lot more that we could have gone to see).

      We next headed toward a place that’s been on my “must see” list for a long time – Little Finland or Hobgoblin’s Playground. Getting there again consisted of driving miles of sandy, rocky roads. The ridge along which Little Finland is located is about fifty feet or so above a large relatively flat area. Along the base of the cliffs there are a number of large California Fan palm trees (not something we expected to see in the desert). Once we found our way up onto the ridge, we were surrounded by some of the strangest rocks I’ve ever seen, eroded mostly by the wind into intricate shapes, some resembling animals or monsters.
      It was a difficult place to take photos, as there was so much distracting background that it was hard to isolate individual pieces of the scene. Somehow, however, I managed to take dozens of photos, including a few “keepers”. The hike at Little Finland was around a mile in length, although you could probably hike back and forth and make it considerably longer. We ended up hiking over 5 ½ miles on the hikes of this day, after which we drove until we found a good campsite off of Mud Wash Road. There were supposedly petroglyphs somewhere around there, but we never found them. Looked for shooting stars (it was one of the Lyrid meteor shower nights) until bedtime. We didn’t see any.

      Our next day began with a drive to another trailhead. This meandering "trail" was up and down over the outcrops of stone, for a total of a little over a mile and took us to the area known for the Falling Man petroglyph. There are an impressive number of other petroglyphs on the cliffs in this area too. There were even a couple of potholes (or tinajas) with water and tadpoles. We hiked around, following a bunch of GPS waypoints that I had pre-loaded on my phone and found Falling Man (there must be an interesting story here) and most of the other petroglyphs. There is an amazing variety of these scattered throughout the area, including some that were in what I would consider pretty precarious spots high on the cliffs. Those ancients were skilled climbers (except for perhaps that poor falling man).

      After finishing at Falling Man, we drove on down the road to our next trail, this one to take us to the 21 Goats Petroglyph Panel. This was an interesting hike (about two miles round-trip) in that it was a bearpoppy restoration area. The sign explained the ecology of the poppies and that they grow in a limited area and only on gypsum soil. We spotted a few along the hike and even found one near enough to the trail that we were able to get a couple of pictures. On to the petroglyphs – this was a really cool panel. I stepped off the width at over 35 feet, and it was probably at least 12 feet above the ground to the top. The name is somewhat misleading, as I counted about 38 “goats” (actually desert bighorn sheep). We took our photographs and headed back to the truck.

      Next we drove to the trailhead for the Khota Circus (also spelled Kohta) Petroglyphs. This was a longer hike (around 3.6 miles round-trip) which went through different environments – some with sand (tough walking), and other places through washes and rocky outcrops. There was also quite a variety of wildflowers along the way. The Khota Circus is about 80 feet long by 6 feet high at the base of a tall cliff. It’s mostly animals (thus the name) – many goats, some turtles, birds, snakes, and a few humans. One of the humans is obviously a hunter shooting at a goat. Apparently, we missed another smaller but better preserved panel high on a nearby cliff.
      We researched a bit once we returned to civilization, and found that the petroglyphs range in age from 700 to 3000 years old and were created by Anasazi or Southern Paiutes. There is a small slot canyon near the petroglyphs, but it isn't very long or interesting. Over the previous two days, we had seen very few people on the trails. Gold Butte only receives just over 100,000 visitors a year, most at Whitney Pocket, which is at the end of a semi-paved road, and at Little Finland. The rest of the time, we were on narrow, rough roads where only the hardiest souls (like us) go!
      Grand Canyon-Parashunt National Monument
      We were a bit ahead of schedule, so Melissa suggested that we go east to visit part of Grand Canyon-Parashunt National Monument (another huge park of more than a million acres that gets fewer than 100,000 visitors a year). It is even more remote and rugged than the areas that we had been in the previous days. There are no developed facilities, and most of the roads require high clearance and sometimes four-wheel drive vehicles. As we left Whitney Pocket, we came upon a field which was filled with a “superbloom” of Las Vegas poppies. We drove throughout the northern part of the monument, and noticed what looked like redbuds here and there. That was totally unexpected, considering the desert climate, but it turns out that they were California redbuds, which are indeed native to the area.

      We drove until we found a place to camp along the road. We broke camp the next morning and headed toward the Paiute Wilderness for a hike, and as it turns out, the only hike we took in this vast park. The road to the trailhead was a crazy, narrow, up and down thing, but our expert driver (Melissa) handled it with ease. The trail didn’t have great scenery, but it was nice, and there were many wildflowers along the route. After leaving this area, we headed via several rough roads to Tweed’s Overlook, giving us a great overview of the northern section of the park.

      We talked to a couple of guys up there who told us about a drive called “Nutter’s Twist” – supposedly a tough, rough road. Of course, we wanted to drive it. It was indeed rough, with a couple of really difficult wash crossings with steep, high banks. The only victim of the crossings, other than our nerves, was one running board that got bent on one of the boulders while crossing one of the deeper washes. There are several hiking routes ranging from one mile to over eleven miles within the park, but we will have to return another time for some of those.
      Final Thoughts
      If you enjoy the desert, and you want an off-the-beaten track adventure, head to Buffington Pockets, Gold Butte National Monument, and Grand Canyon-Parashant National Monument. Here, you will experience isolation and extreme quiet, get away from civilization, and see scenery that few people get to enjoy.
      Need to Know
      Information
      No permits are needed for any of the areas discussed above. There are no established campgrounds or facilities and there is no way to resupply provisions, supplies, or food / water. We double checked tires and carried a spare.
      Getting There
      Colorock Quarry in Buffington Pockets is accessed by exiting I-15 at exit 75, toward Valley of Fire State Park and the Bitter Springs Backcountry Byway. After just over three miles, the byway continues straight, and the road to Valley of Fire goes off to the left. Continue for about four miles, then turn right at the Colorock Quarry sign. From there it is about 3.5 miles to the quarry. (If you have time while in the area, be sure to visit Valley of Fire State Park. It's spectacular!)
      Gold Butte National Monument is south of Interstate 15 and east of Lake Mead. Leave the interstate at Exit 112 onto Nevada 170 for 3.1 miles, then turn right onto Gold Butte Backcountry Byway. The road is semi-paved to Whitney Pocket, which is about 25 miles from the interstate. Beyond that point, a high-clearance four-wheel drive vehicle is needed.
      Grand Canyon-Parashunt National Monument can be accessed several ways. From Gold Butte National Monument (Whitney Pocket area), go east on Pakoon Spring Road to road #101 or 111. From St. George UT, go south on either road #1009 or 1069. From Highway 389 between Pipe Spring National Monument and Fredonia UT, go south on Antelope Valley Road toward Tuweep, then turn west into GC-PNM. Once you are in the monument, choose your own adventure.
      Best Time to Go
      Spring and fall would be ideal. Summer will be very hot, while winter weather will be quite variable.
      Maps and Books
      The Arizona Strip Visitor Map shows recreational information for the Arizona Strip Field Office, Grand Canyon-Parashant National Monument, Vermilion Cliffs National Monument, and surrounding areas (Grand Canyon, North Kaibab National Forest, etc). There is a good map of Gold Butte and part of Grand Canyon-Parashant on a kiosk in a parking area near Whitney Pocket. I took several photos of sections of this map (it has road numbers on it which were very useful). The Delorme Nevada Atlas and their Arizona Atlas can be helpful for getting to these areas. For information on other hiking opportunities close by, see the Hiking Nevada as well as the Hiking Arizona Falcon Guides.
      Editor's Note: This article originally appeared in Issue 57 of TrailGroove Magazine. You can read the original article here for additional photos and content.
    • Susan Dragoo
      By Susan Dragoo in TrailGroove Blog 0
      Carpets of emerald green moss blanketing volcanic slopes; steam escaping through the earth’s crust, depositing hot water in natural pools; glaciers and colorful rhyolite mountains; lush growth in a stunted forest…the Laugavegur Trail through Iceland’s southern highlands offers a visual feast and an epic hike.

      I first hiked the popular thirty-four-mile trail in 2015 and had often thought of going back. The opportunity presented itself in 2022, when I learned of a new trekking route in the same general area as Laugavegur but a bit farther east. The idea of seeing a slightly different perspective was appealing and, along with my daughter-in-law, Jessica, put the trek on my calendar for late July. Like my hike seven years earlier, it would be a hut-to-hut walk, staying in Iceland’s well-organized system of forty rustic, communal mountain huts, dispersed all over the island. Though basic, these cabins offer warm, dry, and welcoming shelter from Iceland’s volatile weather.

      But at the last minute, unexpected environmental conditions made our new route impassable. My contact in Iceland, Einar Westlund, a former hiking guide, said there was lots of water in the rivers, more river crossings than usual, and the ice bridges we would have relied on had melted. It would not be safe to attempt the new route so the alternative was to do the Laugavegur Trail again. Airline tickets already purchased, Jessica and I were committed, so Laugavegur it was.
      A Second Trip to the Laugavegur Trail Begins
      The change required a quick pivot for me. I was already away from home when we got the news, having driven to South Dakota from Oklahoma to meet my husband Bill, who had been traveling on his motorcycle out west. I would be flying to Iceland from Rapid City rather than our home base of Oklahoma City. Anticipating a hut-to-hut trip, I had packed only a light sleeping bag and no sleeping mat, since the huts have bunks or at least mattresses. But with the last-minute change we would have to camp part of the time, requiring much warmer sleeping bags. Fortunately, we would be able to rent a tent and mats in Iceland, and I was able to nab Bill’s twenty-degree sleeping bag, which he’d been using for camping in the mountains.

      We were all set, or so it seemed. Then, two days before my departure, Bill broke his leg riding a motorcycle up a rocky hillside in the Black Hills. At the emergency room in Rapid City, we waited to hear how bad it was. It was a relief to learn that, though bad enough, it was not so bad that Bill needed me to cancel my trip. The fracture of his left tibia was non-displaced and he insisted he could drive himself home in our pickup.
      Feeling guilty but not terribly so, I flew out of Rapid City on schedule and arrived in Reyjkavik, where I waited for Jessica’s arrival from Oklahoma City. She showed up not long after but, unfortunately, her luggage did not. She was wearing her hiking boots and backpack, so at least she had those essentials. At the hotel, I identified several items I could loan her and the next day we went shopping for others. Meanwhile her husband (my son), Mark, was trying to track down her bag and figure out how to get it to her once we started our trek. Finally, early the following morning, as geared up as we were going to get, we trudged to the bus stop with one large duffel carrying both our gear to head for the trailhead.

      After a four-hour bus ride, we arrived at Landmannalaugar, the starting point for the Laugavegur hike and a spectacular place to visit on its own. Located within the Fjallabak Nature Reserve, Landmannalaugar is on the edge of the Laugahraun lava field, formed by an eruption in about 1477. After setting up camp we hiked to the nearby crater of Stutur and walked around its rim, a good warm-up for the days to come, with expansive views and the first chance in several days to get our heart rates elevated.

      The highlight of our stay in Landmannalaugar was the hot spring. There, as hot water surfaces from beneath the lava, it mixes with cold streams and fills a natural lagoon, resulting in a comfortable soaking temperature around 96 to 104 degrees Fahrenheit. The Icelandic name Landmannalaugar translates to the “People’s Pool,” referring to the long history of this remote oasis serving as shelter and respite for tired travelers of earlier days. That night, it never really got dark; it was, after all, late July in Iceland, truly the land of the midnight sun, where the day is nineteen hours long and the darkness is mostly just twilight.

      Our first day of hiking offered the most elevation change on the hike, which I had erroneously remembered as “mostly flat,” a common problem for me unless I’m talking about something memorably steep like the Grand Canyon. Landmannalaugar sits at just under 2,000 feet elevation and from there the trail ascends for six miles on black obsidian slopes and across snowfields to about 3,400 feet at the Hrafntinnusker Hut, our first day’s destination. The landscape along the way is otherworldly, with steam escaping the earth and geothermal pools making it obvious that this place is nothing if not actively volcanic. Hrafntinnusker was one of the huts where we were lucky enough to get accommodations, and given that this is one of the colder spots along the trail, we were happy for a bed out of the weather.

      It was rainy and cold the next day as we started our nine and one-half-mile trek to Hvanngil. We walked downhill most of the way, back to a little less than 2,000 feet. Today we experienced the first of numerous river crossings, which we would learn to take seriously. The swift current of the cold glacial streams can sweep you off your feet in a moment and we came to appreciate the value of taking small steps, using our trekking poles, and relying on another hiker’s strong arm if necessary.

      Arriving at Hvanngil, we had two unexpected treats. One was that we were able to nab spots in the hut that night. But, even better was that Jessica’s bag had been located and delivered to the hut, way out there on the trail. It was the best moment of the trip, seeing the smile on her face when she saw her duffel. Jessica had not been letting it get her down, but having her own things clearly brought her great (and well-deserved) joy.

      The next day, trekking seven and one-half miles to Emstrur at Botnar, the path was fairly level. Along the way we enjoyed the sights: bright green moss, a profusion of wild flowers, and a black desert of lava. We had lunch out of the wind next to a roaring waterfall and, just before reaching Emstrur for the night, took a short side trip to gaze upon the breathtaking gorge of the Markarfljot River. Mild weather made for comfortable camping that night at Emstrur.
      A Final Day and Night Hiking the Laugavegur Trail
      The next morning we left for Thorsmork, “The Valley of Thor.” With an eleven-mile hike ahead of us, it would be our longest day. We descended to less than 1,000 feet of elevation and as we approached Thorsmork, we saw, for the first time along the trail, trees. Iceland’s landscape is mostly barren of trees, having been deforested after the Vikings’ arrival. Attempts to reforest the island are inhibited by the poor soil. But in Thorsmork, the topography of the valley, nestled among three glaciers, creates a warm microclimate, resulting in lush vegetation of moss, ferns and, most notably, birch trees. The warmer weather and beautiful scenery made our last night of camping a joy.

      After hiking to the peak of Valahnakur the next morning, we caught the bus back to Reykjavik, then spent an extra day sightseeing. As if we hadn’t had enough drama, we learned that day that the Fagradalsfjall Volcano was about to erupt. Located between Reykjavik and the Keflavik airport, an eruption had the potential to disrupt air travel or prevent our reaching the airport. I was a bit on pins and needles about it but, as it turned out, the volcano waited two days after we left to spew its gases and molten lava. A week later, it was the biggest tourist attraction in Iceland, suggesting that, in a weird sort of way, we missed out.
      All’s well that ends well, and in this case, it ended very well. Iceland is a top-notch hiking destination with scenery like no place else, and in my case, twice may not be enough.
      Need to Know
      Information
      The Laugavegur Trail is moderate in difficulty. Except for the elevation gain on the first day and the river crossings, the trail is not particularly challenging. It is very well marked and the typical four-day schedule keeps hiking distances to an average of 8.5 miles per day. Laugavegur is usually hiked from north to south, as it has a slightly downward slope in that direction.
      Accommodations are limited to huts or their adjacent campsites. Both are operated by FÍ (the Icelandic Touring Association). Hut size and comfort varies, but all offer mattresses or bunks to sleep on, toilets, running water and a communal kitchen. They are heated by gas or geothermal energy, but there is no electricity. Be sure to book in advance here.
      The weather in Iceland is unpredictable, with the potential for rain, wind and cold temperatures and even snow, even in the summer months. Come suitably prepared. Numerous reputable trekking companies provide guided hikes with luggage transfer and this is something I highly recommend.
      Best Time to Go
      The Laugavegur Trail is only open from late June to mid-September. The exact dates depend on the weather. The trailhead and some of the huts are accessed by gravel “F-roads” which are closed during the winter months. The best time to hike the trail is July and August. Earlier or later, you may not be able to access the trail.
      Getting There
      Fly into Keflavik airport, about forty-five minutes west of Reykjavik, the capital of Iceland and its largest city. Reykjavik is a clean, friendly city with abundant hotels and restaurants. Bus service to the trailhead is readily available. See here.
      Maps and Books
      For a good read on Icelandic culture, see How Iceland Changed the World by Egill Bjarnason. Specific information and a map of the Laugavegur Trail can be found in the guidebook Trekking Iceland's Laugavegur Trail & Fimmvorduhals Trail and via the Iceland's Laugavegur Trail & Fimmvorduhals Trail map. National Geographic also offers their Iceland Adventure Travel map.
      Editor's Note: This article originally appeared in Issue 57 of TrailGroove Magazine. You can read the original article here for additional photos and content.
    • Kevin DeVries
      By Kevin DeVries in TrailGroove Blog 0
      For at least half an hour, the solar eclipse seemed like a total bust. Sure, I could glimpse a chipped-out corner of the Sun with my rinky-dink eclipse glasses, but its apparently-undaunted intensity continued to bounce off the surface of Fiddler Creek, searing my skin and melting the chocolate in my food bag. But as totality approached, the atmosphere finally changed. An eerie glow settled over the landscape, and birds began to chirp their evening songs.

      The Sun, even 99% covered, had bravely persisted in rendering daylight. But then – totality. A flip of the light switch. A blue dusk. The only evidence of the Sun was its corona, blazing out from behind the moon. Planets revealed themselves in the daytime.
      Time is a strange phenomenon indeed. Those four minutes of totality seemed to pass in an instant. Before I could blink, the fabled ‘diamond ring’ emerged for a few seconds, as the Sun shone only through a tiny crater at the edge of the Moon’s surface. And moments later, as the Sun re-emerged, the whole thing was over. Sometimes, I wish I could freeze the clock and enjoy a few extra minutes of this once-in-a-generation event.

      A few months prior, I’d noticed that the 2024 eclipse cut its path of totality directly over the 223-mile Ouachita Trail (OT) in eastern Oklahoma and western Arkansas. I’d previously hiked most of the OT in early March 2020. The solar eclipse gave me the perfect excuse to finish what I started. The odds of a sunny April day in Arkansas seemed low, but perhaps I’d get lucky. In any event though, I wanted to hike the OT for its own sake.
      A Thru-hike of the Ouachita Trail Begins
      Getting to the trail turned out to be half the battle. I took an overnight train to Texarkana, and caught a bus a couple hours north to Mena, AR. Eventually, getting to the beginning of the trail took nearly nine hours, and involved putting together five separate rides.
      By the time I got to the western terminus at Talimena State Park, in eastern Oklahoma, the sun had nearly set. I snapped a quick photo and busted out a couple miles in the gathering gloom. Just before dark, I plopped down near a stream and snuggled into my quilt for the night. A quick cowboy camp would suffice.

      The high terrain of Oklahoma proved the most chilly – and challenging – miles of the OT. The days were sunny and warm, but high pressure dominated the region for my first few days on trail. As soon as the sun set, the temperature dropped to the freezing mark. Equipped with warm clothes and an extra dose of fluffy down though, I cowboy camped my way through Oklahoma, reveling in the delightful orange sunsets and perhaps some of the brightest stars in the eastern United States.
      The OT is well-marked along its entire length, but seldom-traveled in spots. The previous autumn’s leaf detritus lay thick on the ground, obscuring the rocky terrain of eastern Oklahoma. Each footstep was an adventure, with no indication of what kind of rocks I’d find underneath. In such conditions, my progress was tedious. I hiked deep into the evening hours those first few days. When I finally quit for the night, my legs ached badly enough that I struggled to fall asleep.
      Hiking into Arkansas
      Soon enough, I reached the Arkansas state line and my first resupply point – Queen Wilhelmina State Park. There, I charged my phone, met a couple other thru-hikers, and gorged myself at the magnificent breakfast buffet. Only three days in, I’d already developed an insatiable appetite.

      It was a busy weekend in the National Forest. Plenty of families took advantage of the beautiful weather to stretch their legs with a quick day hike. And, a couple days before the event itself, eclipse-chasers were already starting to set up camp. On one occasion, I crossed a dirt road, only to find my way blocked by a car-camping couple who’d set up their tent directly in the middle of the trail. I apologized awkwardly as I danced past their guylines. I belonged in the backcountry, away from roads and the throngs of eclipse-seekers.
      The event itself lived up to the hype. Despite an unfavorable forecast, clear skies persisted through most of the afternoon, allowing me an unimpeded view of the eclipse. As the evening progressed though, clouds began to pile up and a strong southerly wind swept moist air into the region. As darkness fell, lightning flashed to my south.

      After dawdling for most of the afternoon during the eclipse, I needed to make serious miles. And given the night’s grim forecast (thunderstorms and heavy rains), I desperately wanted to get underneath a roof. There was a shelter eight miles away, but the thunder was only getting louder.
      The next few hours were a blur, as I power-hiked through the darkness. The wind picked up, the lightning became almost continuous, and the humid air menaced rain. But, though the radar looked like a gallon of spilled paint, the downpour held off for the time being.

      Finally, I spied the sign marking the short side-trail to the shelter. No sooner did I duck under the roof, than did the rain pour down by the bucketful. I made it, with minutes to spare!
      I took advantage of a break in the weather the next morning to hike to the next road crossing, where I planned to resupply in the tiny hamlet of Story, AR. The trail had turned into a moat. A couple normally-dry creeks were running knee-deep. And more rain was on the way.

      I’d planned for this eventuality. Each of my previous three springtime hikes in Arkansas had involved multi-day bouts of terrible weather, so I planned a couple of buffer days on this trip. I sat out the remainder of the day in Story, as well as the following day. When I hit the trail thereafter, I again had beautiful weather for the rest of the trip.
      Story is a must-stop for any Ouachita Trail hiker. The Bluebell Cafe and its long-owner, Lori, have become legendary in the OT community. Lori offered me a ride from the trailhead to her store, and even a couple quick stops around town. The Bluebell itself is largely patronized by a stable crowd of remarkably-friendly locals. The sight of pouring rain through the cafe window made my burger taste even better.

      After the rain-induced interregnum, I hit the trail for the final 100 miles of the OT. This western section proved lower, greener, and less rocky than the western half of the trail. I cruised through the easier terrain, reveling in the occasional mountaintop vista. A particular treat was Flatside Pinnacle, the best viewpoint on the entire trail. Though a fierce wind battered the mountain, I couldn’t resist the temptation of a thrilling lunch at the viewpoint.
      The End of the Hike & Ouachita Trail Reflections
      The last thirty miles of the OT finally brought a reprieve from the constant up-and-down. I cruised around the edge of Lake Maumelle, approaching the outskirts of Little Rock. The OT wouldn’t give up so easily though, delivering one final burst of rocky terrain at the eastern terminus in Pinnacle Mountain State Park.

      I’ve often wished that I could have begun long-distance hiking in the 1980’s or 1990’s, rather than the 2010’s. Trails such as the Appalachian Trail (AT) or Pacific Crest Trail (PCT) are rightfully iconic, but as the popularity of thru-hiking has surged in the 21st century, the experience they offer has inevitably changed. Shelters on the AT are almost always full during peak season. It’s rare to go more than half a day without encountering other hikers. At times, the AT and PCT can seem like a 2,000-mile conga line, or a linear summer camp. Trail angels, no matter how kind-hearted, often burn out within a year or two, unable to keep pace with the relentless crush of traffic during the hiking season.

      On the Ouachita Trail, I found an experience reminiscent of decades past. The OT is complete and well-maintained, but it’s not crowded. Its AT-style shelters are clean, well-built, and rarely occupied. Trail angels and shuttle services can engage each hiker one-on-one, rather than shuffling them through assembly-line style. Trailside businesses aren’t overwhelmed with hundreds of packages, and don’t need a complicated numbering system to keep track of them all. When locals help with getting hikers to town, it’s a genuine act of spontaneous generosity, rather than daily drudgery. In almost two weeks on the trail, I met only three other thru-hikers.

      The Ouachita Trail is a throwback to the past. But perhaps it represents the future as well. As thru-hiking continues to surge in popularity, we need more trails to distribute the impact. The AT and PCT are arguably near their carrying capacity. But the Ouachita Trail isn’t. Neither is the Bartram Trail, Florida Trail, Pinhoti Trail, or the Idaho Centennial Trail. And that’s to say nothing of emergent trails like the Alaska Long Trail, which are still under development. In the Ouachita Trail, I caught a glimpse of both the past and potential future of thru-hiking. I couldn’t freeze the present. The Ouachita Trail was 223 miles long. I often wished it were twice that length. In the end, those four minutes of totality and those two weeks on trail were but a moment – a memory that I’ll treasure for decades.
      Need to Know
      Information
      The Ouachita Trail is 223 miles, located on an east-west axis in eastern Oklahoma and western Arkansas. No permits are required to hike the OT. The majority of the trail is located within the Ouachita National Forest, with small segments of state and private land (with easements), mainly on the west end.
      The west end of the trail is generally higher, rockier, and more difficult than the east end. Two of the best views include Rich Mountain and Winding Stair Mountain on the west end, and Ouachita Pinnacle and Flatside Pinnacle on the east end.
      Common resupply points include the towns of Mena, AR and Story, AR. As an alternative to going into Mena, hikers may consider mailing a box to Queen Wilhelmina State Park. Check with the park before mailing a box for any special instructions.
      Getting There
      The western terminus, in Oklahoma’s Talimena State Park, is inaccessible via public transit. The closest transit hub is Fort Smith, AR (bus or air), an hour north. Several shuttle services offer transportation. The eastern terminus, in Pinnacle Mountain State Park, is accessible to Little Rock (rail, bus, or air) via a relatively inexpensive rideshare.
      If section-hiking, the town of Mena, AR (near mile 68) makes a convenient endpoint, as it has twice-daily bus service to Kansas City, Fort Smith, and Texarkana.
      Best Time to Go
      The OT can be hiked at any time between October and April. Spring and fall are ideal. In recent years, winter thru-hikes of the OT have become more common. Winter hikers should be prepared for the possibility of subfreezing temperatures, snow, and ice. In times of drought, hikers may encounter the occasional dry stretch.
      Maps and Books
      Navigation is generally easy on the OT, though timber harvesting and prescribed burns have impacted the trail in a few spots, mainly on the west end. The trail is marked throughout with 2”x6” blue blazes. Maps can be ordered (or printed at home for free) here.
      Tim Ernst’s Ouachita Trail Guide is the definitive guidebook for the OT. It’s well-produced and detailed. Although not necessary for navigation, it helps contextualize the trailside sights. A FarOut Guide is available as well. For planning and overview maps, the Delorme Atlas for Oklahoma and their Arkansas atlas can be helpful.
      Editor's Note: This article originally appeared in Issue 57 of TrailGroove Magazine. You can read the original article here for additional photos and content.
×
×
  • Create New...