What's New
- Yesterday
-
Finding the perfect clothing to hike in can be a challenge, particularly if your body doesn't work well wearing unisex clothing. In the past there were not many women's-specific clothing items created for hiking and backpacking. Luckily more manufacturers are designing and selling clothes made for women and their specific needs, and many are providing extended sizing to accommodate more of us. Here are some favorite items that are made specifically for women, although individual preferences and requirements vary. Best Women's Hiking Pants Most of the time, I prefer to hike in long pants, as I tend to be off-trail often and wish to avoid scratches and scrapes on my legs. Also, having long pants helps avoid mosquito-bites and sunburn in the summer. The pants listed below all have been tested on the trail, but since we all have unique shapes and preferences, be sure to try these on before heading out for a long hike. The Outdoor Research Ferrosi Pants ($110) are very comfortable and lightweight with a decent amount of stretch. The fabric is so light, that I can wear it on the hottest days without any issue of overheating, and they dry very quickly. Surprisingly, the material is quite durable for being so thin. These are mid-rise pants and do tend to run large - luckily the drawstring around the waist can help to adjust them further. There are drawstrings around the leg cuffs also, which is great for modifying fit, but I've also found myself stepping on them at times. Overall, these pants are so comfortable, that I keep going back to them despite the other pairs of pants I have. Extended sizing from 0 to 24W (some petite & tall also available). If you prefer convertible pants, the REI Sahara Convertible Pants ($89.85) are a good bet. They zip off just above the knee to become shorts on those hotter hiking days. There are also zippers that run up the outside of the leg from the foot to the shorts, so you can partially unzip for ventilation or unzip completely and convert to shorts without taking off your shoes/boots. These are mid-rise pants, and are quick drying and treated with DWR to resist water as well. Keep in mind, the zippered areas will have less stretch, so be sure they are comfortable for you before taking them on a trip particularly if (like me) you have thicker thighs. Sizes 0 to 26W, with tall and petite up to size 16. For versatile pants that work great on the trail as well as around town, check out Prana Halle Pants ($95). These are boot-cut and low-rise, and have 2 buttons at the waist along with a drawstring. The material is a bit thicker and less breathable than the ones above, so keep the conditions in mind when you look at these pants. I like to wear them on shoulder-season hikes for this reason, but on the other hand they are very durable and well-made. They are treated to be water repellent and UPF50+. Prana also offers the Stretch Zion Halle Pants, which are straight-legged and mid-rise with a slightly lighter but similar fabric. Both come in sizes 00 to 16. A well-known name in outdoor clothing, Columbia offers several hiking pant options including the Leslie Falls Convertible Pants ($85). These pants are made with UPF50 fabric with Omni-Shield to be repellent to rain and stains. They convert to shorts with zippers above the knees, and they also convert to capris by rolling up the cuffs and securing with snaps on each leg. They are available in short, regular, and long inseams in sizes 2-18, as well as 16W to 24W and are slim-fitting in the hips and thighs, so you may consider sizing up if you'd like a looser fit. Best Women's Hiking Skorts / Skirts If you prefer hiking in a skirt, a proven favorite is the Purple Rain Adventure Skirt ($79.99) which is designed by a hiker specifically for the trail, although it looks great off the trail too. It is synthetic and water resistant (PFAS-free DWR), with pockets and a comfortable waistband for under your hip belt. Sizes XS to 3XL. If you prefer skorts, the Prana Koen Skort ($74) is a great choice. The Koen Skort has a thick and comfortable waistband that doesn't roll and can be cinched for better fit. It is made of a lightweight, quick-drying material and can be made shorter by cinching up the sides. The shorts are quite comfortable for hiking, not too tight and not too short. Sizes XS to XXL. Best Women's Hiking Shirts There are so many variations of shirts to wear on the trail, and I often switch things up depending on the location and weather conditions of my hikes. Also, many of these shirts allow for layering, which is the best way to account for changing conditions. Here are some items I've found that work well. T-Shirts The Patagonia Capilene Cool Daily Shirt ($49) is a short sleeved, synthetic, moisture-wicking, and fast-drying t-shirt that comes in several colors and with graphic tee options as well. This is a good basic t-shirt that is comfortable with a little stretch, and it will work well under other shirts or on its own. Sizes XXS to XXL. For wool the Woolverino Microweight 145 Women's Wool V-Neck ($69.99) is a lightweight tee made with a merino wool blend (84% Merino Wool, 12% Nylon, 4% Spandex). It has raglan sleeves for comfort, and is long enough to fit under backpack hip belts. Although a great shirt, be careful to avoid snags and significant abrasion. It is machine washable and UPF20. Sizes XS to 2X. Our own TrailGroove synthetic Performance Shirt is also a go-to of mine on warmer hikes and serving as a baselayer in other conditions. The more relaxed fit allows for comfort and breathability and being 100% synthetic, it dries extremely fast. An affordable and versatile option is the Under Armour Women’s Tech Twist Short Sleeve V-Neck ($25). This synthetic t-shirt also comes in a crew neck and in many colors. It is a very lightweight shirt that can be used for running, hiking, or any other workout as it is sweat-wicking and quick-drying. Friendly note: the lighter colors can be slightly transparent. Sizes XS to 3X. Tank Tops The REI Co-op Sahara Shade Tank Top ($34.95) is a UPF 50+ sleeveless top that is perfect for hiking in hot conditions. It has a higher neck and is long enough to fit below hip belts. As with most of our options, it is quick drying and comes in a large range of sizes. Be sure to protect those shoulders if you'll be in the sun, though! Sizes XS to 3X. A tank version of the Woolverino tee above – the Woolverino Women's Racerback Tank Top ($59.99) – has the same breathable, lightweight wool blend as the tee, but in a sleeveless racerback. This shirt has less coverage than the REI tank above, and is machine washable. Again, handle with care and watch for snags. Sizes XS to 3X. Long Sleeve Sun Protection When you need extra sun protection, check out the Outdoor Research Echo Long Sleeve Shirt ($65). It has raglan sleeves and flat seams to allow easy movement with comfort. It is made of a very lightweight, stretchy, and extremely breathable fabric – so much that it can be see-through. The Echo shirt can be used as a base layer for all 4 seasons as well and is UPF 15. Previous versions had roll down cuffs to cover hands, and I’m hoping OR will consider adding that back to newer versions. Sizes XXS to XXL. For a more traditional, collared shirt, the Columbia PFG Tamiami II Long-Sleeve Women's Shirt ($60) is a classic choice. It has snaps instead of buttons, and is a very lightweight shirt with UPF40 protection. This shirt is easy to layer with a tank or t-shirt underneath. It has a vented back, zippered side pockets and roll-up sleeves. Sizes XS to 3X. For ultimate sun-protection, especially on the back of your neck, a hooded shirt is a great option. The Mountain Hardwear Crater Lake Long-Sleeve Hoody ($79) is UPF50+ and made of a lightweight, "solar knit jersey" with flat seam construction for comfort. There is a drawcord at the hem to shorten if needed, and it has thumbholes that allow extra coverage over hands. There is one small zippered pocket for valuables on the side. Wear with a baseball cap (see the TrailGroove Store) or trucker hat to provide more coverage. Sizes XS to 3X. Best Women's Outerwear (Rain Gear, Insulated Jackets) When hiking on overnight and longer trips, carrying the right outerwear allows you to be prepared for any weather situation. It's important to pay attention to current conditions as well as forecasts, but sometimes a storm will surprise you even with the most pleasant hiking forecast. When backpacking in the warmer months, I stick to ultralight items as they spend most of their time in my backpack, but I do need them to be dependable for the few times I do need them. Typically, this includes a rain jacket and rain pants (stored where I can access them quickly) and an insulated jacket for warmth. During colder trips, I will layer these items and sometimes add more specialized winter clothing. One ultralight women's rain jacket is the Marmot Women's Superalloy Bio Rain Jacket ($185) which is quite lightweight and listed as 5 oz, although mine is slightly higher at 5.75 oz. This jacket has a zippered chest pocket which can be used as a stuff sack for easy packing. It is made with Marmot's NanoPro breathable fabric membrane and taped seams, being both waterproof and windproof. Sizes XS to XL. Zpacks offers the Women's Vertice Rain Jacket ($299) which weighs just 5.1 oz. It is made with their Vertice Waterproof Breathable Fabric and has fully taped seams. This jacket runs a little long for full rain protection and ease of use with a backpack. There is a visor in the hood that adjusts vertically with a strap on the back of the hood, and a zippered chest pocket that doubles as a stuff sack. There are waterproof armpit zippers for ventilation. Sizes XS to XL. The Zpacks Women's Vertice Rain Pants are similarly made with the Vertice Waterproof Breathable Fabric and weigh just 2.5 oz. These pants come in sizes S to XXL. For warmth, I carry a packable down jacket which I store protected in my pack to keep from getting wet. Some may prefer a synthetic jacket instead of down, which will also work well, but may not pack as small and will likely weigh a bit more. My go-to is the Montbell Alpine Light Down Parka ($285). It is quite warm for its weight (12.8 oz) and made with 800 Fill Power EX down. The Alpine Light has some thoughtful features, such as an adjustable hood for a close fit and zip end guards to protect your face/chin from getting poked by the end of the zipper (I wish all jackets had this). One thing to note...the jackets listed above only go to up women's size XL. So, if you are in need of a larger size in this type of clothing, the men's sizes go up to XXL which will give larger chest and hip/waist measurements, but also longer sleeves. That said, the REI Co-op Women's Magma Down Hoodie offers a more budget-friendly option here that goes up to 3X in women's sizing. There are many other options for rain jackets in extended sizes, but they have a tradeoff in being much heavier materials. One exception might be the Frogg Toggs Women's Xtreme Lite Hooded Jacket ($69.99) which comes in sizes S through 2XL. Best Women’s Backpacking / Hiking Base Layers The perfect base layers are essential for backpacking trips with cooler overnight temperatures or when hiking in very cold conditions. The base layers can also serve as comfortable (and clean) pajamas to keep your sleeping bag clean. There are many options, but remember you want to have breathable and moisture-wicking clothes in case you have to wear them while hiking. Also, the lighter the better in many cases, if you'll be carrying them on your back much of the time. Made with a breathable fabric, the REI Co-op Lightweight Half-Zip Base Layer Top and Tights are a dependable choice. $49.95 (top) & $44.95 (tights). These all-synthetic pieces (92% recycled polyester) are also UPF50+, and the top is high-neck and half-zip for warmth but with the flexibility to unzip and cool down a bit. The top also has underarm gussets, and both top and bottoms have flat seams. Both pieces are offered in sizes XS-3X, and the tights have Petite sizing options. The top weighs 5.7 oz, and the tights weigh 4.3 oz. For a more natural fabric, there is the Smartwool Classic Thermal Merino Base Layer Crew & Bottom ($125 each) which come in sizes XS-4X and in several colors and patterns. These are made from 100% merino wool, which has the natural benefits of temperature regulation and odor resistance. The top also comes in quarter-zip. 7.69 oz top. 7.3 oz bottom. Best Women’s Hiking Underwear Underwear choices are so individual, not just because of preferences, but also because of our unique bodies. The suggestions below will not work for everyone, and again, make sure what you have fits well and is comfortable before heading out on a trip. No one wants underclothes that itch, bunch, or slide around when you're trying to enjoy a hike. The REI Co-op Active Bikini Underwear ($19.95) are a good synthetic choice. They are made of fast-drying and moisture-wicking fabric and are not super tight. I have a pair that has lasted several years with very little sign of wear. These are so lightweight that it's easy to throw an extra pair or two in your pack. Sizes XS to 3X. The Woolly Women's Bikini Brief ($34) is made of natural fibers and also comes in hipster, thong, and high-waisted options. The merino wool is blended with 5% elastane, and may stretch quite a lot after a while of hiking. Again, make sure the fit is right and that it's comfortable for you. Sizes X-Small to XX-Large. Sports Bras for Hiking Regarding bras, it is best to pick one that fits you well, doesn't cause friction with your backpack, and doesn't slip while hiking. Some women go very light with a bralette, while others prefer (or require) more support even including underwire and thick padding. My preferences have tended to be in the middle. One example is the Beyond Yoga Spacedye Lift Your Spirits Bra ($66); it is a moisture-wicking sports bra with removable pads. It provides light to medium support and comes in sizes XX-Small to 4X. For lighter coverage, there is the Branwyn Essential Bralette ($52), which has no underwire or padding, but is a seamless merino blend. This bralette has the benefits of merino that make it a good choice for sweaty hikes. The "gentle support" is comfortable, but may not work for women who require more support / prefer more coverage while hiking. It has convertible straps, which can be used to make it a crossback bra to help avoid chafing. Comes in sizes XS to XXL. Branwyn also makes the Essential Busty Bra ($62) with a thicker band, larger cups, and slightly wider (still convertible) straps, but is still lightweight without padding or underwire. For a bra with more support, there is the Under Armour Infinity Mid Impact Sports Bra ($40). It has injection-molded pads (not removable) that feel very light along with a sweat-wicking band. There is a hook and eye closure in the back for easy on/off, and the straps can be worn straight or crossback by detaching at the front. There are small mesh panels on the sides to provide extra ventilation. Available in sizes XS to XL, in 2 options (A-C cup, D-DD cup), and also available in plus sizes 1X-3X. While this guide should get you started, it all comes down to what clothing works best for you on the trail and in the conditions you expect to encounter. Conclusion Hopefully these suggestions help you get on the trail with clothes that don’t just work but work and fit well. In addition to the suggestions above, be sure to check out REI Co-op clearance sales in the Outlet for highly-rated backpacking and hiking gear for a discounted price.
- Within the Last week
-
 pepperjack412 joined the community
 -

Best Backpacking Tents by Application and Budget
Aaron Zagrodnick posted a blog entry in TrailGroove Blog
As one of the most important decisions you can make when it comes to backpacking gear, your choice of a backpacking tent can have quite the impact in regards to your comfort in camp and protection from the elements. Additionally, choosing the best backpacking tent can also have an impact when it comes to weight carried on the trail (as one of, if not the heaviest items in your pack), and a tent decision can have quite the impact on your wallet, as well. With many factors to consider, in this article we’ll look at the top backpacking tents currently on the market, with a preference towards tents that of course offer protection from the elements, but also are lightweight and include plenty of space for the weight (including headroom), while remaining sufficiently durable and easy to use. Additionally preference here leans towards tents that haven’t had any flame or fire retardant chemicals applied, and for tents that are easy to get in and out of and have space to store gear. Best Solo & Ultralight Backpacking Tents For solo use I look to save just about as much weight as possible and space is less of a concern – I find a little extra space to be much more useful and important when there’s more than one person sharing a tent. If it’s just me and in this day and age, I’ll look to go with a Dyneema Composite Fabric tent every time and will look for an ultralight tent under the 20 ounce mark or so. Previously my choice has been the (discontinued) Zpacks Hexamid Twin, which while designed for two was much more workable for one person having only a single side door and one vestibule. This tent however still only weighed around a pound. An ultralight Dyneema Composite Fabric tent from Zpacks Luckily there are modern-day alternatives available from Zpacks via their Plex Solo tent ($599, 14.5 oz.) as well as their Altaplex Solo tent ($699, 16.5 oz.), with the Altaplex being designed for taller hikers. I like a rectangular, non-tapering floorplan whenever I can get it no matter what tent I’m looking at, and as such the Altaplex would be an intriguing ultralight option. That said for those using standard-width pads who want the lightest pack, the Plex Solo and the Plex Solo Lite tent (a Plex Solo tent option featuring more ultralight materials and further weight savings) are equally interesting choices. With the solo tent category one door and one vestibule work great, as can be found in the tent designs discussed above. However, especially for those that backpack with a wide pad and like space, the Duplex Lite tent ($699, 14.9 oz.) should be given strong consideration. The Duplex Lite is also an option for 2 with standard-width pads, who want to save as much weight as possible and don’t mind bumping elbows. Regardless of which Zpacks tent you go with, I’d suggest at least considering their .75 oz. canopy material over the default .55 oz. Dyneema. I’ve used the .55 oz. material for years without issue – it’s not a bad default material and my tents have withstood years of use and severe weather. However, future DCF tents that I purchase will likely be of the .75 oz. variety just for all-around insurance. The .75 oz. material will be stronger and offer greater puncture resistance, which may be appreciated over the long haul and when you need it, without too much of a weight penalty. As you might have guessed, Zpacks offering buyers the choice of this fabric option is one reason their tents are recommended so highly in this article. Note that as you might expect, their "Lite" tents are not offered in this heavier duty fabric, but are still worth consideration as the lightest of the light. However, if you’re not sold on Dyneema and prefer a more traditionally-designed tent, one that does stand out in this category can be found in the NEMO Hornet Elite Osmo 1-Person tent ($600, 29 oz.). With 39” of headroom this tent may not be the most ideal choice for the tallest of users, but this height is on par with other tents in the more traditional, double-walled and freestanding (or semi-freestanding) tent market. At less than 2 pounds this tent will not weigh you down and can even fit a rectangular large and wide sleeping pad. If you’re looking to save some cash, NEMO also offers a standard version of the Hornet Osmo, which still comes in at a respectable weight with slightly smaller interior dimensions. Summary: Best Solo & Ultralight Tents Zpacks Plex Solo Standard Zpacks Altaplex Classic Zpacks Plex Solo Lite Zpacks Duplex Lite NEMO Hornet Osmo Elite NEMO Hornet Osmo Standard In summary if you’re looking for a Dyneema Composite Fabric (DCF) ultralight or solo tent and are open to a non-traditional design, Zpacks offers an excellent choice of floorplans and overall performance, and with the option of a heavier-duty DCF fabric for durability. For a more traditional design but still in the ultralight category, take a look at the NEMO Osmo series. Best 2-Person Backpacking Tents For a 2-person backpacking tent, I look for 2 doors with side entries and 2 matching vestibules, without question. This allows each person their own entry and exit (no having to crawl over anyone) and their own space to store gear at night. Generally, around 3lbs. or less is a good target here. For many years my go-to option here was the Six Moon Designs Lunar Duo ($395, 45 oz.). This tent features all the prerequisites above, but the weight of their lighter backpacking model (previously known as the Explorer model, and suggested if budget allows over their heavier Lunar Duo Outfitter) has crept up a bit in recent years. The Six Moon Designs Lunar Duo 2-person backpacking tent That said, the Lunar Duo backpacking model is not exactly heavy by any means and is a wonderful design with a 54x90” floorplan. This is one of the best floor measurements for a 2-person tent I’ve ever used. It’s long enough for tall hikers, wide enough for 2 wide pads, and isn’t excessive even with 2 standard pads…extra space is always nice. Additionally, the 45” centered height is great for sitting up in the tent. If at least one hiker uses a shorter pad, you can easily fit 2 people plus a dog or very small child in this tent as well, with gear being stored in the large vestibules. Find our Lunar Duo review here. About the only downside to this tent is that, as with all silnylon / silpoly tents including those to follow from Tarptent, you’ll need to seal the seams with something like SeamGrip SIL seam sealer at home before you head out, although many manufacturers are now offering this as an add-on service. Many backpackers – including myself – have long hoped that Six Moon Designs would come out with a Dyneema Lunar Duo to take things from lightweight to ultralight...we’ll continue to keep our hopes up. With its 90" long floor, the Lunar Duo from Six Moon Designs can fit 2 people with extra room, especially if at least one person utilizes a shorter sleeping pad. For something lighter but significantly more expensive, the Zpacks Duplex tent ($749, 17.9 oz.) or the larger Zpacks Triplex Pro tent ($899, 22 oz.) are worth significant consideration. Zpacks tents are made from Dyneema Composite Fabric to save weight and you’ll end up with a tent that won’t sag in the rain like you can get with silnylon. At a 45” floor width, the Duplex will be tight for 2 people and both hikers will have to use standard-width sleeping pads, unless you want to absolutely max out the width of the floor with 1 wide and 1 regular-width sleeping pad…something I don’t recommend. The Triplex Pro however, at a 65” floor width could work for up to 3, but also has plenty of room for 2 people with wide pads and room for gear for those who like plenty of space. Utilizing standard-width sleeping pads with the Triplex Pro can get you a 2+ person tent with room for a child or a dog for example, however for my use case the original Triplex (with a 60x90" floorplan – our Triplex review) was more versatile as a 2+ tent and offered more room for taller users. For a 2+ person tent that will fit wide pads, the LightHeart Gear Duo Tent ($340, 36 oz.) with its unique 55x100" floorplan is also worth a look and the longer floor makes fitting a dog in much easier. The Zpacks Triplex offers room for 2 people using wide sleeping pads with room to spare. Mainstream manufacturer Big Agnes makes some interesting tents in their Platinum and Carbon lines that are either freestanding or semi-freestanding, however there are some compromises to be had related to interior space or entry configuration (a side door, even when solo, is preferred). For example the Tiger Wall 2 Platinum tent ($700, 39 oz.) will get you a semi-freestanding tent for 2 using standard-width pads, but the 86” length and 39” peak height combined with a lengthwise sloping ceiling would be cramped for taller users. In this category the Lunar Duo would be the closest tent to being a perfect fit for 2. That said, we’re not making a custom tent here and beggars can’t be choosers. For two using wide pads who also have a dog along, the aforementioned LightHeart Duo would be a better fit with the Zpacks Triplex Pro working for niche situations for 2 with standard-length wide pads who like room and gear (or maybe a dog) in the tent. These tents feature 2 doors and 2 vestibules. Summary: Best 2-Person Backpacking Tents Six Moon Designs Lunar Duo Six Moon Designs Lunar Duo Outfitter Zpacks Duplex Zpacks Triplex Pro LightHeart Gear Duo Big Agnes Tiger Wall 2 Platinum To summarize, the Zpacks Duplex would be more of an ultralight option for 2 with standard pads, while the LightHeart Duo or Zpacks Triplex Pro allows for maximum comfort / room for a dog or gear. The venerable Six Moon Designs Lunar Duo series offers a budget-friendly option with a perfect floor size for two. For a more traditional design, the Big Agnes Platinum tent is worth consideration. Best Family or Group Backpacking Tents There is not much discussion to be had here when it comes to the best group and family backpacking tent, as unfortunately it seems manufacturers pour most of their research and development into their 1 or 2-person tent designs. The Tarptent Hogback ($549, 63.2 oz.) is my choice in this category with few competitors. The Hogback is a 4-person tent that weighs in around 4 pounds and features an 86x86” floorplan that can fit up to 4 standard-width pads, or 3 wide pads, and features double-wall construction with either mesh or partial-solid fabric inner options. 4 people in the Hogback will be a squeeze and you’ll be fighting for vestibule space, but we’ve used it for 3 plus a dog on many occasions. Tarptent Hogback 4-person backpacking tent Although for years Tarptent declined to entertain the idea of making Dyneema Composite Fabric tents, in recent years they began to utilize this weight-saving non-stretch fabric, but it hasn’t made it up the line to the Hogback quite yet (which would save quite a bit of weight in a tent this large). That said, we’ve been quite happy with the silnylon fly utilized in our Hogback and about 4lbs is still quite light for a tent of this size. You can read our full Tarptent Hogback review here. Although more of a backpacking shelter than a tent due to its floorless nature, the Black Diamond Mega Light tent ($500, 45 oz.) is also worth considering in this category and these tents and tents of a similar design have been successfully used by educational expeditions for many years. Depending on where you’re backpacking however, the extra bug and weather protection you get with an integrated floor like you’ll find on the Hogback may be appreciated. There is an optional nest available for the Mega Light; however it more than doubles the weight and almost doubles the price. For a lighter option Hyperlite Mountain Gear offers their UltaMid 4 pyramid ($1440 as a tent, 62 oz. with the floored mesh insert and pole). With either of these shelters you'll need to be aware of some compromises pyramid shelters can have – like a pole in the center of the tent, slanted walls, typically one (relatively) small door for entry and exit, lack of vestibule space, and the possibility of rain getting into the tent when entering and exiting due to the slanted walls. For freestanding options, the Copper Spur UL4 tent ($850, 88 oz.), with its larger (listed) 86x96” floorplan can fit 4 people with a couple of those people using wide pads, and this tent also has an impressive 50” inside height. In our testing getting this tent's floorplan to measure up to specs would be quite a stretch; thus we cannot recommend this tent maxed out with 3X wide pads along with 1 standard-width pad. That said the tent will fit 4 people all in the same tent, although you’ll be well over 5lbs. And if the UL4 still isn’t enough space, you can take a look at the 86x108” Copper Spur HV UL5 ($950, 117 oz.) which, as you might expect, is designed for groups of 5 and features 60” – or 5 feet, of headroom. The Copper Spur UL line is typically a leader on the spec sheets – just be aware that to achieve light weight in a traditional design Big Agnes uses very light 15 and 20D fabrics that are lower on the hydrostatic head scale and feature a PU (polyurethane) coating. Coatings are very waterproof and allow manufacturers to tape seams, but coatings wear off, unlike impregnated silicone or Dyneema waterproof fabrics (it would be suggested to use a groundsheet – I use one made of window insulation film). The recently updated and aforementioned Zpacks Triplex Pro with its 65x84” floorplan would work for 3 average sized people with standard length / regular width pads who aren’t too tall – and is about as light as you could get for this use case, but may be a bit short for taller users. At some point and once the group size gets larger, taking multiple smaller separate tents may make the most sense and can even save weight over a single larger tent – although depending on your tent choice, this can potentially be more expensive. Summary: Best Family or Group Backpacking Tents Tarptent Hogback Black Diamond Mega Light HMG UltaMid 4 Big Agnes Copper Spur UL4 Big Agnes Copper Spur HV UL5 Zpacks Triplex Pro For family and group tents the Tarptent Hogback is our choice, if your group will fit. The struts allow for good use of the 86x86” floorplan, but 86x86” is tight as group size approaches 4. The Black Diamond Mega Light and HMG UltaMid4 are pyramid options, which again are great if you fit and if you can deal with the drawbacks of the pyramid design, including inefficient use of floorspace. For more traditional designs, the Copper Spur series should be considered, however care will need to be exercised with the ultralight fabrics utilized. For 3 looking for the lightest possible solution, look no further than the Zpacks Triplex Pro. Best Budget Backpacking Tents Budget is relative, but for this category we can go ahead and rule out ultralight Dyneema tents and set our focus on the much more affordable nylon and polyester options. The Six Moon Designs Lunar Solo ($260, 26 oz.) can be had for less with free shipping and a sign-up discount, and if you catch it on sale it can even go for under $200. The Lunar Solo is roomy for one, fitting either standard or wide pads. The REI Co-op Half Dome Series of tents with a 2-person as well as a 3-person option has also been a go-to choice for many years. The REI Co-op Flash Series of tents offer lighter weight options, and can typically be found on sale at intervals throughout the year. The venerable Six Moon Designs Lunar Duo can also be found in their heavier but much cheaper polyester Outfitter Tent version, which will get you a palace for 2 people in a package under 4lbs. for around $200. If you’re looking to save and aren’t too picky on an exact model, checking the REI Co-op Outlet from time to time can lead to some good savings on a variety of tent models from various manufacturers. Summary: Best Budget Backpacking Tents Six Moon Designs Lunar Solo REI Co-op Half Dome Series REI Co-op Flash Series Lunar Duo Outfitter REI Co-op Outlet Tents If you’re looking to save some cash but still want a great tent, the SMD Lunar Solo is a venerable choice in this category for solo use. For two, look to the Lunar Duo Outfitter also from Six Moon Designs. The REI Co-op Half Dome series make for a traditional choice, with the REI Co-op Flash series offering some weight savings, and it’s always worth browsing the REI Co-op Outlet to see what’s on sale. Best 4-Season Backpacking Tents All the tents listed here thus far are primarily targeted towards 3-season use, but if you’re wanting to extend your trips into winter where heavy snow load can be expected and freestanding features become more important, you’ll need to look into 4-season options. The Black Diamond Firstlight 2P ($550, 54 oz.) has been a popular option for solo and 2-person use for years – you can find our full review of the Firstlight 2P tent here. If you like the Firstlight but want a little more space for 2 people, look at the Black Diamond Firstlight 3P ($600, 64 oz.). Tarptent Scarp 2 4-season tent For my use, I like the Tarptent Scarp 2 ($400, 56 oz.), however the weight is getting up there with the crossing poles and you’ll need to set a couple snow anchors with this one. For more, take a look at our Tarptent Scarp 2 review. When it comes to 4-season tents and winter backpacking, you don't want to make any compromises in regards to protection from the elements or the sturdiness of your tent, and extra weight carried here is typically worth it. Summary: Best 4-Season Backpacking Tents Black Diamond Firstlight 2P Black Diamond Firstlight 3P Tarptent Scarp 2 For winter and 4-season usage the Scarp 2 from Tarptent is my choice, be it a solo or 2-person trip. However and as you might expect, Black Diamond has plenty of choices in this category that are among the most popular 4-season tents of all time. Final Thoughts Overall when selecting the best backpacking tent you need to find a balance between weather and bug protection, weight, space, and price – and getting that balance just right will be a little different for each of us. However, with hundreds of options on the market the perfect tent is likely out there for everyone no matter your needs. For more on baseline information and factors to consider when choosing a backpacking tent or shelter, see our guide on how to choose a backpacking tent that goes into tent design and factors to consider on a more overall and general level. For a list of additional backpacking tents to consider from various manufacturers that you can narrow down by capacity, season, and more, check out this page at REI.com. - Earlier
-
Best Backpacking Sleeping Pads by Season & Category
Aaron Zagrodnick posted a blog entry in TrailGroove Blog
Finding a great backpacking sleeping pad is the next logical step in getting your backpacking gear all set once you’ve decided on the big 3 (tent, sleeping bag, backpack). The sleeping pad rounds out what’s known as the big 4 in backpacking – and this list makes up some of the most important gear you’ll carry, with these items typically also including the most expensive items you need to purchase and also representing the items where you can save the most weight. In this guide, we’ll look at the best backpacking sleeping pads that you can find on the market today. Note that in this guide, we’ll list the specs for the regular size if possible (generally 72x20 inches) and list the r-value as well – the higher the value the warmer the pad. Best Summer & Ultralight Backpacking Sleeping Pads For those that are looking to focus on a summer season specific sleeping pad and / or are looking for an ultralight solution for warmer seasons, there are a few standout choices on the market that weigh less than a pound. First, if you’re a backpacker just looking for set and forget type reliability and if you’re the type of sleeper that can find comfort in just about any flat place, the venerable closed cell foam sleeping pad could work, and will save some cash as well. The Therm-a-Rest Z Lite SOL (14 ounces, $60, 2.0 r-value), is a folding foam pad that makes packing easier (but as a foam pad, still bulky). This pad is a little light on the r-value, but would be sufficient for summer trips with moderate lows well above freezing. The NEMO Switchback folding pad (15 ounces, $60, 2.0 r-value) is a competing option in this regard and worth equal consideration. For more, see our review of the NEMO Switchback. These foam pads are also great as a sit pad outside the tent and on breaks during the hiking day. Most backpackers will want more sleeping comfort than a foam pad can offer however. For the lightest of the ultralight insulated inflatable sleeping pads, look no further than to the NEMO Tensor Elite (9 ounces, $250, 2.4 r-value). This new for 2025 pad will offer warmth for summer trips above freezing for most people and offers inflatable comfort, albeit in a mummy shape – this pad is all about saving weight. It should be noted that this pad utilizes 10 denier shell fabrics; extra care will need to be exercised. NEMO also offers their Tensor Trail Ultralight (14 ounces, $190, 2.8 r-value) that doesn’t quite have the warmth to weight of some of their other pads that we’ll discuss later, but this pad is a bit lighter and makes this category. The NEMO valve system allows for easy inflation, deflation, and fine-tuning of comfort level. Exped has offered some of our favorite sleeping pads over the years, and in this category they offer their 1R and 3R pads, with both coming in either mummy or rectangular designs. The Exped Ultra 1R mummy sleeping pad (11 ounces, $120, 1.3 r-value) isn’t insulated, and with this low of an r-value this will only be suitable for the warmest of summer trips. Ever since the Synmat series, Exped has offered value and all-around sleeping pad performance. To me, the Exped Ultra 3R insulated pad (13 ounces, 2.9 r-value, $140) is a much more interesting pad. I’ve taken predecessors of this pad down to freezing or just a bit below, and lower than that combined with a thin ultralight foam pad (1/8" CCF foam). Again, Exped makes a rectangular 3R as well, but at a pound we are perhaps delving into the category to follow. I've found that quilted construction in a sleeping pad (as seen above), or vertical baffles (baffles running head to toe) are the most comfortable and help to keep you on the pad. With a wide enough sleeping pad it's not a deal breaker. However for me the leader in this category would be the Therm-a-Rest NeoAir XLite NXT (13 ounces, $210, 4.5 r-value) and this is an interesting pad because it’s also a leader in our next category as well. This pad has the ultralight weight that puts it in this category, and with the 4.5 r-value you likely won’t need to worry about warmth on summer trips. Looking for an ultralight pad for fast and light summer trips but that also packs warmth for the shoulder seasons? It’s a tall task to beat this pad for that type of use case. Summary: Best Summer & Ultralight Backpacking Sleeping Pads Therm-a-Rest Z Lite SOL NEMO Switchback NEMO Tensor Elite NEMO Tensor Trail Ultralight Exped Ultra 1R Exped Ultra 3R Therm-a-Rest NeoAir XLite NXT Best 3-Season and All-Around Sleeping Pads This is your all-around, bread and butter sleeping pad category. While weights may not be the most ultralight due to the needed increase of r-value for 3-season and shoulder season temperatures, recent advances in sleeping pad technology (it all started with the original Therm-a-Rest NeoAir) have allowed for some very intriguing options to hit the market. Weights here are generally around a pound or just a little more, with insulation that should be good to freezing or a bit below. Choices in this category can be quickly narrowed down to just a few options. The best options include the NEMO Tensor All Season sleeping pad (around $220, 1lb) which is an excellent choice for 3-season use where warmth is appreciated, but it still might get chilly to below freezing at night with a possible cold snap taking things down to the 20s or below, or for cold sleepers any time of the year. With a 5.4 r-value and a rectangular sleeping shape, this pad has a warmth to weight to sleeping and packing space ratio that would have seemed impossible a decade ago. The NEMO Tensor All Season is my pick as the top overall sleeping pad currently on the market. For those looking to save more weight, the Therm-a-Rest NeoAir XLite NXT ($210, 13 ounces in the regular mummy, 4.5 r-value) again gets the weight down to an even more ultralight level with sufficient warmth for 3-season trips, and will save some space in the tent and pack if needed. This pad is also available in a rectangular shape – the NeoAir NXT MAX, which would be my choice if going with the NeoAir in this category, for the additional comfort. While the NeoAir line comes with an inflation bag that works well, it’s unfortunately not adequate to utilize as a dry sack for gear, as can be found in the Exped Schnozzel. That said it is included, and any inflatable pad these days should come with some type of inflation bag / solution. Inflation bag included with NEMO sleeping pads The great thing about these two pads is that they are light enough to be very justifiable for summer trips, have the warmth needed for shoulder season use, and can even be used for winter backpacking if you add in a foam pad to your system to boost the total r-value. New for 2026, Exped has released their Ultra 6.5R sleeping pad line (16 ounces, $200, 6.9 r-value) which takes their venerable synthetically-insulated sleeping pads and also adds in reflective foil to boost warmth. If you want to sleep warm and are looking for a lightweight, but perhaps not ultralight sleeping pad, this would be a sleeping pad line to strongly consider. While at a 6.9 r-value this line will work in the next section as well, the weight specs do put this line in the all-around category. Summary: Best 3-Season and All-Around Sleeping Pads NEMO Tensor All Season Therm-a-Rest NeoAir XLite NXT Therm-a-Rest NeoAir NXT MAX Exped Ultra 6.5R Line Best Winter Backpacking Sleeping Pads If you’re looking for a dedicated winter backpacking sleeping pad however, pads from NEMO and Therm-a-Rest again rise to the top. The NEMO Tensor Extreme Conditions Ultralight Insulated sleeping pad (18 ounces, $250, 8.5 r-value) isn’t the most lightweight in length of name but offers a very impressive weight to r-value specification and comes in multiple shapes and sizes. The NeoAir XTherm NXT sleeping pad (16 ounces, $240, 7.3 r-value in the regular mummy) from Therm-a-Rest is available in either a weight saving mummy shape (previous link) or in their XTherm MAX version in a larger, more comfortable rectangular version. These pads are very impressive on the spec sheet and in regards to warmth to weight ratio, achieving a warmth to weight to bulk combo that would have seemed impossible to achieve a couple decades ago. However, I prefer to use my all-around 3-season type sleeping pads combined with foam pads (Therm-a-Rest RidgeRest, etc.) for winter backpacking. The r-values add up, and the foam pad offers some redundancy in extremely cold conditions. As mentioned in the previous section, another pad to look at will be the Exped Ultra 6.5R line. At a 6.9 r-value this line could be used in winter conditions but at 16 ounces for the standard size would work for your 3-season trips, as well. Summary: Best Winter Backpacking Sleeping Pads Tensor Extreme Conditions UL Insulated NeoAir XTherm NXT XTherm MAX Add-on Closed Cell Foam Pads Exped Ultra 6.5R Best Women’s Backpacking Sleeping Pads Any sleeping pad in this article can be used by either men or women. There are few women’s specific sleeping pads on the market. These are typically temperature rated such that they will be warmer per a given temperature rating. Additionally they may be shaped differently (if mummy-shaped) – generally wider in the hips, etc. for a better fit when sleeping and / or offered in shorter versions. Note that you can always use a rectangular sleeping pad for maximum room all around and / or choose a warmer pad and in various widths / lengths. Regardless for women’s sleeping pads – a market in constant flux – the Sea to Summit Women’s Ether Light XT Insulated (18 ounces, ~$200, 3.5 r-value) offers a plush 4” of height in a women’s specific shape, and would be suitable for most 3-season, typical conditions for an average sleeper (a thin foam pad could be added for a warmth boost). You might also be able to find a Therm-a-Rest ProLite Plus Women’s (23 ounces, under $100 on closeout, 3.9 r-value) – note that the specs are often not listed correctly online – this is an old-school self-inflating foam mattress that offers just 1.5” of height but offers some intrigue. While this is getting a bit heavy, 30 years ago this would have been one of the most comfortable options you could get. You can find a list of women’s backpacking sleeping pads here at REI Co-op. Summary: Best Women’s Backpacking Sleeping Pads Women’s Ether Light XT Insulated Therm-a-Rest ProLite Plus Women’s Choosing the best backpacking sleeping pad is a series of compromises – it must be comfortable enough and warm enough, but pack small enough and be light enough. This results in a compromise, but in recent years these compromises have been lessened. Most Comfortable Backpacking Sleeping Pads & Best Wide / Long Options When comfort is the most important consideration (although keep in mind no matter how cushy, you won’t be comfortable if you’re cold), the Therma-a-Rest NeoLoft sleeping pad ($250) will be hard to beat. This larger air mattress has nearly 5” of height, but is still reasonably backpackable at 25 ounces. With a 4.7 r-value this pad should still keep you warm in 3-season type conditions. If you’re backpacking in, but will then be setting up a basecamp for a few days, this pad might be up your alley. For me however, I don’t quite need to go up to NeoLoft level to find comfort on the trail and thus can save a bit of weight. I like to look for a pad long enough so my feet don’t hang off the end, and wide enough that as a toss and turn side-sleeper I don’t have to worry about falling off the side. The previously mentioned NEMO Tensor All Season sleeping pad – but in the long wide version, or the NeoAir XLite NXT MAX (in the large) are leading backpacking sleeping pad comfort contenders here. 25” wide pads are appreciated in this regard, along with a pad that is slightly longer than your height combined with a good backpacking pillow. A good backpacking pillow setup, combined with the right size sleeping pad (NEMO Tensor series shown) will go a long way towards a comfortable night on the trail. Note that any inflatable sleeping pad will be made warmer and more comfortable if you add a closed cell foam pad underneath. If you’re only using an air pad, you’ll usually want to inflate fairly firmly for more warmth, but if using a foam pad under it you can deflate the pad to a softer firmness while still having sufficient warmth in typical conditions. And, if you toss and turn at night – instead of bottoming out the pad on hard ground, even a thin foam pad will add a surprising amount of cushion for your hips. It should also be noted that while a very niche item, if you’re looking for a 2 person backpacking sleeping pad the Exped Ultra 6.5R Duo (31-43 ounces, $320, 6.9 r-value) is an intriguing choice with separate inflation chambers for each person and in Exped fashion, is a compelling choice across the board. Summary: Most Comfortable Backpacking Sleeping Pads Therma-a-Rest NeoLoft NEMO Tensor All Season (in larger sizes) NeoAir XLite NXT MAX (size large) Add-on Closed Cell Foam Pads Exped Ultra 6.5R Duo (for two) Best Budget Backpacking Sleeping Pads If the latest greatest technology and spreadsheet leaders aren’t your thing, more budget-oriented sleeping pads in the $150 or less range are without a doubt quite workable. A venerable choice has been the Exped line – this line has a great valve system, vertical baffles that I find help keep you on the pad, and larger outer baffles to keep you centered. The Exped Ultra 3R insulated sleeping pad (16 ounces, $140, 2.9 r-value) is my choice in this category. This pad is warm enough for 3-season backpacking, can be used as part of a system with additional foam pads in winter, and won’t break the bank. The Ultra line from Exped and their predecessor from Exped (Synmat series) have been part of my backpacking gear repertoire for years, as they offer a nice blend of warmth, weight, comfort, ease of use, and price. If price however is of paramount importance, look to the Therm-a-Rest RidgeRest, the Therm-a-Rest Z Lite SOL, or the NEMO Switchback. These foam pads will not be the most comfortable, and depending on the sleeper may only be barely better than nothing in the comfort department, but they do add 3-season warmth and will get the job done for around $60 or less. That said, for deals on usually more expensive inflatable pads from time to time, it’s worth checking at the REI Co-op Outlet. Summary: Best Budget Backpacking Sleeping Pads Exped Ultra 3R Therm-a-Rest RidgeRest Therm-a-Rest Z Lite SOL NEMO Switchback REI Co-op Outlet Sleeping Pads In Conclusion Finding the right sleeping pad is important on the trail, both for warmth and for comfort. To some extent this all goes hand in hand – while comfort is more than just warmth, you can’t be comfortable no matter how cushy the sleeping pad if you’re cold. When I look for a sleeping pad I look for the lightest weight sleeping pad that will keep me comfortable and warm on backpacking trips, and one that is also sufficiently durable while meeting the budget while also being easy to use. You can find a complete selection of backpacking sleeping pads mentioned in this article along with additional choices here at REI Co-op. For more on sleeping pads take a look at our article: Choosing the Best Backpacking Sleeping Pad. For more on the “Big 3” of backpacking gear, see our articles: Best Backpacking Tents by Application and Budget and Best Backpacking Sleeping Bags, as well as our Best Backpacking Backpacks Guide. -
Best Backpacking Stoves by Season & Use Case
Aaron Zagrodnick posted a blog entry in TrailGroove Blog
There’s something almost magical about the backpacking stove – after a long day of hiking to near exhaustion and perhaps through a chilly rain, there’s nothing like getting a hot meal going and eating a steaming meal to warm the soul so to speak. But poetic license aside, when we hit the trail we need a stove that’s lightweight and reliable. Due to varying performance at different ambient temperatures, the best choice will vary by season. While alcohol stoves were all the rage among ultralight backpackers 15-20 years ago, they are slow, the weight they save is debatable, and if a spill were to occur while running it could be a bad situation (not great with a canister stove either, however). They are perhaps best suited for ultralight overnights, or for the backpacker who doesn’t want to throw away or recycle gas canisters – an admirable approach. In a similar fashion, venerable liquid gas stoves like the MSR WhisperLite aren’t slow, but can (will in my experience) be messy, are heavy, and while offering reliable performance when it gets cold, I’ve found inverted canister stoves have been just fine on deep winter trips below 0F. While for the true backpacking chef liquid-fuel stoves are known for their simmering capability, I’m almost always wanting to eat whatever is fastest and easiest at the end of the day. When I do want to get fancy, quesadillas and the like are no problem on an upright canister stove – with the right technique and cookware – and I’ve found many modern upright canister stoves to simmer quite well. Thus, my alcohol and liquid gas stoves now occupy a bin on a shelf in my gear room, and stay there – I use some type of canister stove now for every trip. Best All-Around / 3-Season Backpacking Stoves For all-around 3-season use with temperatures above freezing or a bit below that, we need not create a lengthy list here (the winter stove list will be even shorter!). With performance that seemingly cannot be surpassed, and for over a decade, the Soto WindMaster upright canister stove (2.4 to 3.1 ounces, $70) – find our Soto WindMaster review here – has been our go-to and top choice in this category since it has been released. This stove isn’t perfect. I wish the pot supports were simply integrated into the stove…there are options for an ultralight removable 3 prong support, and offering more stability an option for a 4 prong support. However, even with the slightly heavier 4Flex support the stove weighs just 3 ounces and this support can be left on in a semi-permanent fashion and folds partially for easier packing. I’ve also had the piezo igniter fail once in over a decade of backpacking trips with this stove. Carry a lighter for backup and in your emergency kit. The piezo was replaced and makes the stove easy to use – I prefer an integrated piezo igniter on a stove whenever I can get it. A stove should include a way to light itself. Any cons now explained, the Soto WindMaster offers consistent performance across a wide range of conditions, temperatures, and canister fuel levels due to its micro regulator valve system. To explain as briefly as possible, a regulator on a stove will automatically adjust in regards to pressure of the canister – which changes based on ambient temperature, elevation, and due to the amount of gas left in the canister, to give you more consistent performance. While the Soto micro regulator system oddly seemed to generate much controversy when released, it works. It does add some complexity to the design of the stove (while simplifying use), however using this stove compared to a non-regulated upright canister stove is night and day. Looking for a 3-season upright canister stove for backpacking? You can very much just get the Soto WindMaster with the 4Flex pot support with no looking back. That said following the Soto WindMaster release, MSR released an update to their venerable PocketRocket series – the PocketRocket Deluxe (2.9 ounces, $85). You can read our full PocketRocket Deluxe stove review here. Adding a regulator to their already popular stove series made this stove even better, and to give credit where credit is due, this stove has the best piezo system of any stove I’ve ever used. It’s more integrated, protected, easier to use, and just well designed – one of those things that you just like to use. In our testing we didn’t find the MSR’s valve to have quite the effect when compared to the Soto, and at $85, it’s not cheap. That said, this is a solid stove and the integrated pot supports are just what the doctor ordered. MSR's ignition system on the PocketRocket Deluxe is best in class. If you are looking to save weight but save cash as well however, there are various, very cost-effective (and simple) upright canister stoves available that many backpackers have used with success. However, when it comes to this category and considering what we’re dealing with, I prefer to stick with more of a name brand. For a non-regulated upright canister stove (best for warmer temps, you may want to toss the canister in your sleeping bag to keep it warm along with needing to use other tricks and being patient with slower performance), options like the Toaks Titanium Backpacking Stove (1.6 ounces, $30) and a personal, nostalgic favorite of mine that has stood the test of time – the Snow Peak GigaPower (4.23 ounces, $40) are both worth a look. Various integrated all-in-one stove systems are available, however I do not typically like the tall / narrow cookpots that come with these systems and prefer to mix and match my own gear – see our backpacking cookware guide for more. However, if you’re mostly boiling water, don’t mind the significant upfront weight (although they are fast and efficient), the cookpot included works for your cooking, and you need something as wind-resistant as possible these can be worth a look while knocking a cookpot off your list as well. The MSR WindBurner Personal Stove System (16 ounces, $200) is unique here in that it features a radiant burner with MSR claiming it to be windproof with a capacity good for 2 typical freeze dried meals. There is no igniter on this stove and MSR recommends a lighter or match. Summary: Best Overall & 3-season Backpacking Stoves Soto WindMaster 4Flex Soto WindMaster w/ TriFlex & 4Flex MSR PocketRocket Deluxe Toaks Titanium Backpacking Stove Snow Peak Giga Power 2.0 Auto MSR WindBurner Personal Stove System Best Winter Backpacking Stoves If you were to choose one of the stoves above for most of your 3-season trips, as I have, you’ll need one more stove in the gear stash if you want to go backpacking year round and during the winter seasons. Upright canister stoves are simple, but pressure in the canister decreases as it gets colder. When it’s very cold, and we’ll likely be melting snow for water and running our stove for long durations (cooling the canister even more due to evaporative cooling), another solution is needed no matter how fancy of an upright canister stove you might have. Traditionally, the solution for this was to use a liquid gas stove like the MSR WhisperLite series (15 ounces, $200). These stoves are still a good choice, however they need to be primed and in my experience, gas will inevitably leak or get spilled. There is something special about them when they’re running, but for my needs I’ll turn to an inverted canister solution here. That said, if you can’t decide between liquid gas and a remote inverted canister stove, the WhisperLite Universal has you covered. By having the ability to turn the canister upside down with a remote canister setup, you can now enter a liquid feed mode, relying now on the omnipresent effect of gravity rather than the changing pressures within a canister. Additionally since the canister is remote, you can often use a windscreen (check directions, it's often included). For a remote canister stove and as might be expected, we can turn to MSR here. Their WindPro II remote canister stove – you’ll be around 11 ounces all packed and this stove will cost you about $140 – has served me well with solid performance on those winter trips melting snow for water…below 0F type backpacking trips. For more on this stove, take a look at our WindPro II stove review. This stove is a bit heavy for me for a summer trip, but then again if I could only have one stove this would be it and I reach for it without hesitation when packing for a winter trip. Unfortunately, this stove doesn’t have a built-in ignition system. This can be solved by carrying an add-on piezo igniter. Summary: Best Winter (Cold Weather) Backpacking Stoves MSR WhisperLite Universal MSR WhisperLite International MSR WindPro II Remote Canister Stove Best Backpacking Stoves: In Conclusion If you want to backpack across all seasons and want to buy just one stove, go for a winter-capable stove and just carry the weight in the summer. You’ll be carrying around an extra half pound, however, and these stoves do take up more pack space. My preference is to have a dedicated winter stove and an upright canister stove for warmer and even shoulder season trips – regulated stoves are great for this but their additional performance can only do so much when the weather gets bitter cold. For more on the best fuel to use for all these canister stoves we’ve discussed, check out our article on the best backpacking canister fuel. For more on different types of backpacking stoves, stove theory, and design considerations, see our guide on How to Choose the Best Backpacking Stove. For a full selection of 3-season and winter-ready backpacking stoves of all types, see this page at REI Co-op. -

Backpacking in the Dominguez Canyon Wilderness
Vince Martinez commented on HappyHour's blog entry in TrailGroove Blog
Good afternoon, I plan on a recon trip to Little D to find the best way to ascend/descend the mesa. ONX provides two alternatives to All Trails. What route did you use to Ascent the mesa? The further west up to the mesa? Thanks for your recon. Great stuff. -
Vince Martinez joined the community
-
 rogersimmm joined the community
 -
 userjjb joined the community
 -
 toddwell joined the community
 -
Hi Carl and welcome!
-
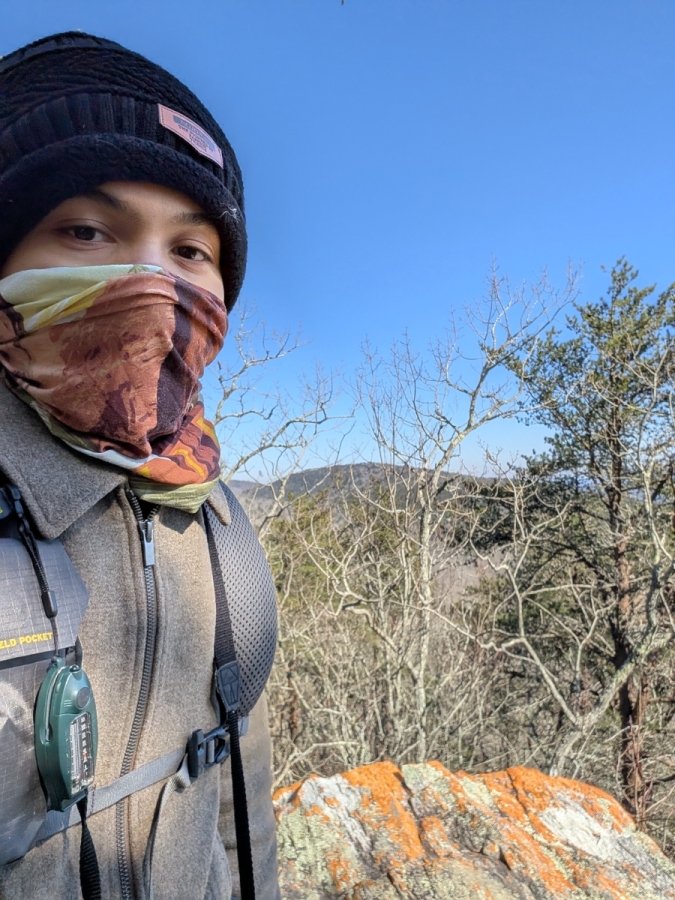
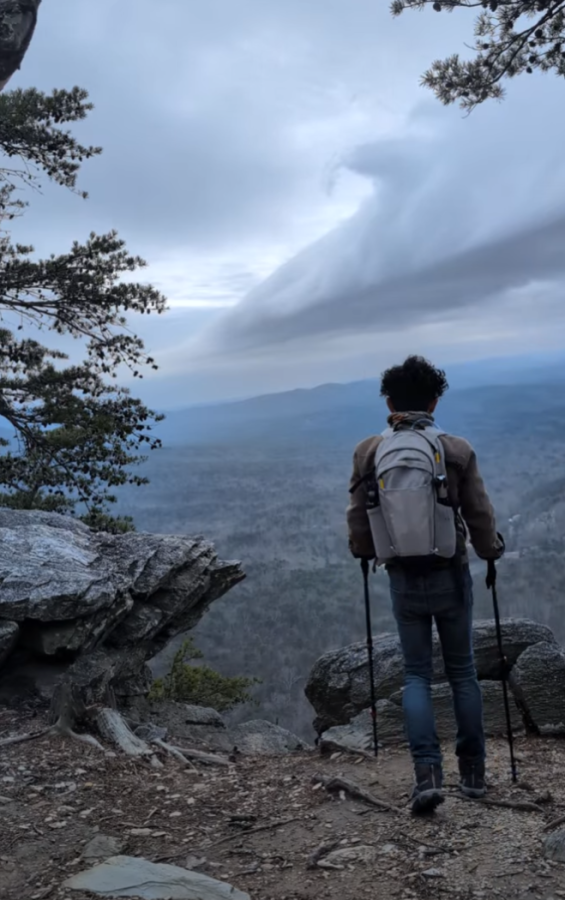
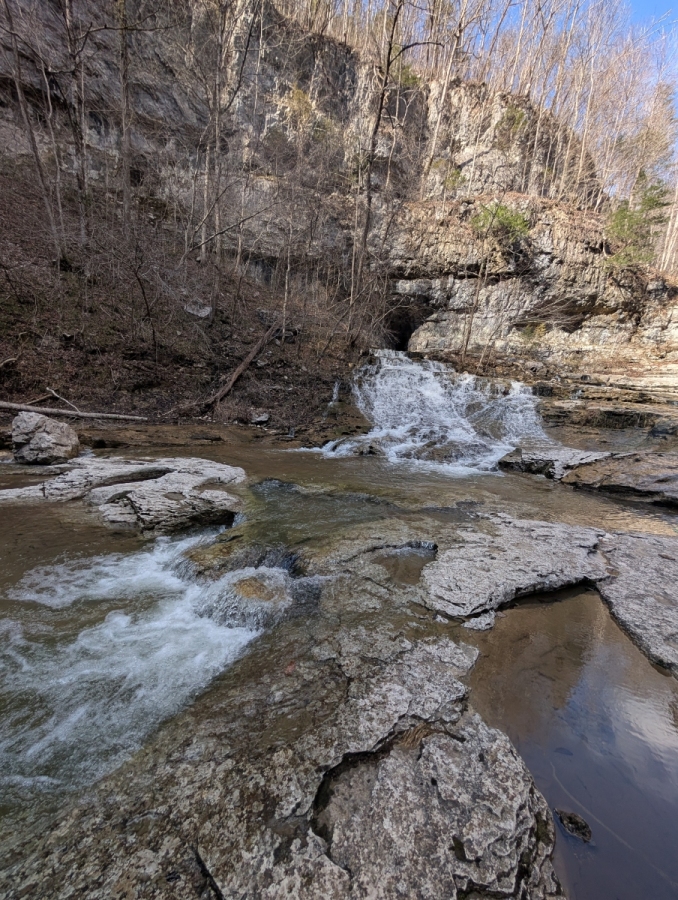
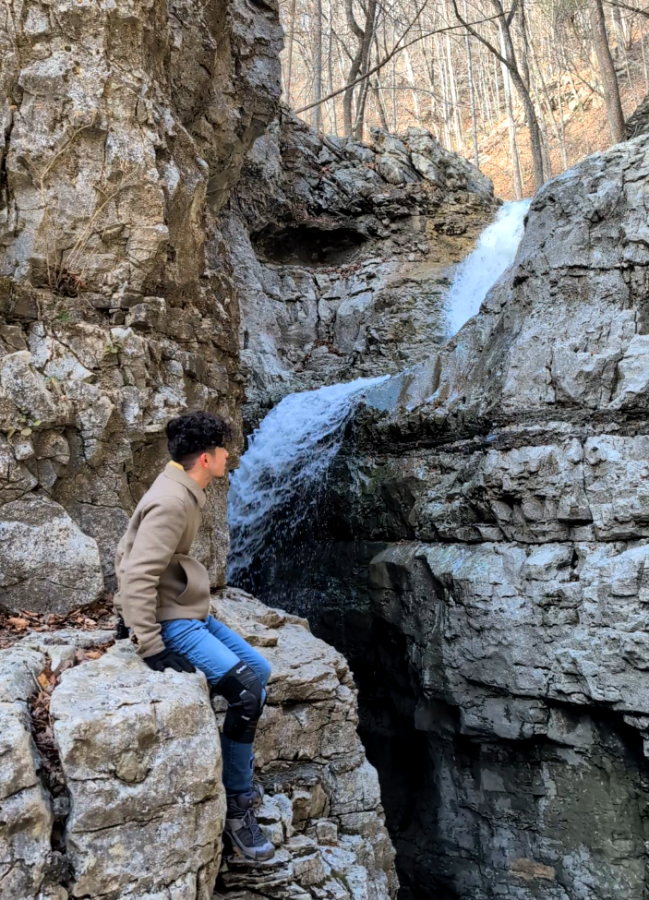
Hello everyone. I’m Carl, currently operating out of the Anniston/Oxford, Alabama area. Before moving here, worked as an engineer in Florida and was relatively outdoorsy being a kayak fisherman and occasionally camped on the spoil islands, also dabbled in rock climbing (boulder and top rope) for a year or two. However, as soon as I went into the Cheaha I instantly fell in love with the hiking! I'm using the Talladega National Forest and the Pinhoti as my local testing grounds to hopefully launch my backpacking career! I am looking to share information and experience in this community and hopefully get some expedition friends to take on some ambitious adventures in the future. Although if anyone is in the Cheaha, Talladega, or even within the 2.5 - 5 hr range into Georgia, Tennesee, and South Carolina, wants to do some weekend adventures let me know! I just know I do prefer hikes with a little bit more bite and gruel to them haha. Recent hikes I've done since start of this year: Cave Trail - Pinhoti Loop (13.5 mi, 2400 ft) Walls of Jericho (8.2 mi, 1,457 ft) A lot of Lake Cheaha loop rucking These are mostly training trips for an Olympic Peninsula (Hoh, Mt. Ellinor, Rialto) May adventure and Glacier National Park 6-day backpacking trip in July. I'm also eyeing Linville Gorge for a Sept/Oct adventure as well. Thanks for having me, looking forward to meeting you all!
- 1 reply
-
- 1
-

-
 TheInsight joined the community
 -
 TrvlJohn joined the community
 -
Backpacking and Hiking Water Treatment Guide
Aaron Zagrodnick posted a blog entry in TrailGroove Blog
On any hiking or backpacking trip, the ability to procure drinking water during the hike is one of the most important logistical considerations for both pre-trip planning as well as while we’re on the trail. Finding the water is of course the first step, and having the necessary gear to properly process the water so it’s suitable to drink is the second part of the equation. Here we’ll look at the main types of water filters and backcountry water treatment methods that are best suited for backpacking and hiking, and elaborate on the necessary reading between the lines that needs to be done when choosing the best backpacking water filters or treatment options for backcountry use. An assortment of various types of backcountry water treatment options Backpacking & Hiking Water Treatment: What We Need to Treat & Filter Microorganisms and Biological Concerns While protozoan concerns such as giardia and cryptosporidium get the most publicity, concerns are best looked at in a categorical fashion. Starting with biological contaminants from smallest to largest, viruses (example: hepatitis, rotavirus, often smaller than .1 micron) are notoriously difficult to filter as they can slip through most common filter’s pore size. Luckily, viruses are mostly a concern where there are many other people – for example where you might find untreated sewage. However, it’s always important to remember the source of the water you’re filtering. Bacteria (example: E.Coli, Salmonella, average size greater than .3 microns) are a more common concern in the wilderness as they are spread by both humans and wildlife, but luckily they are larger than viruses and more easily captured by most common filters. Protozoa are a bit larger and include cryptosporidium and giardia, and a filter that will filter to 1 micron or smaller is recommended for removal. Concerns that are larger still include tapeworm eggs and unsightly, but not necessarily dangerous, critters of various types in your water such as insect larvae. On many occasions I’ve scooped water from crystal clear mountain streams and upon close inspection, have been quite surprised at what that scoop reveals to the eye – from sticks and stones to tadpoles and worms of various types – not to mention what you can’t see. I prefer to get my calories from my food bag while backpacking, and luckily these larger organisms are of course, very easily filtered. Water sources will vary in purity, but various types of backcountry water treatment and filtration methods are available and can be utilized. Each method offers pros and cons, and I often prefer to use methods / technologies in combination depending on the trip. Other Treatment Considerations Many other components can make up the water you’re drinking in the backcountry as well. Chemicals, pesticides and herbicides, heavy metals, tannins, silt, taste and odor, as well as natural particulates of various types will need to be considered. Some of these concerns will only affect smell and taste, others could affect your health. Visible suspended matter is removed by most filters, but tannins and taste / smell can pass through – in my experience even drinking tea colored water however, has been fine. If your water source is downstream of an area that has seen prior or active agricultural or mining use for example, chemicals and other various components introduced by man could be in the water source, especially as you move further downstream in the water supply chain. To reduce these types of contaminants and concerns we can utilize a purifier or filter that contains a carbon stage, or add a carbon element or step to an existing setup to assist in reducing many of these possible impurities. Physical Backpacking & Hiking Water Filters / Purifiers Most water treatment products designed for backcountry use that are reasonably lightweight, will not address all of the above concerns in one fell swoop. Thus, we need to evaluate our backpacking and hiking destinations, as well as our own personal comfort level to find the best compromise. For backpacking in the mountainous wilderness areas of the United States for example, the general consensus is that viruses are usually not of a great concern, and many times our water sources are fairly pure from man-made pollution as we’re getting it close to the source. In these cases bacteria and protozoa are usually the main concerns. Other backcountry trips may find us filtering water on the banks of a river far from the source, that has passed through many towns before we consume it, perhaps on foreign soil, and the full gamut of contaminants are more of a possibility. Water filters do just what they say; they filter the water to a certain micron level to remove bacteria and protozoa. Water purification by definition, including options like the First Need XLE will take this all a step further by also removing viruses, though not all products that are officially listed as purifiers will remove or reduce chemicals, heavy metals, tannins, debris, etc. – your water may be purified by marketing general standards, but it will not necessarily be “pure”. A classic pump filter works well for pulling water out of hard to reach and shallow sources. Popular water filters for backcountry water treatment should filter to an absolute pore size of .3 microns or smaller for adequate removal of bacteria, protozoa, and all things larger. Note the absolute part of the pore size equation, as filters listed with a “nominal” pore size will only on average filter to that level. Absolute is a guarantee, and is the number we’re actually interested in. If you prefer viral protection, you will need an option with a much smaller absolute pore size; as a result flow rate will likely suffer and these types of purifiers are rare. Alternatively some filters combine with other technology to treat the virus part using an iodine or ion exchange process. Backpacking water purifiers that remove viruses physically are rare but can be found in the MSR Guardian pump purifier. Other options combine a normal filter with a cartridge that contains an iodinated resin for added virus protection, while the Grayl purifier uses an ion exchange process to achieve this goal. Physical filtration can be achieved utilizing various types of elements and technologies. The most popular lightweight water filter technology today, hollow fiber filters work by passing water through a multitude of small tubes; tubes that are perforated by many, many, pores so small (rated to the micron) that anything larger than this pore size cannot pass through, trapping any living organisms or non-living matter larger than the pore size. Hollow fiber filters are popular for their light weight and versatility – you can pretty much find one in any filter configuration you prefer – be that as a gravity filter, inline filter, or pump. Hollow Fiber Filtration Hollow fiber filters can usually be backflushed to help restore flow rate, and flow rate will vary depending on pore size, surface area, and use. The most popular hollow fiber filters are in the .1 to .2 micron range making them sufficient for bacteria and protozoa, and this micron level is usually a good balance of protection, sufficient flow rate, and lifespan. Smaller micron, virus-rated filters also exist in this category as seen with the aforementioned MSR Guardian purifier, but flow rate will be slower due to the smaller pore size. Gravity filters, an example shown here using hollow fiber filter technology, use the force of gravity to move water through the filter. Hollow fiber filters cannot be allowed to freeze when wet (the MSR Guardian is an exception) or after they've been used, so on trips where it will freeze at night you’ll need to sleep with the filter in your sleeping bag or carry it in your pocket any time temperatures begin to flirt with freezing during the day – this goes for nearly all other filters using different types of elements as well. In addition to freezing, physical filters also need to be treated with some care in regards to drops and impacts, which could damage the element. Some hollow fiber filters like the Platypus GravityWorks (read our full GravityWorks review here), and the Katadyn BeFree have manufacturer supported integrity tests which are very helpful for a little peace of mind – unlike other gear, you can’t really tell if a filter is working properly or not, without this test. Ceramic Media Other types of physical filter media will use a ceramic element like the MSR EX filter, and the Katadyn Pocket Filter, or utilize a glass fiber element like the venerable Katadyn Hiker Pro. Ceramic filters have the ability to be repeatedly field cleaned. Some filters are entirely self-contained and will need to be thrown away when their flow rate diminishes too much to be of practical use, while others setups will have a replaceable cartridge that fits into a housing. In the Field with Physical Filters No matter what filter technology you end up going with, physical filters are most often utilized in an inline, gravity, squeeze, or pump configuration. The traditional pump water filter requires you to pump the water through the filter element via a hose in the water source, and is a proven setup at both getting you water and providing an ample upper body workout. Pump Filters Pump filters have moving parts and increase the complication and weight, but these are also great for pulling water out of hard to reach places. The other methods will require you to fill some type of reservoir with dirty water first, by either submerging the dirty water container or bag in the water source or, if it’s one of those shallow or small sources you occasionally may need to use a separate vessel to fill the dirty container, like a mug (boil later to sterilize). An inline water filter connected to a hydration setup treats water as you drink. Gravity Filters Gravity setups like the Platypus GravityWorks and the Katadyn Gravity BeFree let gravity do the work for you, by filling a dirty reservoir with water and by elevating, hanging from a tree branch or rock if possible, water passes through the filter element into a clean container. Inline setups such as the MSR Thru-Link splice into the tubing of your hydration reservoir and your own drinking force filters the water with each sip, while with squeeze setups like the Sawyer Squeeze, you can utilize a combination of gravity and squeezing force to move the dirty water through the filter and the filtered water into a clean vessel or drink directly. Water Bottle & Straw Filters Other options integrate the filter into a water bottle (LifeStraw Go Series) or softbottle (BeFree), where much in the same manner as an inline filter with a hydration reservoir, your drinking or a combination of drinking and squeezing is what filters the water as you go. Straw type options like the Lifestraw Peak (view at REI) are also another strategy, treating water by directly inserting one end into a water source and drinking from the other side of the straw. A straw filter is limited in that you cannot process larger volumes of water and each sip takes more work, and straw filters are perhaps best reserved more for emergency usage. Prolonging Filter Life In whatever case, seek out the cleanest water possible to prolong the life of your filter and for the best flow rate. While many filters can be backflushed or cleaned, this is usually a losing battle over time. Although filters are rated by the gallon or liter in regards to their lifespan, and while it’s a great idea to evaluate this when choosing a filter, take this number with a grain of salt. Clean water is important for other treatment methods as well; in very turbid situations it’s a good idea to allow water to settle in a separate container (in for example, a Sea to Summit Bucket), then treat from the top. Luckily, this is more of the exception than the norm for most of us. Backcountry UV Water Treatment Ultraviolet treatment options like those offered by Steripen, come in various forms using either normal or rechargeable batteries, and utilize, as with many municipalities, UV light from a special lamp that’s inserted into your water container to neutralize many microorganisms by disrupting their DNA. This process usually takes about a minute and you’ll most likely be treating a liter of water or so at a time. Some other UV bottles have come (and gone) to / from the market that feature an integrated lamp, and yet others have been designed to float from the surface of your water vessel. UV water treatment uses battery powered ultraviolet light that's inserted in a container to treat many microorganisms. On the plus side, these UV treatment options are quite effective at neutralizing the things that physical filters have the toughest time with – viruses – and the technology is proven. However, many are not comfortable relying on an electronic and potentially fragile instrument for their main or only wilderness water treatment source. Additionally, UV light on its own is not sufficient for neutralizing all living organisms that could be present in your water – tapeworm eggs for example, or larger organisms and larvae that may or may not do any harm but may not necessarily be what you want to ingest, nor will a UV product remove anything from the water or improve its composition. If the water is dirty, you’ll be drinking dirty water. Steripen offers a filter with a 40x40 micron mesh screen that can help here, which is intended to reduce organic matter or particulates. Performance may also be insufficient in murky water, requiring pre-filtration. All said, this is an excellent technology as long as you’re aware of the limitations; I utilize a Steripen Adventurer Opti as a secondary treatment with a hollow fiber filter on any trip where I desire viral treatment. Chemical Water Treatment Chemical treatment usually utilizing chlorine dioxide (Aquamira) or Iodine (Potable Aqua) and on occasion some other chemicals like household bleach or other chemicals that produce chlorine, like Aquatabs can be effective, but like anything this category has its share of pros and cons. In contrast to physical filters and like UV treatment, chemicals are again effective against viruses, but often take longer (hours) to work on such concerns as cryptosporidium (4 hours) and these products will add a taste to your water; other products are not suitable for cryptosporidium whatsoever. Advocates for chemical treatments praise the ease of just adding the treatment right into their water bottles and allowing the treatment to take place as they hike. To be honest, most of my thought goes into making sure my drinking water source is either free of any chemicals or how to reduce or remove them should there be any chance of them being present, so chemical treatment is a bit counter-productive from my point of view, and options like iodine are not an option for pregnant women or those with any type of a thyroid issue. Iodine and chlorine (i.e. bleach) on their own, are not effective against cryptosporidium. However, this method is lightweight and over the years has been popular with ultralight backpackers, though decreasing in recent years with the increased availability of very light hollow fiber filters like the Sawyer Mini. In this category, other devices have seen the market over the years that create a solution with salt to create an oxidant solution that you subsequently dissolve in water; but as with other chemical treatments, with a 4 hour wait time these are not the quickest of options. An example can be found in the discontinued MSR MIOX. These devices seem to come and go from the market. Chemical treatment may also be integrated with some filters to move them into the purifier category. As with boiling, chemical treatment can be a good backup to bring as well or to utilize in conjunction with other methods. Hundreds of miles from the source, I took extra steps in my treatment process at this backcountry location. Boiling Boiling water is an excellent way to neutralize microorganisms that might be present, but it takes a while, requires a lot of fuel, and let’s be honest, on a hot summer day, who wants to drink steaming hot water when we could be drinking that crisp and cold water from a mountain stream? As such, boiling can be tough to utilize as a main water treatment method on most 3 season backpacking trips, but it’s an excellent method to keep in mind as a backup method should your filter or other method fail you. In winter however, melting snow for water may be your best and only option. Be sure to bring a big pot (my Evernew 1.3 works well solo) and a stove that will work well during continued usage in cold conditions like the MSR WindPro II – read our WindPro II review here. Opinions on how long to boil water vary widely; the CDC suggests bringing water to a rolling boil for 1 minute, or for 3 full minutes at altitudes above 6562 feet (be sure to check that 2 on the end of your altimeter!). Data suggests however that pathogens are neutralized at lower temperatures; in the end it depends on heat and time but luckily, both are achieved by bringing your water to a boil and after removal from heat. Carbon Filtration As we’ve seen, the technologies used above are all mainly designed to thwart microorganisms. If improving the taste and smell of your water, or if any agricultural and / or industrial contamination is a concern, look for a system that integrates filtration technology combined with a carbon stage that will improve and / or reduce, but not necessarily eliminate, these concerns. If desired, a carbon element can be integrated into an existing system using a modular approach to filter water further. This will increase the weight of your system, and possibly the cost of replacement elements, etc., but there is of course no free lunch. The Grayl UltraPress and Katadyn Hiker Pro are all examples of filters with integrated carbon filtration – or if you’re like me and have settled on a treatment method that does not address this concern, but you may occasionally head out on a trip where some of these concerns would be nice to cover, you can always splice in an add-on carbon element (I use an add on GravityWorks Carbon Element) for this purpose when needed. My Approach to Backcountry Water Treatment For a complicated issue, there are unfortunately no one size fits all solutions and in the end, when we’re concerned about not carrying extra weight, it all comes down to a compromise and what each one of us is most interested in removing from our water. Luckily there are many lightweight and effective options out there to choose from. For general backpacking we should expect to find an option that will treat what we’re concerned with for around a pound or less. About half a pound is usually doable, and lighter options of just a few ounces are very realistic to target. The best backpacking water filter or water treatment method very much depends on the task at hand. Most of my trips are very well served by standard hollow fiber filtration technology; as with all of us most likely, my preference is to backpack into areas where the water is already fairly good. As such I’m not usually concerned about viruses or pollution, (both a Steripen and carbon filter have a spot in the gear room for such destinations to use in conjunction with a hollow fiber filter), and I like to target the removal of bacteria, protozoa, and the removal of larger critters no matter their parasitical intent or lack thereof. The hollow fiber filter also has that added benefit of giving your water a good scrub; removing particulate matter. I really like a filter that has a manufacturer supported integrity test as well, so it essentially comes down to the cartridge for me. The Platypus GravityWorks cartridge fits all of the above criteria, and it just so happens the whole setup it comes with works well and is pretty darn convenient to use both on the trail as well as in camp. For a complete list of backcountry-ready, tried and tested backpacking water filters and treatment methods that you can sort and filter by all the main points we’ve discussed in this post, check out this page at REI. -
 wocov joined the community
 -
Spring comes slowly to the high country of the Rockies and other mountain ranges in the western United States. As the days get longer and temperatures rise, summer backpacking season seems tantalizingly close. But between the snow melting and the summer wildflowers blooming is a period of time colloquially referred to as "mud season". Depending on elevation and latitude, mud season might last from mid-March to late May, give or take a few weeks. With snow melting and spring rains mixed in, many trails turn to muddy messes or even small-scale streams if the drainage isn't designed properly or the water bars (structures built across the trail to divert water) aren't cleaned out. Tips for Hiking During Mud Season Not only is hiking in these conditions unpleasant, it can also damage the trails. Fortunately, many trails in the Southwest are in excellent condition during late spring and make great destinations. February through May is a great time to plan a trip to national parks, wilderness areas, and other public lands in Arizona, New Mexico, and Utah, for example. If you're not able to get to the Southwest, there are still ways to make the most of mud season. Giving your gear a good cleaning and condition check is always something worth making time for, but can be easier said than done on nice sunny weekends. If travel to other regions is not on the agenda, exploring other outdoor activities, like road bicycling or running, can be great ways to get in shape for when hiking season truly arrives. Different Trails, Different Mud Seasons And by becoming familiar with your local trails you can gain a good intuition and understanding for which ones will be quagmires at certain times of the year and which ones might be passable. Sandy soils or trails with good drainage, or those in the rain shadow of a mountain range, are good places to target. For example, when many of the trails in the mountains are muddy other destinations at lower elevations often offer some good hiking or vice-versa. Each region has its own nuances, and figuring those out is half the fun – it’s all about knowing your region and your opportunities! Mud season trail Hike Early in the Day During Mud Season Other ways to deal with mud season is to hit the trail for dayhikes as early in the morning as possible, as often times during this time of the year overnight temperatures are still in the freezing range (subsequently freezing any muddy trail solid, saving both the trail as well as your gear from mud). By hiking early, you can often get a hike in and be heading out just as things start to warm up and thaw for the day. Mud Season Footwear Waterproof footwear combined with hiking gaiters is also helpful at this time of the year – this will help keep not only water, but the mud out of your shoes or boots. Editor's Note: This Jargon installment originally appeared in Issue 45 of TrailGroove Magazine. You can read the original article here.
-

The High Point of Texas: Hiking Guadalupe Peak
Karen Garmire posted a blog entry in TrailGroove Blog
A spur of the moment side trip landed us in the Guadalupe Mountains National Park with easy access to the tallest point in Texas. Guadalupe Peak looms over the surrounding desert flatlands at a respectable 8,751 feet, accessible only after paying the price of a grueling 8.4 mile round-trip, 3000-foot elevation gain trail. This is truly a spectacular not-to-be-missed hike that comes with bragging rights for ascending the highest peak in Texas. Located in Guadalupe Mountains National Park, Guadalupe Peak offers a challenging hike with expansive, rewarding views. Hiking to the Summit of Guadalupe Peak There is nothing predictable about this trail; we hiked it in early April during unseasonably cool weather and were surprised with a wide range of weather conditions. Our hike started out sunny, with warm temperatures and calm winds that changed to light wind, cooler temperatures and even a few snow flurries as we ascended toward the peak. That being the said, it’s not unusual to start out in sweltering heat and arrive at the top needing some serious cold weather gear. We were lucky to have a break in the wind and clouds when we arrived at the top that allowed us to take time to enjoy the view of Texas and southern New Mexico to the north. This is a shoulder season hike, best hiked during the cooler months of the year. Peak seasons in the park are March through May and September through December when average high temperatures are less than 80 degrees. The trail is well maintained and a reasonable (but constant) grade. The steepest portion is in the first couple of miles. A few sheer drop offs are not for the faint of heart. However, the trail is wide with passing room along virtually the entire trail and the cliff side paths make for impressive photos. Many families make this hike with children. Sturdy hiking shoes or boots will make the mostly rock tread easier on your feet but are not required. We opted to use trekking poles, but most hikers went up fine without them (we like to use trekking poles so we can take in the scenery with less risk of stumbling). As you make your way up from the trailhead at roughly 5750’ to 8751’ elevation at the top you’ll notice the stark changes in your surroundings from the high desert to high elevation pinyon tree forests. The progression offers a fascinating lesson on the adaptability of flora and fauna to these unique ecosystems. We didn’t see too much in the way of wildlife on the hike, except for a few lizards on the rocks and vultures and hawks flying overhead. An earlier start would likely provide a better chance to see some of the local animals (gray fox, skunks, porcupine, mule deer, snakes, etc.). Those that make the trek are rewarded with a 360-degree view for miles on end with mountain peaks rising from the surrounding Chihuahuan Desert. Guadalupe Mountains National Park is home to eight of the highest peaks in Texas including the impressive sheer limestone bluff, El Capitan, not to be confused with the similarly named and equally impressive rock formation in Yosemite National Park. There is no trail to the top of El Capitan, but the best view in the park is from atop Guadalupe Peak. Off in the distance, and barely visible are the 2,000-acre gypsum sand dunes on the west side of the park. The monument on Guadalupe Peak is a quirky pyramid that was put on the peak before it became a National Park and commemorates the transcontinental overland and air mail carriers. If you plan your trip during the spring, you’re likely to see spectacular blooms that may even include the rare Guadalupe Mountain violet! The hike starts out in the high desert and passes through high elevation pine forests. If you have an extra day, and don't mind carrying a backpack and extra water, you could camp overnight at the backcountry campsite one mile from the summit and enjoy star gazing before summiting the next morning and possibly catching sunrise from the peak. Guadalupe Mountains is sometimes described as the least visited national park, but it’s one not to be missed in our book. Need to Know Information The National Park Service advises carrying one gallon of water per day and turning back when half your water is gone. There are no water sources on this trail. No-fee backcountry wilderness permits are available at the visitor’s center up to one day in advance. The campground with five tent sites is one mile below the peak. All toilet paper and solid waste is required to be removed in a commercial toilet bag (Wag-Bag or the Restop 2, etc). One bag per person, per day is required for backpackers and you may be asked to show proof you have the required bags before obtaining your permit. Guadalupe Mountains is in the Mountain time zone although your smart phones and other devices may try to convince you otherwise since the nearest towers transmit from the Central time zone. The sparsely populated area makes Guadalupe an ideal location for dark sky viewing. There is a fee to enter the park, however the wilderness permit is free. Getting There Guadalupe Mountains National Park is located in west Texas about 2 hours east of El Paso. The trailhead parking lot holds only a few cars and fills up quickly even on weekdays. There is additional parking at the visitor center and the well maintained trail to the trailhead adds a bonus mile to your hike. A quick stop at the Pine Springs Visitor Center is highly recommended for the latest forecast and sage advice. If you are planning an overnight excursion you must get a backcountry permit here. Pine Springs Campground is located at the trailhead with 13 RV sites and 20 tent sites. These must be reserved in advance and the campground is often full. Chosa Primitive Camping Area, a much larger campground managed by the BLM is 29 miles to the northeast on the road to Carlsbad Caverns National Park. It is suitable for both tents and RVs. Chosa is a dispersed, dry camping free area with no facilities. Best Time to Go The best time to hike would be spring and fall to avoid possible extreme summer heat. Start early in the day. Maps & Books The park is covered in the National Geographic Trails Illustrated Guadalupe Mountains National Park map. In addition, the Delorme Texas Atlas can help with getting to and from this and other destinations in the state. In regards to guidebooks, see Hiking Carlsbad Caverns & Guadalupe Mountains National Parks as well as Best Easy Day Hikes Carlsbad Caverns and Guadalupe Mountains National Parks. -
 lonzahid74 joined the community
 -

Two Short Hikes in Zion: Canyon Overlook & Many Pools
Steve Ancik posted a blog entry in TrailGroove Blog
Zion National Park is one of my favorite national parks, and for good reason: there are amazing views, beautiful cliffs and streams, abundant photography opportunities, and wonderful hikes. The park has several well-known popular hikes – The Subway, Zion Narrows, and Angel’s Landing for example – but there are some other shorter or lesser known hikes that are also well worth your while. I have made a couple of short visits as part of my mountain biking and hiking trips over the past two years, and these two hikes stand out as favorites. Both are relatively short and have breathtaking views. Looking out from the alcove along the Canyon Overlook Trail in Zion National Park Hiking the Canyon Overlook Trail in Zion A very short hike, by most hiker’s standards, Canyon Overlook Trail is just a half-mile long well-maintained route. It is quite popular, so solitude is not usually part of the experience here. The trail starts off with a climb up rock steps leading past a “bonsai” tree and along a cliff edge high above the Pine Creek Slot Canyon. The trail has handrails in places to protect sightseeing tourists from falling to their doom while gazing at the amazing scenery. The main rock that forms the massive cliffs of the park is of early Jurassic age (about 180 million years old) Navajo sandstone, a formation that was laid down in a vast sand dune field covering much of what we now call the Colorado Plateau. The sand is cross-bedded, showing the layers of the dunes as they shifted and blew across the area. With this thick formation now exposed to wind, water, and freeze-thaw cycles, the rock has been eroded into fantastic shapes, exposing the layers and colors. Along the hike to the canyon overlook there is a section of the trail which passes under an overhanging rock that forms a small cave-like alcove, plus hanging gardens with plants growing on the vertical rock faces and a bridge suspended above the canyon. Arriving at the end, the views open up and you are treated to a view toward the west, where you can see the massive (over 2,000 foot high) orange, pink, and cream-colored cliff walls of the main Zion Canyon. Visible from the overlook are peaks with names such as Bridge Mountain, The West Temple, Towers of the Virgin, Altar of Sacrifice, The Streaked Wall, and The Sentinel. It took my group of four mountain bikers about an hour to complete the hike (on foot) while taking plenty of photos. The Canyon Overlook (left) and Many Pools (right) hikes in Zion offer stunning scenery and relatively easy hiking. Many Pools Hike in Zion Another short, but lesser-known hike on the east side of Zion National Park is along a canyon known unofficially as “Many Pools.” This hike is not along established trails, but instead follows a fairly wide drainage that rises to the north. On my visit, we hiked just under a mile up the canyon and gained about 600 feet of elevation by the upper end. We could have continued further, but we were running out of time for this day. Views from all along this canyon are spectacular in every direction. On the hike, you pass several of the pools or potholes, which are places where the flowing water has eroded the Navajo sandstone and formed low areas where water collects. We saw several of these pools filled with water, and some that were dried up when we were there in May of 2022. There were even a few tadpoles in a couple of the pools. To the sides of the wash, there are interesting hoodoo formations, as well as areas with several different colors of rock and lots of cross-bedding. Hiking is mostly easy, with only a few areas where you will need to bushwhack through low shrubs and trees and a couple steeper places that are easily climbed over or around. This is an excellent hike in east Zion, and took my group less than two hours to finish. It’s an excellent spot that is less busy than many other trails in Zion, and affords you with stellar views of the eastern part of the park. Looking south from the upper part of the canyon (Many Pools). Final Thoughts There are many other hikes in Zion, but these two are fairly easy and show you a good example of the geology and scenery of the eastern part of the park. Utah offers countless hiking opportunities and one can spend many years exploring the various corners of the state. As far as views go, in my opinion, you can’t beat Zion National Park, and the two hikes mentioned here are an excellent introduction to the views and experience the park has to offer. Need to Know Information No permit is required for these hikes. There are certain other hikes in the park which DO require permits. The park has an entry fee of $35 for private vehicles, or you can purchase an annual national park pass for $80. For more hiking and backpacking ideas in Zion, see our TrailFinder Page with links to all of our previous TrailGroove Zion articles and find even more by searching for Zion here. Getting There Parking for the Canyon Overlook Trailhead is just east of the eastern end of Zion-Mount Carmel Tunnel. Parking is limited to two small parking areas and a few roadside spots, but we had to wait only a few minutes (we were there around 8:00 am on May 1st) for a hiker to return from their hike and vacate their parking spot. During busy times of the day, it may be necessary to return several times to get a space. For Many Pools, parking is at a small parking area less than one mile to the east of the eastern tunnel along Zion-Mount Carmel Highway on the eastern side of the park. There is an outhouse at this parking lot. From the parking lot, walk east along the road (be careful as the shoulders are very narrow) for about 500 feet, then cross to the western side of the road. From there, you will descend into the lower end of Many Pools Canyon. The hike continues to the north up the drainage. Best Time to Go For the Canyon Overlook Trail, morning is best for photography, as the view is to the west and the canyon walls will be well-lit during the morning. Sunset may be another good time if clouds are just right, but the canyon will be in shadow then. Any time of day would be good for photography at Many Pools, as the views from Many Pools Canyon are mainly to the south. The hike would be most interesting after there has been sufficient rain to fill the potholes, but it would be a good hike at any time of the year. In summer, try to avoid the hottest part of the day, as it is quite exposed to the sun. Maps and Books The National Geographic Trails Illustrated Zion National Park map is a great general map of the park. Canyon Overlook Trail is shown on the map, but Many Pools is not. Trails Illustrated also offers a Zion Day Hikes map and the Utah Delorme Atlas can be helpful for getting to and from trailheads and exploring the rest of the state. For a guidebook on the area, see Best Easy Day Hikes, Zion and Bryce Canyon National Parks as well as Hiking Zion and Bryce Canyon. -
Backpacking Gear: Down vs. Synthetic Insulation
Aaron Zagrodnick posted a blog entry in TrailGroove Blog
Before you begin to narrow down your choice of a sleeping bag or jacket for backpacking usage, there’s one key decision you must arrive at first: the choice of down vs. synthetic insulation. The source of much debate, both options have mostly pros and a few cons. In this post we’ll detail why you might choose one over the other and detail the performance of down and synthetic insulation across various backpacking situations. Down and synthetic backpacking jackets Down Insulation The lightest and most compressible option, down insulation can either be goose down or duck down. Down insulation is rated by fill power (fp) – which is simply a measurement of how many cubic inches one ounce of down will fill. For non-backpacking usage this is non-consequential and lower rated fill power jackets could be utilized for example to save cash (the jacket will just be heavier), but when you’re carrying everything on your back, this is a key number. Higher fill power gear is more expensive, with top of the line jackets and sleeping bags typically using somewhere around 900fp or so. At these higher fill power levels down will give you the lightest and most compressible insulated gear available, but at the most cost. With down you also need to be careful not to get it wet, but this goes for all your gear no matter what it's made from. However, when down does get completely soaked, it takes forever to dry and retains less warmth than synthetics. This can be mitigated by taking standard precautions to keep your gear dry and I’ve found this to mostly be a nuisance when I wash gear at home. That said, on backpacking trips where you are in constant, unrelenting rain day after day with near 100% humidity, your sleeping bag will not have a chance to dry during the day in your pack – and inevitably will absorb some level of moisture every night especially if there is condensation inside your tent. This can lead to degradation in warmth of the bag – without it being completely soaked – after several days. High fill power down cluster Hoping to remedy the situation, chemically treated down has gained significant market traction in recent years – and treated down seeks to help with any potential doubts here by applying a Durable Water Repellent (DWR) treatment to the down itself. I have found that DWR treated down does not quite have the same type of loft (it’s a bit clumpy) compared to high quality non-treated down. Additionally, the natural oils in down make it naturally water resistant. However, treated down does perform better in tests when it comes to its ability to resist water and may offer some additional peace of mind. Another thing to keep in mind is that (and this goes for down or synthetic) your jacket and / or sleeping bag shell fabric likely already has a DWR treatment and will resist light rain or condensation, for a period of time. Being one of the heaviest things you carry, a down sleeping bag is a great item to target to save weight. Synthetic Insulation Synthetic insulation comes in many forms and in many names, and while some perform better than others performance can still be described in general terms here. Synthetic insulation will be cheaper, but compared to high quality down – it doesn’t pack up as small and will weigh more to provide the same level of warmth. In addition, longevity is a concern and synthetic insulation will not retain its loft over the years with many uses like a well-cared for down sleeping bag or garment will. Synthetic insulated ultralight backpacking jacket Synthetic insulation does retain more heat when it’s wet as it will not completely collapse when soaked through, and it will dry faster than down…although sleeping in a soaked synthetic sleeping bag will still not be all that comfortable. When you take thick synthetic insulation and wrap it in a high denier nylon or polyester shell on both sides it can still take quite a while to totally dry – even days to dry for a sleeping bag or thick jacket (unless you find an opportunity to put it in the sun). However, it does perform better in consistently wet conditions and will often get you on the trail for less cash than top of the line down. Synthetic may be the better choice for those that are not looking to save weight and have plenty of room in their pack, or basecamp type backpacking. If you’re one to wear an insulated jacket while actually hiking during the day (I never do this), synthetic will deal with sweat better, but best to take the jacket off before that happens no matter what insulation choice you go with. You’ll want to take extra care of your synthetic insulation – as while longevity is good and getting better, synthetic gear can only stand so many compression and use cycles before the loft begins to degrade (a well-cared for down bag will last decades or more). A synthetic sleeping bag will cost the most weight difference when compared side by side to a high quality down bag, while with something like a synthetic insulated jacket the difference will be less. Down sleeping bag Down & Synthetic Backpacking Gear: Conclusion As a backpacker in the mountain west, my personal choice is to go all down – and I appreciate the weight that’s saved, the investment over the long-term, and the extra space I get in my pack. I do take extra precautions to keep that gear dry – packing it all in a waterproof dry bag and then inside a highly water-resistant backpack. However, if your pack is more on the sort of waterproof side, a trash compactor bag used as a pack liner is a great way to provide additional protection from water. Trips where it starts to rain, and doesn’t stop for several days, have been the only challenge to this system where the sleeping bag can start to absorb moisture during the night and from tent condensation and has no opportunity to dry – but this doesn’t lead to a complete collapse of the bag. In this situation a 20 degree bag may turn into something more resembling a 30 degree bag until it can dry, and having the ability to toss a hot Nalgene in my Zpacks 20 degree sleeping bag is nice to have. On the trail, I certainly appreciate the lighter weight of down gear and the increased compressibility. Medium weight down parka That said, if I had a synthetic 30 degree bag and a down 30 degree bag and was planning to only pack in a few miles and setup a basecamp for several days, then hike out with a forecast calling for rain the entire time with lows in the 30’s, I’d probably pack in the synthetic. Moving daily on a thru-hike or high mileage backpacking trip? I’d choose down. If you’ll be hiking in an environment where moisture is frequently encountered for long periods of time, one strategy is to go for the down bag and combine that with a synthetic jacket or vice-versa. Down or synthetic, at home make sure to dry out your insulation gear after a trip and store it uncompressed, either hanging or stored very loosely in a breathable, large cotton storage bag and when needed, give it a good wash between seasons. The best choice depends on your own backpacking style and the conditions you’ll encounter, but whether you choose to go all down, all synthetic, or mix and match for the best of both worlds all 3 of these strategies are well-suited and workable when it comes to typical backpacking conditions. And frankly, if the gear itself is good enough – I’m not one to automatically rule something out because it’s not down or not synthetic. In all cases, you want to take every effort to keep your sleeping and insulation gear from getting soaked and take care of it at home after the trip, and by doing so you’ll be on a good track towards both having warm gear in camp and using your insulated gear on countless trips over the years. You can find a full selection of insulated backpacking gear at REI. Down insulated jackets can be found here and you can shop down sleeping bags here. For synthetic you can view their selection of synthetic insulated jackets and synthetic sleeping bags. -

The Crossing: A Hike Across Olympic National Park
Doug Emory posted a blog entry in TrailGroove Blog
Chris, Randy and I sat at a local brewery, a map of Olympic National Park spread across the table. We had climbed in the Olympics for decades, but now we were attempting something different – a thru hike from one side of the park to another. You might have thought planning to cross using established routes would be simple, but it was proving anything but. “Even the freaking rain forest is on fire.” Chris traced a route with his finger. The Pacific Northwest was suffering through one of its hottest summers on record, and our choices were dwindling. Park rangers had nixed the north-south high route, telling us the Elwha Snow Finger – the path leading from the mountains to the central river valley – had disappeared with climate change. Descent would require a rope and rack of climbing gear. As Chris noted, the western exits were threatened by the Paradise Fire, burning for months in the upper canopy of the Queets Rainforest. After a month of planning we decided to come in from the east, up the Dosewallips River Trail, over 5800-foot Hayden Pass, and then out to the north, along the Elwha River. Even this route reflected the consequences of a changing climate and aging park infrastructure. We’d be out for six days and travel 60 miles, but 11 miles of that total would be on what were once access roads. A 310-foot section of the Dosewallips River Road had washed out in a flood in 2002, and cost, competing views of wilderness, and the likelihood the river would continue running higher essentially meant the road – the traditional eastern approach to the park – would never be rebuilt. We would end our trip the same way. On exiting the trail system at Whiskey Bend, we needed to trudge six miles along a road that was frequently blocked by flooding and was crumbling away one chunk of asphalt at a time. Our Hike Across Olympic National Park The trip began, then, with our staggering along the Dosewallips Road. The temperature topped 90 degrees. The steep rise to the abandoned ranger station angled us into the sun’s glare, bleaching the road bed white and burning the outline of my pack along my shoulder blades. Drenched with sweat, we dropped our packs at the base of a towering cedar. I sucked in a breath and looked at what remained of the ranger station and campground. The place felt haunted. The river’s white noise might have blended with voices, as families came to picnic beside the sparkling water. Now plywood covered the windows and doors of the park service buildings. Modesty at the toilet was provided by a shower curtain hung where the door had once been. Waist-high grass swayed, overgrowing the picnic tables, and the informational signs – “Dosewallips Trailhead/Mountain Wilderness” – and a host of others had been blown over, the plastic facings shattered and their bases smothered in weeds. On the trail at last, we fell into a familiar line: Chris leading, Randy next, and me anchoring. Our goal was camp on Deception Creek, 8 miles and 1500 vertical feet away. Our time on the sun-drenched road had wasted us. Even sheltered under the cedars and firs, I couldn’t catch a full breath in the heat. We dropped onto the mossy carpet beside the trail at ever-shortening intervals. At each stop we’d gulp water and then guiltily check our bottles, evaluating whether what remained in them would last till camp. Finally, mercifully, a bear wire appeared, tracing a line from a fir’s branches to the ground. The camp was just below the trail, a big dusty circle with the creek trickling quietly along one side and the river giving a full-throated roar on the other. I dragged myself down the path and walked out beside the river. The Dosewallips cascaded by in blue-white arcs smooth as Chihuly glass. We had 13 miles behind us and 47 left to go. “These long hikes, you get faster each day,” I said over dinner. Randy, ever the cynic, caught Chris’ eye and bobbed his head my way. “Does he ever stop lying?” “Well, the weather is supposed to break soon,” I replied, trying to fight the leaden mood exhaustion brought on. But the next morning supported Randy’s negative world view. The trail climbed the valley, popping out of forest and into meadows of head-high grass and Russian thistles, the plants holding heat like a sauna and disguising chuckholes deep as tiger traps. I remembered the first book I’d ever read about the Olympics – a 1970 edition of the Olympic Mountain Trail Guide by Robert L. Wood – and thought how this day contrasted with his telling. Mt. Fromme, described as “crowned with snow cornices”, now shimmered at the valley’s head, a series of naked cliffs that seemed to float, detached from the earth. Near tree line, Dose Meadows opened before us, acres of grass and lupine burning with light. At Woods’ writing, the meadow had teemed with wildlife, marmots, deer, and bears among throngs of backpackers, but we hadn’t glimpsed an animal, human or otherwise, in a day and a half, the three of us alone on the once-popular trail. A boot path led around a low dirt hill to another gorgeous site on the Dosewallips, the river here placid and shallow. Once the tent was up, Chris and I hastily repacked for our side trip up Lost Peak. We might be thru-hiking, but peaks rose all around us, and the climbing bug couldn’t be easily shaken. “You sure you’re not coming?” I asked. Randy stood beside me with a book under one arm. “Swear to god, man, just two miles up. No farther than that.” But Randy snapped his book open, and the two of us headed up the Lost Pass Trail, so primitive and steep we had to kick our boot edges in to hold the slope. We reminisced along the way. One goal of this trip was to slow life down and refocus. “I feel like the last twelve years went by like a dream, Doug,” Chris said. “Like I lost them. Where’d they go?” Once, we climbed three weekends a month, but we all settled down and had kids, and while their young lives flew by, our trips to the mountains had become rare and manic in turn. Harsh alpine country surrounded us at Lost Pass. We headed toward a rounded dome to the east, kicking over talus and through krumholz. The mountain was parched. Heather snapped as we pushed through, and every broadleaf alpine plant was burned a brittle red. Lost Peak was a rubble pile about 100 feet higher than the dome, and we scrambled the boulders to the top. We looked back the way we’d come. The river’s canyon wound away, slopes darkening with firs until everything vanished in the haze. Randy was still reading when we returned, reclining against a log in the meadows and bathed in sunset light. The scene was blissful, and, next morning, the universe picked that same joyous tune. High clouds rolled in and the heat wave broke. For day three we’d maintain our basecamp, go light to Hayden Pass, and then follow a climber’s trail to Sentinel Peak. The river breathed its last beneath a final bridge, just a sheen of water trickling down rock steps. We hiked through tundra and followed the looping switchbacks to the pass, just a sharp notch in the ridge. A strong trail south wound up Sentinel, crossing talus basins and squeezing through clumps of alpine firs. Views opened on the rock slabs just below the summit – far off, the smoke plume from the Paradise fire and, nearer, clouds building behind Mount Anderson, a tortuous ridge-run away, its twin summits separated by a glacier and a rock pillar thrust skyward like a knife blade. We settled back in camp early. I’d planned on an afternoon nap, but we shoveled down snacks and chattered away, and I couldn’t keep my eyes closed, afraid I’d miss the next story though I’d heard each one a dozen times. That evening, a buck stepped from the shadows across the river, the first animal we’d seen in four days out. Heedless of us, he lowered his head to drink, his neck and shoulder muscles rippling. He picked his way soundlessly through the brush, glowing in front of that dark forest like Zeus come to earth in animal form. The next morning we hiked to the pass again and took the Hayes River Trail down, coasting nine miles to the banks of the Elwha. The views of Mount Anderson’s intimidating glaciers disappeared. We navigated a trail washout, and shortly after that entered a gentler world. Hikers appeared in clusters. The forest rose and moss painted earth and blow downs a delicate green, every image softened as though viewed through a gauze-covered lens. On the porch of the Hayes River Patrol Cabin we took a break before strolling to yet another perfect river camp. Compared to the Dosewallips, the Elwha was mellow, its water clear and the gravel-lined bottom symmetrical as though a pool boy had taken a rake to it. Our final two days of hiking had a dreamlike quality to them after the battering we’d taken at the outset. On day four, the valley broadened as we passed the Elkhorn Guard Station, deciduous trees draped with moss in a scene out of the Mississippi bayou. After one last camp, on the Lillian River above the Elwha, we passed increasing numbers of hikers and reminders of the human history in this valley: the weathered cabin grandiosely named “The Elk Lick Lodge” and the equally-dilapidated Cougar Mike’s Cabin a couple of miles further up the trail. Olympic National Park offers stunning forest hiking interspersed with scenic meadows and mountain views. The End of the Trail Half an hour past Cougar Mike’s came trail’s end at Whiskey Bend. We swung around the road damage and hiked the pavement the final six miles to one last barrier, the gate closing the road to traffic. There we encountered a scene of intentional destruction, all in service of this beautiful country we’d just traversed. I dropped my pack and followed my friends onto an overlook platform. Across the river, a matching platform was filling with tourists exiting a bus, but on our side we stood alone. A century ago, the Glines Canyon Spillway had been erected to dam the Elwha at a cleft between rock walls. Now the dam was gone, removed in 2014 to restore the river and allow a vanished ecosystem to be reborn. In all honesty, it didn’t look like much – the spillway was just two weathered cement walls caked with moss, old metal channels hanging loose above the rushing water. Back in the direction we’d come, manmade Lake Mills had drained. The ground it once covered looked like a construction site, braided channels flowing through a mudflat and patches of scrub. But the point of it, I told myself, was what this scene symbolized. With the park’s roads crumbling, the high country parched and the forest on fire, at least this attempt was being made to return one river valley to its pristine state in a way everyone could enjoy, whether or not they chose to hike the whole darned park to get there. Along the trail in Olympic National Park Need to Know Information As the park service says, “Wilderness Camping permits are required for all overnight stays in Olympic National Park wilderness (backcountry) year-round.” All of the areas on this trip were considered “non-quota”, which makes getting a permit easier, but the process is still fairly complicated and appears to be changing from an in-person or phone in to an online system. Best recommendations are to check out the wilderness sections of the park website, call the park at (360) 565-3130, or stop into a wilderness information center at Hoodsport or Port Angeles. One possible complication is that the Hayden Pass Trail was damaged (fire again) in 2016, and as of 2019 the NPS doesn’t recommend it. If it is not reopened, you might consider taking the primitive Lost Pass Trail north and exiting at Hurricane Ridge. Best Time to Go Obviously, the weather has been warming, but from the end of July through September, weather in the Pacific Northwest remains as close to perfect as you can imagine. While it’s always a necessity to pack rain gear, days are long and nights are temperate. Getting There The Dosewallips River Road leads west off Highway 101, just north of the tiny town of Brinnon, Washington. If you’re coming from the Seattle area, the coolest way to make the trip is via the Edmonds/Kingston ferry (reserve your spot through the Washington State Ferry system), and then take Highway 104 till it ends at Highway 101, at which point you head south toward Brinnon. Maps and Books Olympic Mountain Trail Guide by Robert L. Wood is the book I still use for general park info since the author knew every trail well. The book has been out for decades and was recently updated in 2020. If the idea of bagging a few peaks along the way appeals to you, be aware that the Climber’s Guide to the Olympic Mountains is known to have some interesting route descriptions for obscure peaks. The guide lists both Lost Peak and Mount Fromme as Class 1, trail all the way to the top, excursions. Lost was a thrash that became a light scramble at the summit; Fromme appears to be a Class 2 that begins with a steep unpleasant stomp through krumholz. Most of the other allegedly 1.1 climbs in the Dose Meadows area are probably of a similarly mixed character. The book does give an overview of all of the approach trail systems, so it has its uses. There’s also a newer Falcon Guide, Hiking Olympic National Park by Erik Molvar. For navigation, the waterproof and tearproof National Geographic Trails Illustrated Olympic National Park Map is suggested. -

Be Prepared: Training, Gear, & Backpacking Trip Planning
Susan Dragoo posted a blog entry in TrailGroove Blog
Experience is certainly the best teacher, or at least the most effective, but when it comes to backpacking, it is far better to learn from others’ mistakes than to make them ourselves. Suffering the consequences of poor judgment or inadequate preparation can be uncomfortable at best. In the twenty years I’ve been backpacking and across a wide range of scenarios throughout the country on every type of trail, I’ve made plenty of my own mistakes and learned a great deal about preparation and training for ambitious multi-day hikes. In recent years I’ve taken up hiking in the Grand Canyon, where bail-outs are not as easy as hitchhiking on the nearest county road. As the signs at the canyon say, “Going down is optional, coming up is mandatory.” Don’t overtax the staff at the Park Service with avoidable issues of dehydration or blisters, but rather, be prepared! My excursions into the canyon have helped me fine-tune my approach to training and preparation for backpacking, and I continue to learn from others more expert than myself. Whether deep in the abyss of the Grand Canyon or high atop a peak in the Rockies, there are some fundamentals that should be considered for any backpacking trip. Prepare Your Body: Training & Physical Conditioning for Backpacking Human beings are very adept at self-deception, and one area in which we are most talented is overestimating our physical conditioning, then failing to test ourselves adequately before we attempt some epic undertaking. I’m a strong believer in maintaining a constant level of conditioning that will allow me to “train up” for a backpacking trip within a couple of months. Some may go backpacking so often that they don’t need to “train up” at all but I only do one or two major backpacking trips a year, necessitating a ramp-up each time. There are two aspects to preparing your body: one is conditioning yourself physically to carry a certain load over a certain type of terrain for a certain number of miles. The other is testing your physical and mental toughness and readiness for those certainties before you put yourself out there in a remote wilderness situation. To maintain a high level of fitness, I run two to three times a week, do strength training three times a week, and walk on the days I don’t run. When I am preparing for a backpacking trip, I add the stairclimber to my gym routine and start carrying my backpack with heavier and heavier weights on longer and longer hikes as the date of my trip approaches. Training for steep ascents and descents is the biggest challenge, since I live in the flatlands, but there are multiple ways to address this. In the gym, you can use the stairclimber and do step-ups to help prepare your legs for ascending. Walking backwards on a treadmill at maximum incline and pulling/pushing sleds also help. Of course, if you live in a mountainous area, this may not be a problem for you, but the main thing is to hone your body to become accustomed to the conditions you will experience on your hike, and finishing your training with the assurance that your physical conditioning (and mental toughness!) is up to the task. Neglecting this will make your experience far less enjoyable. It should be noted however, that overdoing it is a possibility. The last thing we want is to have to cancel a planned trip because we injured ourselves by over training for it. Prepare Your Backpacking Gear: Packing List & Considerations I’m often asked, “What is the most important piece of gear for backpacking?” The answer is footwear. It’s no surprise that you need to wear a well broken-in pair of shoes or boots and, like your body, footwear is something you need to test in training. Wear the shoes or boots you plan to hike in while you are getting in shape for the hike. That way you will find out whether your shoes give you blisters or rub hot spots, or have any other issues. Footwear Should you wear hiking boots or trail runners? It’s a personal choice, with trail runners becoming more and more popular, but if you are carrying a heavy pack the ankle support of a hiking boot may be beneficial. I did my first Grand Canyon backpacking trips in Keen hiking boots but used Hoka Speedgoat trail shoes for a rim-to-rim day hike and a rim-to-river-to-rim day hike. Both worked well for the task at hand. For more on footwear, refer to this guide on the TrailGroove Blog. And, good socks are essential. Look for Merino wool and synthetic materials, and stay away from cotton – other materials offer much better performance. Some hikers wear hiking gaiters to keep out rocks and sand, and this isn’t a bad idea. I wore gaiters on my rim-to-rim hike because of what I read about deep sand on one section of the trail but this proved to be a non-issue. Still, gaiters are not a bad idea if you are wearing trail shoes and want to prevent debris from invading your footwear. In some places, snow and ice are a consideration. Microspikes are handy in this case and I used YakTrax on one of my late spring backpacking trips in the Grand Canyon. Backpacks Second only to footwear, a properly fitted backpack is your most important piece of gear. It may be tempting to borrow a pack from a friend but if that friend’s body is not exactly the same as yours it could be a mistake. Go to an outdoor store and get fitted for the right pack. Look for a lightweight pack but think twice before sacrificing comfort. It may seem counterintuitive that a lighter pack would not be more comfortable, but I prefer my 3.5 lb. Osprey to my 1.5lb. Osprey because the hip belt on the heavier pack is more substantial and distributes the weight better. With any pack, test, test, test. These are items that I’ve found are particularly important to have dialed in and may require a few tries to get right prior to a trip (find more backpacking gear articles here). A successful backpacking trip starts with planning and packing at home. General Backpacking Gear List Overview Backpack Tent / Shelter & Accessories Sleeping Bag Sleeping Pad Backpacking Pillow (or stuff sack w/ spare clothes) Trekking poles (optional, suggested) Water Treatment & Water Storage Backpacking Stove, Fuel, & Cooking Gear / Utensils Lightweight Headlamp and Extra Batteries Lighter Small Pocketknife Food, Proper Storage Bear Spray (depending on destination) Toiletries & Hygiene Kit Clothing for the Weather & Extra Clothing / Rain Gear Map & Compass First Aid Kit Whistle Satellite Communicator Permits Additional Resources Some specific links are included above (when not otherwise linked to in this guide) for additional reading, and you can find all of these items here at REI Co-op. You can again find more information and specific articles on just about all of the above categories here on the TrailGroove Blog. It's Backpacking: Keep Your Pack Weight Down No one doing a three or four-day backpacking trip should have to carry more than 30-35 pounds. I’ve heard the rule of thumb as one-quarter of your body weight, and 30 pounds is more than that for me. But if you weighed 200 pounds, there’s still no sense in carrying a 50-pound pack just because you can…unless of course you prefer many heavier creature comforts. In general though, lighter pack weights lead to more successful longer hikes. In training, I gradually increase pack weight on training hikes, using the contents I will actually carry on the hiking trip. I once put a dumbbell and bags of beans and rice in my pack but that did not work out so well. Replicate your planned hiking experience in as many ways as possible. Make a formal gear list and weigh everything using a backpacking scale. Don’t take anything you really don’t need, although it does take experience to determine what “need” truly means. For instance, I do now carry a one-pound chair when I backpack because it’s worth it! When it comes to gearing up, checking out the gear selection at REI Co-op is a great place to start. A Note on Trekking Poles I am frequently astonished that anyone would question the need for trekking poles, especially when carrying a heavy pack. I’ve found that poles are extremely helpful on uneven terrain and they are of critical importance in taking the load off my knees when I am hiking downhill, as well as giving me an advantage when ascending. With poles, I have the added advantage of my upper body strength to help with the movement, almost becoming a four-legged animal. I prefer the collapsible (bungee-cord) kind to the telescoping poles. To me they seem more stable and reduce to suitcase size if you are flying. I have an old pair of Black Diamond poles I have used so much I recently had to replace the wrist straps. Otherwise, they are in good condition. I prefer cork handles as they provide better ventilation for your hands. I usually wear cycling gloves when using poles, however, as this protects my palms from rubbing. See the TrailGroove trekking pole guide for more info. Know the Route: Backpacking Trip Planning Phone apps have become increasingly popular in recent years, but they cannot replace a paper map. Things can happen to your phone and trails can sometimes become obscure. It’s fairly easy to follow trails in a place like the Grand Canyon but not always so in the deep woods. Thankfully, most “official” trails are well blazed, although distractions can lead to following what seems like “the trail” but actually is not. If you get to a point where you can’t see any more blazes, go back to the last blaze you saw and start again. You will often see the next trail marker when you take another look. Before you set out on your adventure, catch up on the latest trail reports for your destination. Closures, detours, etc. can all happen at the last minute. Online resources include, but are not limited to park websites / groups, trip reports, and even an old-fashioned call to the ranger station can be a great way to keep up. Plan in advance if permits are required and make sure you obtain those beforehand or ensure that you can obtain them in person once you arrive. Additionally, familiarize yourself with regulations prior to a trip. Once the plan and itinerary is set (and despite modern satellite communication devices, I still like to make someone else aware of this prior to setting out), one of the last things that is typically done is getting that food packed – the right food, the right amount, and the right way to pack it are all important considerations. You can find more on packing backpacking food here. As a last step, check the weather forecast before you head out so you’ll know what to expect and can plan accordingly. It is obviously ideal to have the gear you’ll need for any weather occurrence no matter the forecast, but if it will be particularly cold for example, swapping in the warmer of two insulating jackets or a pair of warmer socks to sleep in can be considered…and so on for other types of anticipated weather conditions. Getting Ready for a Backpacking Trip: Conclusion There’s so much more to backpacking, but you get the idea. Learn all you can, test yourself and your gear, and prepare carefully. New backpackers will benefit from a trial run with an overnight backpacking trip close to home to test body, gear, tent, sleeping system, cooking setup, et cetera. One can gradually ramp up from there. When you get it all dialed in, it’s a beautiful thing. Have fun out there! Editor's Note: This article originally appeared in Issue 58 of TrailGroove Magazine. You can read the original article here with additional photos. -
Best Backpacking Pots & Camp Cookware Selection Guide
Aaron Zagrodnick posted a blog entry in TrailGroove Blog
Performing a few simple yet vital tasks, our choice of a backpacking pot is one item that the rest of our cooking gear will frequently revolve around, especially if you like to pack your entire cooking kit inside your pot. A backpacking pot serves as a vessel in which we can prepare our backcountry meals and heat or even sanitize water if needed – and despite being such a simple item it is not one easily replaced. In fact, if one were only allowed to take a few items of gear into the backcountry a good pot would be near the top of one’s list. This article will cover basics on backpacking cookware selection while focusing on the main player in this department – the backpacking pot – as we’ve already covered mug selection and backpacking utensils at the aforementioned links. An assortment of titanium backpacking cookware Backpacking Pot Capacity With options out there in nearly every shape and size, the first step in narrowing down our cookware selection process is choosing the right capacity. In this regard we want to go with the smallest backpacking cook pot that will adequately cover our cooking needs, since weight increases with capacity. For solo use, pots or mug / pot combos in the range of 600-900ml are usually ideal for weight conscious backpackers. Sizes on the low end of this range will serve one well when it comes to boiling water for a freeze dried meal or for freezer bag style cooking, but if you like to cook simple meals in your pot, larger options are suggested. In these sizes many options will be of the mug / pot combo variety, like the Toaks 750 or the MLD 850. These choices, while often being on the large side for a mug and on the small side for a pot, can save some weight and keep your camp kitchen simple by having only one vessel, whether it’s needed for morning coffee or meal preparation. In many cases and if you so chose (and get the sizing right), you could potentially even fit a fuel canister inside your mug / pot combo for packing, ending up with a very compact camp kitchen setup. For more involved meals it may pay to go with a larger, dedicated cook pot however along with a smaller dedicated mug. The Toaks 550 cup / mug / pot combo in titanium For groups of 2 or more however it will be time to move to a dedicated mug for each person, but a single pot can still be shared if desired. Here it pays to increase capacity as we’ll be boiling more water at once and having a pot that can handle this capacity will increase efficiency. Generally, unless appetites are limited and you plan to split single meals, moving into the 1000ml / 1liter + capacity range is needed, and it’s nice to have a little buffer to lessen the chance of spilling or boiling over. For 2 person trips the Evernew 1.3 liter pot has been about right for me, not only for basic meal preparation but this 1.25-1.5 liter range works very well for a wider range of cooking needs, from boiling water for 2 freeze dried meals, to cooking up a pasta dish right in the pot, or for comfortably heating water for an entire Nalgene. For larger groups you will simply increase the capacity from here, although you can use your normal 2 person pot with multiple boils for the occasional group trip if needed. This won’t be convenient for meals that are made in your pot, but can work for boiling water to go around for meals that just need hot water. At some point however it may pay to take separate cooking gear for speed, convenience, and for requiring less group coordination – and large pots are difficult to pack. Additionally, larger pots may also be too unstable, or too heavy when filled, to work with your stove of choice – suggested maximum pot sizes can often be found in your stove user manual. Solo or in a group, one situation where you will want to step up in capacity is if you’ll be going winter backpacking and melting snow for water – with low water content in snow it can take a lot of snow melting to get those water bottles filled. The Evernew 900 titanium pot is a good size for 2 people that need to boil water for freeze-dried meals. Backpacking Pots & Camp Cookware Features Once you’ve decided upon the right capacity, there are a few other features to look for in the cookware department. One of the most important is shape. If you’re going solo and choose a pot / mug combo option, your pot will probably end up looking like a large mug. However, when choosing a dedicated pot something shallower and wider is desirable over a skinny and tall form factor and the wider pot will be able to use more heat from your stove and increase your fuel efficiency on the trail. A nice tight fitting lid is essential for further fuel efficiency, as are ways to “handle” your pot. Look for collapsible handles, and if the handles feature an outer insulating material (often for lifting the lid as well) this can be helpful while adding minimal weight. However, ultralight cookware will often omit this feature to save weight, and in this case you can still handle the pot with a pot holder (bandanna, etc.) and / or by always making sure to configure your handles upwind. If you’ll be cooking more complex meals in your pot quite often a non-stick coating can be helpful, but may have health considerations or concerns for some, will add weight, and can scratch if the proper utensils or cleaning methods are not used. The ability to perform cooking tasks such as dry baking would also be limited. Additional features to look for include measurement marks stamped right on the pot to make meal preparation easier, and a built in pour spout is a nice to have for spill reduction when you’ll be transferring hot water to another vessel. This could be the case when heating up water for a Nalgene bottle to make a shoulder season heater for example. A pour spout can make all the difference when adding water to freeze dried or freezer bag meals. Cookware Materials While exceptions exist, most of the time for backpacking purposes we’ll be deciding between two materials – aluminum and titanium. Titanium will be the most expensive option, but is very light and strong, allowing pots constructed of this material to be of a very thin gauge. And while debatable, if aluminum cookware poses a health concern / consideration to you, titanium would be the way to go. For actual cooking, with its thin gauge construction and tendency to develop hotspots, titanium can be challenging, but not impossible to use if you’ll be performing more complex trail cooking tasks in the pot like trying to bake a trail pizza, simmering, or when cooking less watery meals where burning is more likely to occur than with aluminum pots. Stainless steel pots can be found (such as the MSR Alpine series), however a stainless steel pot will be most ideal in a base camp or car camping type scenario due to weight considerations. An aluminum pot, such as the Sea to Summit Frontier series, will conduct heat across the pot surface more evenly and distribute the heat better, while still being pretty light, and cheaper. In the end the best material to choose comes down to budget and personal preference / style. If you're car camping you might as well just take the traditional heavy stainless steel cook set or the cast iron cookware from the kitchen cabinet, but for backpacking purposes it's best to stick with lightweight aluminum or titanium pots. Backpacking Cookware: Optional Items Once you’ve settled on a pot, a mug (or pot that can also be used in this regard), and your utensil of choice about the only thing left to consider might be a plate or bowl of some type. If you’re making freeze dried meals no plate will be needed as you’ll be eating right out of the bag, and if you’re solo eating out of the pot or eating freezer bag style will certainly save you the weight and extra cleanup of bringing a dedicated solution here. Lids of larger pots can be used, and mugs can perform double duty, but if a dedicated plate or bowl is still needed various solutions like the popular Fozzils Bowls are worth a look, and other options include this Snow Peak titanium option. This category is a bit of a luxury however, so it pays to go as light as you can or accomplish this task with your other cookware if possible and if weight is a concern. For the solo backpacker, pot / mug combos can work well. Conclusion Whether you end up with an ultralight titanium mug / pot combo for the lightest trail weight or the slightly heavier anodized aluminum pot sure to be great the next time you need to sauté a side dish in camp, much like a good down sleeping bag outdoor cookware is one area where it does makes sense to invest. Of all the things I pack on backpacking trips and while a lot of gear changes over time, I still often pack the same titanium pot and mug that I’ve been using for over a decade. For a list of backpacking cookware that you can sort and filter by many of the options we’ve discussed above, take a look at this page at REI. -
Best Backpacking Utensils and Trail Cutlery Strategy
Aaron Zagrodnick posted a blog entry in TrailGroove Blog
Although your local or online retailer likely carries an array of backpacking and camping utensils sure to satisfy even the most advanced culinary ideas, most of us that don't work as a chef for a living can attain backcountry mealtime prowess with the simplest of choices and without cluttering or weighing down our pack. Here are my thoughts on the main players in this department and what I've found has worked best over the years. A selection of backpacking utensils The Backpacking Spoon Perhaps utilized mostly for liquids at home, a backpacking spoon serves most mealtime purposes well on ultralight backpacking trips where most meals are made all-in-one style in the pot, freezer bag, or as freeze dried meals, and while those meals might not be soup the consistency is almost always easily scooped and eaten with a spoon. The backpacking spoon is also great if stored inside your food bag in that you're guaranteed that it won't ruin your Opsak if you're using one like me. The long-handled spoon is perhaps, the most versatile backcountry utensil you can choose. The Fork While a staple off the trail, very rarely have I found myself longing for a fork when it comes to camp cutlery on the trail. Only on those few times I've cooked something more extravagant like steak the first night out has a fork been desirable, but steak on the trail or something similar is a rare, special occasion event indeed. In fact, while I have taken the lightest fork in the kitchen drawer backpacking a couple times, I’ve never purchased a dedicated backpacking fork, and hence no photo here. However, Vargo makes a very nice titanium fork and spoon set that is worth a look if you desire a more complete backcountry cutlery set. The Spork If you really can't decide between a fork and a spoon and don't want to carry both, one of the many sporks on the market can be an obvious choice. However, the spork’s short tines make it less than ideal as a fork and the same tines make for tough going in soup mode. I've used several throughout the years from offerings like the Toaks spork to a nylon spork (and spatula / knife combo) from Guyot Designs, but no matter which you choose the spork is a jack of all trades...while specializing in none. Combo spoon and fork options are also available that look to seek the best of both worlds in a single implement. If you do decide to go with a spork, I'd suggest going with something like the long handled Snow Peak spork (view at REI) to make eating out of freeze dried meals easier. A backpacking spork offers a jack of all trades, master of none solution. The Knife You're most likely already carrying this, and thus no extra knife is needed for hiking purposes. A multifunction Swiss Army knife (I carry the Victorinox Evolution 17 which offers a nice blend of trail features without going overboard) does the job for tough to open packaging and for slicing up such backpacking treats as cheese and summer sausage...and these types of knives will usually even have a can opener if you ever end up taking some old school backpacking food like we did back in the day. Specialty Utensils Many other specialty utensils fill those outfitter shelves in nearly every form, color, and material from spatulas to foons to whisks and more (I am still waiting on an ultralight titanium potato masher myself), but these are very rarely needed for the average backpacker and work-arounds are easy enough with standard choices making your pack that much lighter. If you're headed out on a car camping or base camp excursion with a more elaborate camp cooking itinerary, by all means take multiple utensils as well as a bamboo cutting board and the kitchen sink, but for backpacking purposes where your camping gear needs to be light, simple is usually best. No matter what utensil you prefer, look for something that won't weigh you down, won't complicate meal time, and is durable. My Approach In the end, after having tested camping utensils of every kind you can imagine over the years, I've found a spoon in the material of your choice – titanium, aluminum, and plastic are the most popular, to be best for backpacking purposes. You should be able to target something in the under 1 ounce weight range here. I always go for titanium when it comes to backpacking cookware for its light weight, inertness, ability to sanitize over flame, as well as longevity and strength – titanium utensils offer almost the same light weight of plastic utensils, but add welcomed durability (utensils made from aluminum are not far behind). Other options like the GSI Essential spoon (view at REI) fall somewhere in between plastic and metal utensils with a nylon-silicone construction. A spoon combined with a small knife of the Swiss Army variety (or whatever knife you are carrying) will make a very versatile combo that keeps you prepared for nearly any backpacking meal. Of spoon varieties (or even if you go for a fork or spork), long handled varieties are my favorite as they allow for getting to the bottom of freeze dried meals or freezer bags easily without getting food on your hands. Long handled varieties probably won't pack inside your cook pot though, but I just stash mine inside an Ursack and inside a Ziploc bag. I don't like folding varieties here – more nooks and crannies for food to accumulate and thwart cleaning efforts. The best long handled spoon I've used is the no longer produced Ti-ware polished titanium spoon from REI, but Toaks makes a nice current day alternative with just a polished bowl – the polishing is both easier to clean and more friendly on your teeth than the rough surface of non-polished offerings. A comparison of titanium spoons with polished and unpolished bowls. Titanium offers a slight upgrade compared to aluminum utensils. And since I've lost the old REI offering somewhere along the way, I now use the Toaks long handled titanium spoon – a ~$10 investment here at Amazon or over at REI, that will last forever, along with my trusty Swiss Army knife on every trip. Thus and in conclusion, any small knife combined with a long handled spoon in your material of choice will leave you very well prepared for just about any backpacking meal. You can view an extensive list of backpacking and camping utensils which you can sort and filter by many of the points we've discussed above here at REI.com. -
How to Choose the Best Backpacking and Hiking Headlamp
Aaron Zagrodnick posted a blog entry in TrailGroove Blog
A good light for backpacking and hiking is a required and essential safety item and a category for which there are no shortage of options available – and considering the convenience and hands-free operation provided, headlamps are the most popular option for your backcountry lighting needs. What follows is an overview of features to consider when selecting a headlamp for the outdoors and thoughts on lighting needs for the trail. A headlamp for backpacking and hiking should be lightweight, easy to use, and have a reasonable combination of run time and brightness. The Backpacking / Hiking Headlamp With headlamps offered in a variety of weight classes and with light output ranging from barely capable of illuminating a camp for basic tasks, to headlamps that could be bright enough to double as an airplane landing light, some form of balance must be sought in this regard. For hiking and backpacking we need a headlamp that checks a few boxes – a headlamp should be lightweight, bright enough for both trail and camp, have acceptable battery life, be easy to use at 3AM in the morning, and be durable and waterproof. While these are the basics, other features can undoubtedly be nice to have. With USB connections and power outlets tough to come by in the wilderness, some way to lockout the light to prevent the light accidentally turning on inside your pack during the day and draining the battery is a great feature to have. Locking out the light, if equipped, can be performed through a manual switch or power button sequence, or – as is the case with the Zebralight H53w that I use, simply by unscrewing the battery compartment cap slightly. Whatever method here, you’ll be assured that you have light at the end of the day and peace of mind on the trail, but this is also something that needs to be easy to do – nobody wants to have to fully remove and insert batteries daily. With LED headlamps dominating the market, these days it’s pretty easy to find headlamps that are both bright and light(weight). Usually something in the 3-5 ounce range – with batteries – is a good range to target. Lighter options do exist (example the Petzl e+LITE) but usually sacrifices will need to be made in regard to light output, battery life, comfort, or all 3. Heavier than this range and we are generally looking at headlamps that might be better suited for other activities and will begin to take up more pack space. Look for a headlamp that is comfortable and waterproof as well – I at times wear my headlamp from dusk to dawn – a wide and adjustable headband helps here and this is another area where lightweight lights have the benefit of less bounce and just less to wear. For water resistance, some headlamps can oddly be lacking so it’s good to check the spec sheet here, and the more waterproof the better – some headlamps may only be splash resistant. Others have a waterproof main housing, but the battery compartment could still get wet in the rain and will have to be dried out later if this happens. In the power department you have a few choices and many headlamps are available that can utilize standard batteries or rechargeable batteries, have a built-in rechargeable battery, or can use both in some cases. If you’ll be taking frequent trips throughout the year, I’ve found rechargeable headlamps to be ideal. When using disposable batteries in the past (Energizer lithium batteries are high performers), I’ve inevitably ended up, after a few trips, with a collection of batteries in unknown states of partial charge. When using rechargeable batteries or rechargeable headlamps, all one has to do is charge things up before a trip and you can start your trip on a full charge every time, and without having to take along too many spares. Photo: Mark Wetherington However both a disposable or rechargeable approach can obviously work. Keep in mind that many headlamps with built-in rechargeable batteries will lose capacity over time. With my headlamp of choice using a single AA battery, I go with Sanyo Eneloop batteries that are both replaceable and rechargeable and spares are easy to bring along. This is especially helpful during shoulder season and winter trips when daylight is limited and I find myself using my light much more. Either way, output of the light will be, depending on the light itself, regulated or unregulated. A regulated light will maintain a more consistent output of light over the life of the battery at the cost of overall time. Unregulated lights will gradually diminish the light output as the battery discharges, but will frequently have extremely impressive run time specs (at least on paper), but many of these hours will be at a quite dim light output. Lumens and Light Temperature for Hiking & Backpacking But how bright of a headlamp do we need? It all comes with tradeoffs, and more light means less battery life. A light with a wide range of adjustment, and that you can easily and intuitively adjust is ideal in this regard. For basic hiking on a trail at night, I’ve found about 50 lumens or more to be a good target number. You won’t be able to see far, but you will be able to see your feet, the trail, and a bit of the trail ahead. Around camp, lower light levels are called for and perhaps 25 lumens will do for performing some camp chores in darkness. Once in the tent, a light output of just about as low as possible can be very nice to have for not blowing out your night vision and when you only need to find things very close at hand. This level of light can be obtained in a couple ways. One strategy is for a lower output, secondary red light to be designed into the headlamp, the red light being especially helpful for preserving night vision. The other method is to simply have an extremely low mode and level of light built into the regular LED in the order of just a few lumens. I’ve found both approaches to work about equally as well. For off trail, searching for a blaze in the distance, or any time you need to see as far as possible high modes are needed – over 150 lumens. Some lights on the market today can output many times more than even this figure. For a backpacking light however, where battery sizes are smaller and we’re looking to go as light as possible, these modes will quickly drain batteries and are best used only for short periods of time as needed, with lower modes preferred for all around use. For checking the map in the tent at night, low levels of light are called for. On longer trips, more battery life is always better and can vary greatly by season. While in the summer I can make a single battery in an AA headlamp last for a weeklong trip, I might be going through an entire battery in a couple nights in late November. Taking along a spare battery, or a way to recharge a rechargeable headlamp with a built-in battery (battery pack or solar charger) in the field is one way to know you’ll always have battery power and if you have a headlamp with a battery level indicator like the Black Diamond Spot, all that much better. Light color is another factor to consider. Possible red LED aside, headlamps on the market today are made of mostly cool white LEDs that are brighter on the spec sheet, but may be a little cold and on the blue side for some. Other warmer LED headlamps are also out there that provide light more like an incandescent light bulb and render colors more naturally. Some brightness will normally be sacrificed however. Other LEDs emit a light in the neutral category; somewhere in between. It all comes down to personal preference in this regard. Beam pattern of the main LED is also something that should be evaluated. Beam types are most often full flood, or a combination hot spot (a brighter, longer distance center spot) combined with a dimmer flood pattern (spill) around the hot spot. Full flood lights can serve one around camp well and illuminate wider areas with brighter light, but less far. Hotspot / spill lights do sacrifice some close-in illumination coverage but will help in finding that next blaze at a distance. Other lights, like the Princeton Tec Axis, have an adjustable beam pattern and some lights may use multiple selectable LEDs to achieve this effect. Center hotspot and spill example Lanterns and Flashlights Other lighting can be nice to have for camp if you don’t mind packing the extra weight, and on some more relaxed trips I have been known to bring along a Snow Peak Hozuki mini lantern for the tent at night – especially nice for a little reading on long winter nights. Any spare light you bring along is not always frivolous and can improve the camp experience a bit while serving as a backup light source as well. Flashlights can be useful on the trail – automatically by being held lower to the ground more shadows are created that can help when navigating bumpy trails. However, a headlamp can also be held and used like this or attached to one’s waist for the same effect. Final Thoughts on Backpacking & Hiking Headlamps Overall, the best backpacking and hiking headlamp might be the one you think about the least on the trail and a myriad of options are available – finding the perfect solution in this category is often a result of a series of compromises and finding the best balance in regard to your own lighting preferences. For a list of outdoor-ready headlamps that you can sort and filter by many of the considerations and features discussed above, check out this page at REI. -
Best Backpacking Sleeping Pads by Season & Category
Aaron Zagrodnick commented on Aaron Zagrodnick's blog entry in TrailGroove Blog
Had one of the self-inflating pads in the 80s with the knurled metal valve. Very high tech at the time, was taking a RidgeRest on most trips. Agreed many great options available today. Once the original NeoAir came out it really seemed to start a new wave of better sleeping pads. The Helix sounds like a good value! -

Best Backpacking Sleeping Pads by Season & Category
Colby Phillips commented on Aaron Zagrodnick's blog entry in TrailGroove Blog
So many great choices for sleeping pads today. I remember in the 80s it was basically the blue foam pad until the original Thermarest inflatible came out. That was an amazing upgrade at the time. I’ve had an REI Helix (4.9 R-value, 3” thickness) for the last couple of years that’s worked well. Can usually find it on sale throughout the year for less than $100. -
Yes! There are several entry points into the Pecos Wilderness near Santa Fe, the closest being from the ski area just outside of town, so I do a lot of hiking there. It’s a great area for day hikes as well as multi-day backpacking trips and peak bagging. I’ve also hiked sections of the CDT between central and northern New Mexico. Lots of good choices for sure.
-
Welcome and that’s great to hear! I’ve been to northern New Mexico a few times although more fishing than hiking. Have you been able to explore the Pecos at all? Always looked intriguing to me.
-
Hi all, I just found TrailGroove online and it’s exactly the type of magazine/website I’ve been looking for. I live in Santa Fe, NM and do a ton of hiking and exploring, and after a two decade hiatus I’m getting back into backpacking. I’ve enjoyed reading through the last few issues of the magazine and look forward to more. Thanks!
-
How to Choose the Best Backpacking Tent Stakes
Aaron Zagrodnick posted a blog entry in TrailGroove Blog
If you’re not thinking about your tent stakes on your next backpacking trip, it’s probably a good sign that you’ve chosen the right ones. If your stakes aren’t a good match for the ground and conditions at hand however, you could be in for a difficult shelter setup process and perhaps even for a long night. With a myriad of lightweight tent stakes on the market to choose from, there’s likely a specific tent stake for every condition you’ll encounter, as well as others that will perform well across a variety of conditions without specializing in any particular one. The best backpacking tent stake may not be the same for every trip, and is one that meets our own individual approach in regards to durability, ease of use, effectiveness, weight, and price. From left to right: Sheperd's hook, MSR Carbon Core, MSR Groundhog, and 2 examples of aluminum tubular stakes. Backpacking Tent Stake Materials Tent stakes can be made from a variety of materials from high grade aluminum like the popular MSR Groundhog stakes, to titanium, plastic, and carbon fiber…or a combination of these materials as you can find in the MSR Carbon Core offering. For backpacking purposes, tent stakes are a bit of a conundrum; they need to be both lightweight, and very strong. Heavier weight titanium and aluminum offerings will generally be the most durable and are the best choice if you’ll be setting up camp in heavily used compacted tent sites, where you might have to coax the stake into the ground by hammering them in. On the flipside, you’ll need to handle ultralight tent stakes of the carbon fiber variety for instance, with a little more care. Most of us end up with something of a compromise between the two extremes, like a tubular aluminum design that has been found in the (now antiquated) Easton Nano, or an aluminum Y-type tent stake. Stakes made of stiffer more brittle material can fail by breaking, sometimes in rather spectacular fashion by becoming a flying projectile along with a resounding ping sound, while other stakes will bend instead of, or prior to breaking. Tent stake design varies widely, and the best tent stake will vary depending on the conditions at hand. Backpacking Tent Stake Design Other than specialized options like snow and sand stakes, design of the stake is mostly related to how well it will hold in the ground vs. ease of use. Popular varieties include the aforementioned MSR Groundhog Y-shaped stakes, needle style stakes, V-shaped stakes, and tubular stakes. Y stakes and V-stakes offer very good holding power and are usually quite strong, but with their sharp edges they can be difficult or painful to use on the hands. Additionally, while these are some of the strongest stakes out there, when they do fail, the failures I’ve observed have been breakages. This is offset a bit by the one piece design however – there’s nothing to come apart. Tubular stakes like the Easton Nano that still remains heavily used have a two piece design, where the top is glued / epoxied onto the aluminum tube, and these stakes will bend in my experience, prior to breaking when too much force is used on hard ground. However, being a two piece design, they can also come apart (but at the right angle can still be used for the rest of a trip). Like many things, they will often fail in this manner right away or last quite a while, so it’s not a bad idea to test at home first. With all stakes, but with these two piece types of stakes especially, it pays to first move the stake side to side to loosen before removal from difficult ground. Ultralight shepherd’s hook stakes don’t offer as much holding power as the varieties we’ve covered so far, and can spin in place if you’re unable to get them all the way in, but they are often quite sufficient and are my favorite stakes for frozen ground, where the thin, needle like profile allows for easy insertion and removal, and in frozen ground any stake you can get into the ground will hold very well. Nail stakes would be another option here, and can also be used to first create a pilot hole for a larger stake like an Easton or Groundhog. It’s a bit of a double edged sword in this regard: thin stakes can’t be hammered into harder ground without bending, but the thin profile may keep you from having to do so. Ultralight titanium shepherd's hook stakes weigh in the ~.2 ounce range No matter the design of the stake you choose to go with, longer stakes will always offer more holding ability while of course being a bit heavier. The standard stake length is usually around 6 inches, and generally this is a good choice and balance of weight to holding power for most situations. Going with a longer stake like the 10” Dirt Dagger stakes for soft ground, or in areas of heavy forest duff in order to get into the better soil underneath can be helpful on some trips or for larger tents and shelters that place a lot of tension on the guylines. Other Considerations One at times overlooked aspect of a tent stake is color. From experience, I can tell you that going with a neutral colored, earth-toned tent stake will quickly lead to you having to buy more tent stakes in short order. Bright colors are the way to go here, or if needed you can attach a loop of brightly colored, or even reflective cord to an existing stake. Additionally, a great trick for those grey titanium shepherd’s hook stakes is to mold a section of heat shrink tubing in the color of your choice to the hook of the stake, although many now come partially painted for visibility. Weight wise, no matter the stake you decide to go with or whatever design you prefer, for backpacking use we still need to keep it light. In almost all circumstances we can find a lightweight tent stake that will meet our needs and still weigh under an ounce each, with many options being right around the half ounce mark…and some lower like the MSR Carbon Core stakes or many titanium shepherd’s hook stakes. Even on the heavier end of these weights, it’s possible to pick up a full set of decent stakes that will hold your tent down, without weighing you down on the trail. Clockwise starting at 2 o'clock, a comparison of ultralight titanium shepherd's hook, Easton Nano, MSR Carbon Core, and MSR Groundhog stakes My Approach Over the years, I’ve found that there is no one tent stake to rule them all. As such, over time I’ve accumulated a small collection of stakes, and will mix it up based on the type of trip, the type of shelter I’ll be using, and the weather. Frequently, I may even mix and match different stakes for a single trip as well. For 3-season backpacking use my go to tent stake has been the MSR Carbon Core for the past several years (find our full review here). Despite its two piece design (and price), this is a great option if you like the weight of ultralight titanium shepherd’s hook stakes, but would like a better hold in less than ideal ground conditions. These ultralight stakes, at .2 ounces per stake, can weigh under 2 ounces for a set, and offer good holding power for most ground, sufficient durability with a little thought, and as a bonus the whole design and top is easy on the hands. Since these stakes are expensive however, I will often mix in some titanium shepherd’s hook stakes for a shelter that needs a lot of stakes or for those additional tie-outs, and during winter or cold conditions when I know frozen ground will be encountered, I will go a full set of shepherd’s hook stakes which are much easier to use in frozen ground with their thin profile. If I know I’ll be encountering very soft ground, or if I’ll be using a shelter that puts a lot of tension on guylines like the Tarptent Hogback, I will then go with larger and heavier stakes I have on hand all around, or will use them on select guylines where the most tension will be seen, combined with lighter stakes in other areas. In conditions where you need it, a longer stake is the way to go. I do not use any snow stakes – in these situations I will use a freestanding tent, and when needed, use snow anchors made from snowshoes or trekking poles instead. Choosing the best backpacking tent stake is a compromise between weight, durability, and holding power. Final Thoughts on Backpacking Tent Stakes In the end, every tent stake has its own share of pros and cons, and so many different options exist precisely for this reason. In this regard – while I’m always trying to simplify and pare down my overall collection of gear to keep things simple and keep only what I really need, different tent stakes are one category where it’s always nice to have a variety of choices on hand, so that you’re able to mix and match for a customized best approach on different trips or even on the same backpacking trip when desired. For a nice list and wide variety of currently available tent and shelter stakes to choose from, take a look here at REI.com. -
Olympic National Park: Backpacking the Quiet Corner
Mark Wetherington posted a blog entry in TrailGroove Blog
From beaches to rainforests to glaciers, Olympic National Park provides hikers with access to a stunning variety of landscapes. Although I’ve barely scratched the surface of what there is to do in the park’s 922,650 acres, I have had the privilege of soaking in its hot springs, swimming in its alpine lakes, and walking among the giant trees in its rainforest. The extensive trail network of Olympic National Park allows for memorable backpacking trips of all lengths, from overnight outings to weeklong journeys. The mix of topography, elevation, and cultural history allow for an incredible diversity of experiences. With certain national parks, you can get an adequate sampling of the landscape from a single backpacking trip, but Olympic National Park is a piece of public land requiring multiple visits just to get oriented to its grandeur. And once you’re oriented, you’ll certainly find yourself wanting to come back for more. Backpacking in Olympic National Park reveals scenic lakes, mountain views, and quiet forest hiking. The Northeastern Corner of Olympic National Park For backpackers looking to plan an enjoyable multi-day trip that samples some of the best of the park’s interior mountain scenery – while avoiding crowds and often some of the more rainy and unpredictable weather closer to the Pacific – the northeastern corner of the park is hard to beat. Beginning a trip at Deer Park Campground, which has some delightful views to the high country and a handful of quaint shelters that you can camp in if you don’t mind the high likelihood of rodent companions, is a great choice with longer loop options leaving from this campground that cross over high mountain passes, visit beautiful mountain lakes and tarns, and travel through verdant forest along the Gray Wolf River. Leaving from the Obstruction Point Trailhead is also an excellent option for trips into the northeastern section of Olympic National Park. Backcountry regulations are, for the most part, not as complicated or restrictive as they are in more high-demand parts of the park; indeed in 2017 I was able to simply show up at the park’s Wilderness Information Center with no advance reservation and get issued permits for an outstanding four-night trip, starting on a Saturday, without any obstacles. However, the backcountry campsite reservation system changed in 2019 and new rules regarding the reservation of campsites and the number set aside for first-come, first-served use have been put into place. Thus, despite there not being as much competition for campsites as in other parts of the park, it would be wise to make reservations in advance. Highlights in the Northeast Olympics are a blend of valleys and peaks. Complimented by beautiful lakes, the lovely meadows and stunning mountains make the park a paradise for the eyes. Competition for campsites can be stiff, especially if you’re planning a trip from the popular Obstruction Point Trailhead. Fortunately, there are several different lakes to camp at within a few miles of each other so if your first or second choice isn’t available there is still a reasonable chance that you will still be able to camp in this magnificent landscape. Having some flexibility with your itinerary in regard to when you stay at the campsites can also help your chances of being able to put together a trip that works for you and doesn’t require you to rush through this part of the park or hike a long day to get there, leaving you little time to enjoy your stay. For those looking for a bit more solitude and who don’t mind some cross-country travel, there is ample opportunity to plan a trip to several meadows in this corner of the park that are a true feast for the eyes. There is a designated campsite at one meadow, but zone camping has also been allowed in certain areas in the past – just check with the rangers when getting your permit and see what the current regulations are. Numerous passes in this area and non-technical peaks also provide scenic highlights, several of which I had the pleasure of experiencing during my trip through the area in 2017. Near the headwaters of the Dosewallips River, you can find opportunities for scrambling to the top of peaks and you can then easily relax in meadows below on your way back to camp. Several trails lead to the area. Those comfortable with cross-country travel will find many worthwhile detours in the area and in this corner of the park if you have energy to spare and a good map. Spending an afternoon hiking to an offtrail meadow was one of my favorite parts of the fieldwork for the revised third edition of Backpacking Washington. Walking almost felt like being on a treadmill; for every few hundred yards of progress I made it seemed like the mountains that hemmed the meadow in stood in the same spot. The stillness was beautiful and profound in the meadow and I found myself often pausing just to take it all in. A black bear making its way through the meadow mesmerized me for a half-hour as it ambled along and splashed in and out of a small stream. If you’re looking to catch trout and don’t mind steep, faint paths that sometimes disappear altogether, high lakes in the area can become must-visit destinations. In late August, so many trout were rising to feed at one particular lake that I almost thought it had begun to rain. Although not as impressive as the Hoh Rainforest or the Queets Rainforest, the forest along the Gray Wolf River Trail is absolutely enchanting. Several campsites allow you to extend your stay in this delightful ecosystem and enjoy the beauty it has to offer before continuing on to other destinations. For those looking for real “top of the world” scenery, the upper Cameron Creek area is one area to explore, while the Obstruction Point and Deer Park Campground / Trailheads offer start or end points for ridgetop hiking options that should not be missed. Views from quintessential alpine scenery with meadows, streams, rugged peaks, and above treeline terrain to views into the park’s interior as well as out to the Strait of Juan de Fuca and distant Vancouver Island can all be found. If you plan a multi-day backpacking trip it might necessitate bringing an extra memory card, as the views are pretty much non-stop. Regardless of where you end up in the northeastern Olympics, you’ll almost certainly wish you had more time. While it is easy to put together a multi-day backpacking loop that hits some of the most majestic scenery, having twice the time would always be better. There’s simply no such thing as swimming in too many refreshing mountain lakes or enjoying the view from too many mountain passes. Backpacking in Olympic National Park: Need to Know Information Permits are required for backpacking in Olympic National Park and can be obtained through recreation.gov. Best Time to Go Late July to Late August for wildflowers, although early season hikes might need an ice axe and traction devices to negotiate the passes. That said, there really isn’t a bad time to hike this part of the park – the stunning mountains, lakes, and lush forests are gorgeous any time you can reach them (which is usually July to October each year for non-mountaineering pursuits). If you can only do a trip later or earlier in the year, then sticking to the rainforests or beaches of the park’s lowest elevation would be more appropriate. Getting There From Hwy. 101 east of Port Angeles, WA turn onto Deer Park Road and continue for 16 miles to the road’s end and the Deer Park Campground. Maps and Books The National Geographic Trails Illustrated map for Olympic National Park is adequate for completing most backpacking and dayhiking trips on trails, although persons interested in doing more cross-country travel might want to print detailed topographic maps for certain sections. A detailed description of a loop in the northeastern Olympics, along with several other trips in the Olympic Mountains, is in Backpacking Washington, 3rd Edition by Douglas Lorain and your author of this article, Mark Wetherington, published by Wilderness Press. -
Best Freeze Dried and Dehydrated Backpacking Meals
Aaron Zagrodnick posted a blog entry in TrailGroove Blog
Let’s be honest; not every backpacking trip provides the time for us to prepare a nightly gourmet meal, and not all of us are ready to embrace, or perhaps we have yet to have a discussion with, our inner hidden chef. While I like to create backpacking meals from scratch at times and when I can, if you’re like me, after a long day on the trail I simply often find myself wanting a sufficient amount of calories that taste great, and I want that meal as quickly and as easily as possible with minimal cleanup afterwards. Freeze dried and dehydrated, ready-made backpacking meals usually fit the above criteria – but if you’ve tried your share of these types of meals, you’ve surely had your share of experiences that don’t exactly hit the spot in the taste department, and not much is worse than having to force down such a meal when it's all you have in the wilderness. As such, here’s a review of the best add water and eat freeze dried / dehydrated backpacking meals that I’ve eaten over the years that do hit the spot, taste great, and are easy to prepare. The Criteria Meals to make this list and review are weighted on a few factors that are important to my approach and palate, including ease of preparation, great taste, calories, lack of artificial colors and flavors, and the inclusion of meat, or another protein that’s tough to carry while backpacking like eggs. While I’m by no means a carnivore on the trail, a vegetarian I also am not – and although I’ll eat a meal that is specifically aimed at other dietary considerations, I don’t abide by gluten-free, vegan, paleo, standards etc. and for the most part have a pretty standard and eclectic food bag. Things like chicken and beef that go well in meals are tough to carry in the backcountry; and I’ve found for dinner applications, meat of the freeze dried variety works best on multi-day backpacking trips for the light weight, taste, quick rehydration, and texture. This would go for something like eggs as well – in my experience taste is definitely not a high point of powdered eggs. On the flipside, I’ve found vegetarian meals are the easiest to replicate through freezer bag cooking or one pot meals in the backcountry. For example, while a simple mac and cheese (our mac and cheese guide) or ramen meal from many popular brands that make freeze dried meals may taste great, it’s pretty easy to make this on your own from the grocery store either in the pot or freezer bag style, and thus meals of this variety are ones I usually just make on my own. With the criteria set, on to the list! Mountain House Biscuits and Gravy $11, 560 calories per pouch. Ready to eat in: 9 minutes. 4.4 ounce net weight. A meal I originally bought for breakfasts, Mountain House Biscuits and Gravy now also works its way into my dinner menus. Buttermilk biscuits were something I used to think were only to be had from a refrigerated can (yes I have taken those backpacking), or from a favorite local diner, but Mountain House has done a great job of bringing these to the freeze dried backpacking meal world. Combined with crumbled sausage and gravy with an ample amount of pepper seasoning, when this one occupies some space in my food bag I’m always looking forward to it during the hiking day. Like all Mountain House meals, this one is now officially rated to stay fresh for 30 years – no more expired meals hidden in the dark corners of your gear stash, and 30 years is even enough time to fall in love with a meal, get burned out on it, and then repeat the process a couple more times. Mountain House Breakfast Skillet $13, 510 calories per pouch. Ready to eat in: 9 minutes. 3.7 ounce net weight. A breakfast meal that originally debuted from the Mountain House “wraps” line, Mountain House Breakfast Skillet works equally well for breakfast or dinner in my experience. This originally debuted at a solid 800 calories per package, but is down to 560 in the latest packaging. This eclectic mix of hash browns, eggs, sausage, and peppers is definitely reminiscent of getting the works plate off your local diner’s griddle. For even more calories, bring a couple tortillas to go along with this one, and if you’re on the pro ketchup and eggs side of the fence, a packet of ketchup is an excellent addition to take along as well. Hot sauce packets of course, would also work for those looking for a bit more kick. Backpacker's Pantry Santa Fe Rice and Beans with Chicken $13, 600 calories per pouch. Ready to eat in: 15 minutes. 5.7 ounce net weight. The Backpacker's Pantry Santa Fe Rice and Beans with Chicken meal combines chicken and rice, with beans, cheese, green chili and vegetables. This is a great dinner for one or two, and adding an olive oil packet works very well for boosting the calories on this one. Although the rice is usually a little al dente in my experience following the specified directions, only slightly so and that’s fine in my book. For a burrito approach, this goes very well with tortillas, and bring a hot sauce packet or two if you’re so inclined. It’s not quite your favorite Mexican restaurant or a burrito from Chipotle, but for the backcountry it’s getting close enough to the latter. The latest iteration of this meal has less calories than before, but it's still a bit higher than average. Mountain House Yellow Curry $13, 510 calories per pouch. Ready to eat in: 9 minutes. 3.9 ounce net weight. A relatively new offering, Mountain House Yellow Curry features chunks of chicken with rice all in a curry sauce that is sweet, savory, and spicy all at the same time. My favorite part of this meal is that while the rice is there, it's not the main attraction so to speak. Where some takes of backcountry bag meals are nearly all rice with a little of this and that thrown in, this one is the opposite with the chicken and curry sauce as co-stars. While a bit of a light meal for two I’ve found, a packet of olive oil as well as adding tortillas (although naan would be better) and planning for some dessert to go along with this meal is a great idea. Overall, this is one of the best meals Mountain House makes and if you asked me of this list which meal would be number 1, this meal would be in the discussion. For more, take a look at our full Mountain House Yellow Curry review. Mountain House Spicy Southwest Style Skillet $10, 490 calories per pouch. Ready to eat in: 9 minutes. 3.9 ounce net weight. An offering that came out with a slew of meals that Mountain House released a few years back, Mountain House Spicy Southwest Style Skillet is in my opinion another that’s served up equally well for breakfast or for dinner. With a green chile and hash brown base, and oddly for freeze dried meals actual hearty chunks of beef combined with other southwest themed vegetables and ingredients, this meal is a bit of a diamond in the freeze dried meal rough. Although this recipe did have a recall to be aware of – those with pouch code 3253174 and best by date of Dec. 2046 were affected, this is a new favorite of mine on the trail...with the right pouch code of course. That said, unfortunately Mountain House discontinued this meal...then brought it back...then discontinued again. We'll keep it here for now in case it comes back (fingers crossed). You can find our full review here. Mountain House Cheesy Beef Enchilada Bowl $13, 660 calories per pouch. Ready to eat in: 15 minutes. 4.7 ounce net weight. However, for a newer meal that you should definitely be able to find in stock, check out the Mountain House Cheesy Beef Enchilada Bowl. This meal isn't perfect (read our review), but it's close, and if you're packing this meal on the trail there's no need to wait for Mexican food until after the trip, as it will be right in your food bag. You can add a few things to this one to make it even better if you wanted, but taste-wise the enchilada flavor is spot-on. One of the newest meals from Mountain House (as of 2026), their cheesy beef enchilada bowl really brings the flavor. Peak Refuel Biscuits & Sausage Gravy $15, 1100 calories per pouch. Ready to eat in: 10 minutes. 6.77 ounce net weight. Peak Refuel doesn't have quite the shelf life as some other meals here, but with 10 years (unopened of course), you have some time. The Peak Refuel Biscuits & Sausage Gravy meal is my favorite meal of theirs and if you ever open this meal up you'll quickly see why. Take a look at our full review for more, but two whole biscuits are included in the package and this meal has a whopping 1100 calories. Breakfast or dinner...you decide – however you likely won't still be hungry after finishing this meal and the local diner-like flavor can't be beat. Price is on the high side, but this meal packs in the calories, flavor, and biscuits. Mountain House Chicken and Dumplings with Vegetables $13, 600 calories per pouch. Ready to eat in: 9 minutes. 4.5 ounce net weight. If you like chicken pot pie, this is the freeze dried meal for you. Mountain House Chicken and Dumplings with Vegetables features chicken, and a heavy dose of vegetables along with buttermilk biscuits and gravy at least reminding one of grandma’s secret recipe....or perhaps just your favorite microwavable chicken pot pie from your local super market’s freezer section. Either way, this one hits the spot while backpacking and especially if temperatures are a little on the chilly side. This is one meal that is on point right out of the bag – no mods or additions required. Mountain House Chicken & Mashed Potato Dinner $13, 450 calories per pouch. Ready to eat in: 7 minutes. 3.7 ounce net weight. I know I know, we can all head to our local grocery store and grab any one of a number of mashed potato packages that are easy to cook, quick, and taste great after a long day of hiking. As such, the key to the Chicken & Mashed Potato Dinner from Mountain House isn’t about the potatoes, it’s the chicken. And it just so happens that this is such a simple combo, but one that's tough to beat. This meal used to come with two whole, grilled freeze dried chicken breasts included in the pouch. This was a bit of a novelty in the past, however these days the meal comes with more of a diced chicken. This is fine, as although I think previously Mountain House intended for us to eat the chicken breasts with a knife and fork, I always just mashed up the chicken and potatoes all together anyway. The price to calorie ratio on this is a bit steep, so this is one meal where I always add an olive oil packet to boost the calories, and I keep this on hand for a splurge occasion. Backpacker’s Pantry Pad See You $11.50, 720 calories per pouch. Ready to eat in: 15 minutes. 6.6 ounce net weight. This one was almost left off, as Backpacker's Pantry has apparently discontinued this meal. However, we thought we'd include it for nostalgia and in hopes that it's brought back someday, as it was hands down the best meal we've ever had from Backpacker's Pantry. With rice noodles and chunky broccoli in a tasty sauce with an adequate amount of chicken mixed in, Pad See You from Backpacker’s Pantry was about as close to take out as I've ever had on the trail. No need to bring along an extra olive oil packet – Backpacker’s Pantry already included one inside the pouch for you to mix in before you added hot water – and unlike a lot of freeze dried meals, this one actually packed some punch in the flavor department without extra doctoring (if stirred well; the spices were always at the bottom). If you like a little extra spice like me though, a little cayenne or a packet of Sriracha went great with this meal. Perhaps someday the meal will be brought back. However in the meantime we've developed a similar and easy DIY recipe that you can try. Mountain House Chili Mac with Beef $13, 460 calories per pouch. Ready to eat in: 9 minutes. 3.8 ounce net weight. A classic Mountain House meal, and just classic meal all around, Chili Mac with Beef from Mountain House takes mac and cheese to an entirely higher level (when you add cheese, as I always do) with beef, beans, and spices. One memorable experience came with this meal on an especially wet, snowy, and chilly hiking day – after setting up camp tired, a bit chilled, and with darkness having fallen this meal definitely raised both spirits and warmth before hitting the sleeping bag. The calories are a bit low on this one; I suggest adding a packet of olive oil and the aforementioned cheese for long hiking days (throw it in before adding hot water). Mountain House Mexican Style Adobo Rice & Chicken $13, 570 calories per pouch. Ready to eat in: 9 minutes. 4.6 ounce net weight. The Mexican Style Adobo Rice & Chicken meal from Mountain House may just be the meal to reach for when you're craving Mexican food on the trail, and this newer meal has always hit the spot for me in the backcountry. While I do wish the chicken in the meal had a bit more presence, it's hard to complain when it comes to taste here. I always like to add some cheese to this one on the trail, and tortillas are almost mandatory. Olive oil and a little spice if you’re so inclined can both work together well for taking the calorie count, and experience here to the next level if desired. For more on this one, check out our review. Mountain House Mexican Style Adobo Rice & Chicken is a great meal that goes particularly well with tortillas. Final Thoughts Note that all the prices above are full price; any time of the year REI offers 10% off 8+ meals here with free shipping available, and cost can also be mitigated through careful shopping, as it’s not too difficult to grab these meals 20% off from time to time and / or with free shipping if you keep an eye out for sales at retailers like REI and here at Amazon. Although all of our palates vary and a lot of these meals seem to come and go on the manufacturer side, the above list is a great start, and are the ones that have stuck around in my food bag. One tip I can add is to always throw in a new meal or two on long trips; it helps prevent burnout on any individual meal and is a great way to find the next one you’ll go back to time and time again. I like to keep a simple spreadsheet at home for each meal, and update it after a trip any time a new meal is tried. I give each a meal a quick rating (poor, fair, and good) in my system, and also note next to this any thoughts on the taste, what might need to be added next time (example: needs black pepper and a packet of olive oil). While a pre-packaged meal can be more costly than making your own meals from scratch, if you have a focus on convenience, having some of these meals on hand can make packing your food bag before a trip that much easier, and freeze dried meals bring that same convenience to mealtime on the trail as well. Either way, whether you like to throw a couple in to take care of a meal or two on a long trip, or if you take one for dinner each night, having a few go-to freeze dried backpacking meals on hand for your next trip can go a long way towards helping out with your backcountry meal planning. For a list of nearly every freeze dried meal made (over 100 different options) that you can sort by brand, category, meal type, etc., check out this page at REI.


-
Popular Contributors
Nobody has received reputation this week.
-
Current Deals
Premium Members: Get a free Gaia GPS Premium Subscription for a year ($60 value) to use with the GaiaGPS smartphone app. Full details here on the Premium Gear Deals and Search Page
REI: Shop REI Co-op Sale & Clearance Items on REI.com
Zpacks: Lightweight and roomy, the Duplex Tent weighs just 19 ounces and sleeps two people with two doors and two vestibules. Learn more here at Zpacks.com
Amazon: Click Here to View All Backpacking & Hiking Gear with Free Shipping (Over 10000 Items)
Subscribe
Join 15k+ Subscribers
Member Statistics
-
Total Members5,545
-
Most Online2,605
Newest Member
pepperjack412
Joined