What's New
- Today
-

Best Backpacking Backpacks: From Overnight to Thru-hike
Aaron Zagrodnick posted a blog entry in TrailGroove Blog
One of the big 3 of backpacking gear choices (backpack, tent or shelter, and sleeping bag), the backpacking backpack you choose will have a profound impact on your comfort during the hiking day. Your pack will also be one of the more expensive items you’ll purchase, and to get the best pack within your budget a little research will be needed as there are a myriad of packs out there on the market. In this guide, we’ll look at the best backpacking packs currently on the market based upon anticipated pack weight and packing category (ultralight, lightweight, heavy weight) along with some budget options as well. For the purposes of this guide, we’ll focus on performance, availability, reasonable price, and reasonable longevity for the intended purpose. Best Ultralight Backpacking Backpacks If you’re a weekend or overnight backpacker and / or manage to keep your total pack weight at around 25lbs or less, more ultralight backpacking packs may be worth a look. That said, if you do plan on going over this weight from time to time, and prefer a quiver of one, the next section in this article may be more appropriate to evaluate. For ultralight loads however, the frameless ULA Photon (35L total, 26 ounces, $220) from Ultralight Adventure Equipment is not the lightest pack out there, but is tough and has excellent comfort at these weights along with a livable pocket configuration. For a bit of a space and a carrying ability upgrade, look at the ULA Ohm (63L, 34 ounces, $280) as well as the ULA CDT (54L total, 27 ounces, $220). The Zpacks Nero Ultra 38L (38L total space, 10 ounces, $250) offers an ultralight option for the lightest of ultralight packers, but in typical Zpacks style still has organization and features you need in a pack of this nature. The Super Nero Ultra 50L boosts the space up to 50L total, with a pack weight of just 12 ounces at $270. Both of these packs are suggested for 20lbs or less of total pack weight. Another option is the MLD (Mountain Laurel Designs) Burn. This pack weighs in just over a pound and retails for $325 with 38L of storage. Featuring the tried and true combination of roll top main compartment, outside pocket, side pockets, and hipbelt pockets, the Burn is a nice option for ultralight overnights or beyond, so long as you are indeed focusing on the “ultra” of ultralight. Note that if you’re moving toward going ultralight, your backpack is the last thing you should upgrade. There is no point in exceeding the comfort limits of a pack just to achieve a target weight number on a spreadsheet. Comfort is more important and it’s better to have a slightly heavier, but more comfortable backpack when loaded. Summary: Best Ultralight Backpacking Backpacks ULA Photon ULA Ohm ULA CDT Zpacks Nero Ultra 38 Zpacks Super Nero Ultra 50 MLD Burn Best Lightweight & Long Distance Backpacks This is the bread and butter category of backpacking packs if you’re focused on lightweight backpacking, planning longer trips where saving weight is a priority, or if you're planning on thru-hiking a long trail. These are the packs that are just right most of the time, just fine (if a little under-loaded) for an overnight, and can be pushed for longer trips – although they may not be the most comfortable for hauling heavy loads the first few days out and until some of that consumable weight is reduced. In this category and if your pack weight will be under 35-40lbs two packs from ULA Equipment have been a favorite choice of both mine and the backpacking community for years. My pick is the ULA Circuit (total volume 68L, 38.5 ounces, $300) that I’ve used on overnights up to 10 day trips and everything in between, although it’s definitely pushing it for trips over a week for me (whether you’d want to grab a pack from the next section in this article is a personal call). If you’ll be packing a little heavier, trend towards longer trips, and / or like more space the ULA Catalyst (75L total, 44.4 ounces, $320) will make more sense. To save a little weight and for a more waterproof pack Ultra versions of both of these packs are available. These two packs feature my favorite storage configuration for the trail (as previously described): large roll top main compartment, large outside back pocket, side pockets, and hipbelt pockets. In either case, you simply cannot go wrong with these two venerable ULA packs if you’ll be carrying less than 40lbs fully loaded (I’ve had 50lbs in the Circuit, not suggested but the pack was no worse for wear). And as a quick note if you're looking for a great kid's pack look no further than the ULA Spark. Another and newer pack to check out in this category is the Durston Kakwa 55 (around 60L total, about 31 ounces, $200-$260). This pack can be either had in the more affordable UltraGrid fabric option or Ultra 200X. Either way you get a pack with impressive organization at reasonable prices, and a pack that’s quite light but still can carry up to 45lbs. A note on Ultra: while many manufacturers have begun using Ultra (100X / 200X / 400X) fabrics for packs, durability has been mixed on the original fabric and the jury is still out on newer, further reinforced X versions. That said an Ultra pack will get you a completely waterproof pack (except seams unless taped). UltraGrid however, is a heavier denier nylon with a UHMWPE gridstop and a PU coating on the inside. This coating is rated at a 1500mm hydrostatic head – that’s as waterproof as some tents on the market. Fabrics similar to UltraGrid have proven themselves over the years. They will become more water-resistant in time, but these fabrics have held up very well to the trail – on or off trail for that matter – and have handled abrasion situations very well in my experience. Long story short, it is hard to beat a good gridstop fabric for packs. Gridstop may not be the most waterproof, but I have gridstop packs with a decade+ of usage that are still quite water resistant and there are other ways to keep your backpacking gear dry. This would include using a pack liner or a large dry bag or two…or alternatively a trash compactor bag would be suggested in regards to pack waterproofing. Gridstops aren’t as trendy as laminates, but I fully expect 10 years or more of use out of packs made with these gridstop ~200+ denier nylon fabrics and there is a lot to be said for that. Back to backpacks, for the lightest of the light, the Zpacks Arc Haul Ultra 60L (60L total storage, about 22 ounces, $400) is worth consideration – this pack is rated to carry 40lbs via a carbon fiber frame system with integrated back ventilation and as a bonus is also available in a women's specific version. The pack uses a lighter Ultra 100X to save weight – so this pack will be better for users that are willing to be a little careful with their gear in order to save the weight. Summary: Best Lightweight & Long Distance Backpacks ULA Circuit ULA Catalyst ULA Spark (for kids) Durston Kakwa 55 Zpacks Arc Haul Ultra 60 & Women's Best Load Hauler Backpacking Packs Weight (of the pack itself...or weight carried within it for that matter) can quickly spiral out of control in this category, with some manufacturers offering packs here that can weigh well over 5lbs. In this category we have a few main venerable larger players, with one example being the Gregory Baltoro and the Gregory Deva series, in particular the Baltoro 75 liter (~80 ounces, $360) and the Baltoro 85 Pro (around 88 ounces, $400), with the women’s version being offered in the Deva 70 backpack (about 75 ounces, $360) as well as the larger Deva 80 Pro pack (~84 ounces, $400). If you’re looking for a cushy mainstream get-it-done pack to haul large loads that can be on your doorstep a few days from now, the Baltoro and Deva packs have been a go-to for many years and are rated to carry up to 70lbs. Saving weight for the pack itself is not however a strong point here. If you’ll be hauling a heavy load (long trips, lots of food and water, or extras like packrafts or camera gear) but still have a lightweight approach like me, you may need to look at smaller companies to fill this niche. Leaders in this category include the Superior Wilderness Designs Wolverine 95L (a 70L is also offered) pack as well as their 95L Big Wild pack (no large outside back pocket), also offered in a 70L version. While color is usually not my primary concern when selecting a pack, these two SWD packs for better or worse are only made in Ultra 400X fabric which only comes in white or black – which I’d have to say, would be towards my last 2 choices when it comes to something like a pack or tent color. That said, these packs are rated to carry up over 50lbs for around $400 and will come in around 40 ounces for the pack itself, plus or minus depending on options. Be sure to check out their available add-ons if you want something like a hydration port or hipbelt pockets. Hipbelt pockets offer convenience and storage for smaller items you'd like to keep immediately at hand. A few other packs stand out here: Nunatak makes extraordinary gear and offers their Plateau Pack (around 40 ounces, $350) with an up to 75L capacity and capable of carrying 50+ lbs. This pack is more custom built and you’ll have to see if things like hydration ports or hipbelt pockets can be added. Be it Superior Wilderness Designs or Nunatak or even Seek Outside which we'll talk about to follow, plan in advance and buckle up for some wait times. Seek Outside offers a couple packs worth checking out – although Seek Outside seems to lean towards the lightweight backcountry hunting crowd at times, some of their products can be used for lightweight backpacking like the 79L Divide 4800 2.0 ($505, 55 ounces). However, Seek Outside takes no custom requests so if you want something like a hydration port, you’re out of luck unless you want to start cutting and sewing yourself. The largest pack they offer with a hydration port is currently the Gila 3500 2.0 ($485, 51 ounces). The Gila isn't all that large of a pack (for a load hauler pack) with a 57 liter pack bag, but you can use the top strap and bottom straps to carry items on the outside and the pack features Seek Outside's load hauling frame. Seek Outside’s frames are very uniquely rated for pretty much whatever weight you can physically carry, so if you’re looking to grab a single pack that can handle just about whatever you can throw at it in regards to pack weight, these are the packs that would be up to the task. Summary: Best Load Hauler Backpacking Packs Gregory Baltoro Gregory Deva SWD Big Wild 95 SWD Wolverine 95 Nunatak Plateau Pack Seek Outside Divide 4800 2.0 Seek Outside Gila 3500 2.0 Best Budget Backpacking Packs If you want to keep it under $200 (at least before shipping and tax) – which I would very much consider a budget range for a backpacking pack – the previously mentioned Durston Kakwa 55 in UltraGrid offers quite a bit of value in this category as long as you’re packing somewhat lightweight, with the REI Co-op Flash 55 (about 55 liters, just under 3lbs, $200) offering another option that’s worth ample consideration. The REI Co-op Flash has the bonus of being offered in both a men’s and women’s version and in my experience, this line has demonstrated good value and very acceptable performance. Another interesting sub-$200 option can be found in the Osprey Rook 65 backpack (men's) and the Osprey Renn 65L (women's). Designed to carry up to 40lbs, these packs offer 65 liters of space, basic features, and can be had for about $190 while weighing in just under 4lbs. A pack from the REI Co-op Flash series. It is also worth checking out the REI Co-op Outlet from time to time, as you can often find many packs or last year’s model that will be perfectly serviceable at a discount here. For a budget load hauler pack, this can be tough since these are typically the larger and more feature-packed (expensive) options. The aforementioned REI Co-op Outlet is a good place to start your search. That said the Kelty Asher 85 is also worth consideration – as you’d expect it’s an 85 liter pack that weighs in close to 6 pounds, but can carry a heavy load and retails for just under $200 full price. With use but not abuse, I’ve found that a quality lightweight backpacking pack can last quite some time – a decade or so – of frequent use. For me they can be pushed beyond that on trips but they will be showing some wear and tear. A backpack is critical for comfort on the trail however, so with that 10 year mark in mind that I get out of quality packs, I’m not afraid to spend up a bit if it translates to durability and additional comfort on the trail. Summary: Best Budget Backpacking Packs Durston Kakwa UltraGrid REI Co-op Flash 55 Osprey Rook 65 Osprey Renn 65 REI Co-op Outlet Packs Kelty Asher 85 My Approach to Backpacking Packs and in Conclusion If you like to keep your gear simple and want one pack to do it all, there are a few ways to go about your approach. You can pick a pack rated for the heaviest load you’ll ever carry, and while it may be a bit much for shorter trips it will work. Or you could go for a pack rated for the typical load you’ll carry, but your shoulders may be complaining at the start of longer trips. This can be done if you’re only rarely expecting to take these kinds of trips and saving the cash is more important than comfort (not my choice). You could also pick a pack for overnights, another for most trips in the middle, and an even larger pack for load hauling and the longest excursions. For me, I like two packs: one do it all (from the lightweight and long distance category) and another load hauler for extended trips with extra gear. One advantage of this route (multiple packs) is that it spreads the wear out a bit and your packs will last longer. For more information on how to choose a backpacking backpack, size, materials, and pack features and considerations, see our guide on How to Choose the Best Backpacking and Hiking Backpack. For a large selection of various backpacking packs that you can sort and filter by capacity and more, see this page at REI Co-op. For Related reading on the "big 3" see our articles, Best Backpacking Tents by Application and Budget as well as How to Choose the Best Backpacking Sleeping Bag. -
 HarperWking joined the community
 - Yesterday
-
Backpacking Hydration Options: An Overview and Guide
Aaron Zagrodnick posted a blog entry in TrailGroove Blog
As soon as we set foot on the trail, a way to carry one of the most essential ingredients for a successful hike – water – becomes essential. With a myriad of options available from bottles of nearly every variety to dedicated, and often complex, hydration systems on the market today, when choosing a way to carry your water while backpacking the shopping experience can become complicated quickly. What follows is an overview of options that are available for this task along with my preferences, and a look at various water-carrying strategies for the trail. A selection of hiking and backpacking hydration options including soft bottles, water bottles, insulated bottles, and hydration systems. Hiking & Backpacking Water Bottles The simple standard water bottle comes in many forms, but attention will need to be paid towards capacity, ease of use, durability, and weight. By far the most popular water bottle you’ll find on the trail, and often off of it as well, is the 1 liter Tritan Nalgene bottle. These bottles offer a nice capacity while still fitting in most backpack water bottle pockets – but they aren’t light – weighing around 6 ounces for the bottle alone and these are often one of the first things backpackers will change if they’re looking to save some pack weight. In the bottle category, repurposed plastic drink bottles will be among the lightest options, such as empty Gatorade bottles, bottled water containers, 1 liter softdrink bottles, etc. and often will weigh less than 2 ounces empty. The bottles are an excellent choice if you’re looking to go ultralight and are ok with treating them somewhat gently. These types of bottles do not handle boiling water well, and I’ve had these bottles last for many trips only to crack when dropped a short distance – relegating them to something I can’t use but get to carry around for the rest of the trip. Luckily, if you go this route replacements are cheap! Soft bottles can also be placed into this category, also being very light if you do not mind a non-rigid drinking container. In between these 2 options is the Nalgene Ultralight, or HDPE version which features a more opaque and flexible type of material than the Tritan (both are BPA free). These at just under 4 ounces in the 1L version, are still a bump up in weight from a something like a repurposed plastic bottle (Gatorade, etc.) but will be much more durable. Both types of Nalgenes will also handle boiling water with ease, and on cold nights these are great for tossing inside your sleeping bag (the heavier Tritan will hold heat the longest). With a balance of durability and weight, the Nalgene Ultralight has become my personal go-to bottle choice on the trail. Both types of Nalgenes are available in a wide mouth (easier to fill) and narrow mouth (easier to drink) versions. Either way, these bottles are likely the all-time most popular way to carry water out on the trail. Of course, there are countless other options on the market in this category (REI offers 100+ water bottles for example), the main things are to select the capacity you need and go with some type of bottle that will be sufficiently durable for your wilderness excursions without weighing you down – not counting the water that the bottle will carry. For capacity 1 liter seems to be about right on size to last for a sufficient amount of time without having to refill too frequently, while still being small enough to be packable. For 3 season use and weight wise, it may be hard to justify anything weighing more than the already a bit burly Nalgene Tritan bottles. This would exclude winter backpacking however, when something heavier that is vacuum insulated like a Hydroflask or a Klean Kanteen can be very nice to have and can keep water / tea etc. hot for many hours even in bitter cold temperatures, keep water from freezing at night, etc. (burying your water bottles, upside down in the snow is another technique here). In all cases make sure your backpack choice allows for easy access to your bottles so that you do not have to take your pack off to get them out or back into the water bottle or side pockets on your pack. Although, there are other ways to attach a bottle to your pack as well and some prefer to attach bottles right onto their shoulder strap. Lastly, one other small, but handy feature to have is a measurement scale on your bottle, which can help when it comes to measuring out water for that freeze dried meal at dinner time. Even if you're a hydration reservoir fan, having a normal bottle and more normal drinking vessel on hand at least for camp is always convenient. Backpacking Hydration Reservoirs & Systems Hydration reservoirs are very popular and for good reason: once they are filled, in place, and setup they make drinking on the go (we are hiking after all here) very easy and can be operated without stopping and having to remove and replace bottles. While filling can be awkward, often times your water filter choice can be connected directly to the system and the hydration bladder / reservoir can be filled by pumping water or via gravity. Hydration systems are perfect if you like to take more of a sip as you go approach vs. a tank up at intervals approach to hydration on the trail. In any event, since having that drink tube close at hand throughout the hiking day makes things so easy, I do find I always seem to end the day more hydrated when I pack along a hydration system compared to a bottles only approach, and this is especially helpful in hot weather and at altitude. For capacity here 3 liters is a great all around size – as long as you remember that you don’t always have to fill it all the way – only enough to get to the next water source (or water source you want to stop at). Many various options exist on the market, but as features increase so does the weight. While insulated tubes are available for cold weather hiking, for winter use I do simply leave the hydration system at home and switch to a bottles only approach (often including insulated bottles as we talked about earlier). Hydration reservoirs can be a little tricky to clean: after all we have a main flexible reservoir often with a small opening, a drink tube, and a bite valve. Some type of system with an anti-microbal treatment like the Platypus Hoser is very much appreciated here, along with a cleaning kit when needed between trips. Many bite valves will wear out or get dirty over time and start to slowly leak, so having some spare bite valves in your gear stash is helpful. Make sure you’ll be able to route the drinking tube out of your pack – most packs have dedicated hydration ports – and while a hydration sleeve in the pack can be useful, it’s not necessary – I usually pack my hydration system sideways across the top of my pack for easy access during the day. Dedicated hydration packs (view REI's selection) exist on the market, and these are best suited for day hiking vs. backpacking. While a hydration pack will be convenient, they are typically heavier and really all you need is a hydration port on your backpack and a separate hydration reservoir. Even a hydration sleeve inside your pack is optional. Capacity Considerations for the Trail Having the ability to carry extra water or have extra water on hand while at camp can be beneficial as group size increases, when you’ll be hiking where the distances between water sources are large and / or during hot weather, and when you’ll be carrying all of your water into a dry location on shorter backpacking trips. While I have been known to carry gallon plastic jugs of water in the latter type of situation on several occasions, this is not the most suggested way of accomplishing this task. Rather than fill our pack with empty bottles that always take up lots of space empty or full, my preference here is to utilize lightweight, collapsible containers like your standard Platypus container or similar. Taking up little space and weight when empty, these can easily be filled at camp or when needed for dry locations. Carrying water for longer waterless stretches of trail will require extra containers and capacity. The total capacity you need among all water containers will vary based upon how often you like to stop throughout the day to filter / treat, how much water you like to drink, conditions, and if you’ll be dry camping or not. In normal conditions where water sources will be prevalent, I find that a 3L hydration reservoir combined with a 1 liter bottle is a great combo: I will usually either leave the water bottle empty or leave space in the reservoir during the day to save on weight, refilling both completely when at camp or at the last water source prior to. Water is heavy, but your pack gets lighter with each sip; strategies vary greatly on how much water to carry and I like to take the carry a little more weight and stop less often approach in this regard. If you like to spend more time in camp, or like to hit the trail and do not want to be forced to filter water again first thing or early in the day, having an extra collapsible container can be helpful. In drier conditions extra containers may also be needed, so a little math will be required in these cases to see what the ideal total capacity to take along should be. Final Thoughts on Backpacking Hydration Options The best route to take when it comes to your backcountry hydration solution? Simply put, there may not be a best. My preference is to vary my approach to the subject depending on season, weather, anticipated sourcing of water and my water treatment method for the trip, and my approach nearly always results in some type of mix of everything we've discussed. A hydration system is great for convenience during the day, but I still always like to have a bottle on hand for camp, for a little capacity boost, and to have if I’ll be adding any type of drink mix to my water, etc. For a complete list of hydration options that you can sort and filter by the considerations we’ve discussed above, check out REI’s complete selection of water bottles and containers here, and you can find a list of hydration systems on this page also at REI. - Within the Last week
-
How to Choose the Best Backpacking and Hiking Backpack
Aaron Zagrodnick posted a blog entry in TrailGroove Blog
No matter your approach to backpacking – ultralight, comfort light, traditional, or whatever our own unique approaches may be in the gear department, backpacking in and of itself goes hand in hand with a gear list (whether on paper or simply in our heads), making a way to carry all that stuff one of the most important gear related items we need to consider. What follows is a guide to selecting an appropriate backpack for hiking and backpacking, including an overview of features, technologies, materials, and other considerations that are needed when it comes to selecting the best backpacking backpacks. REI Co-op Flash 45 Backpack (our review) The Backpack Frame As soon as you start to carry more than 15-20lbs on a trip (including food and water), which is the case for the great majority of backpackers with a full pack, a pack with a frame should be selected to help transfer the weight of the pack off your shoulders and on to your hips. While in years past the great debate was internal frame backpacks vs. those with external frames, the majority of choices on the market today will feature an internal frame when it comes to the multiday hiking backpack category. If you're in the market for an ultralight backpacking pack, with a few exceptions you'll be looking at internal framed packs (or even frameless on the extreme end of the spectrum). Some companies that offer packs like this include Hyperlite Mountain Gear (view their lineup here), backpacks from Zpacks, etc. On the flip side externally framed packs are now available with cutting edge materials and designs that are significantly lighter than the traditional heavy and tubular external framed packs of days past, so with packs breaking out of the mold in many cases, I like to focus more on the other specifications of a pack rather than agonizing over the internal vs. external backpack frame debate. As long as it has a frame – commonly made of aluminum, carbon fiber, or a high density plastic sheet – other specifications such as maximum weight carrying capacity, materials used, comfort, and organization are most important to me. Many frameless backpacking packs exist and are more specialized in nature, suitable for ultralight loads and as such usually most appropriate for shorter duration trips where less food will have to be carried and in areas where water sources are frequent. With careful packing however these ultralight frameless packs can still be used if you’re very diligent about how much weight you’ll be carrying and especially if you are concerned about having the lightest possible total pack weight. However, their use is limited and I find it more feasible to utilize a framed pack on short trips where I might be carrying an extra pound of pack or so, rather than trying to deal with the limited weight carrying capacity of a frameless pack (and often limited storage capacity) on a longer trip. Some frameless packs will even omit a hip belt to save more weight, but even on a frameless pack I still prefer a hip belt – while weight transfer to your hips will be limited without a frame, every little bit helps. While frameless packs will always boast the best weights, often hovering around just 1lb, thankfully many lightweight framed packs are now available from many manufacturers. For most backpacking purposes a framed pack weighing 2-3lbs is a great range to target, and perhaps a bit more if you like to carry a heavier range of gear, food, or water – or all of the above. And like shoes, backpack fit and comfort is critical and this is where it pays to take some extra time measuring your torso length and checking out the manufacturer’s sizing guide, as framed packs are usually available in several sizes. Often each size will have a bit of adjustment built in, and will be provided by moving the hip belt or shoulder strap attachment points in order to fine tune the fit. Backpacking Pack Capacity Expressed in cubic inches or liters, the most popular sizes for modern backpacking would be options in the 45 liter range (~2750 cubic inches) like the REI Flash 45 – quite appropriate for most weekend trips – and packs stepping up in size into the 60 liter range, which I find most appropriate for week long trips or so. Both sizes can be pushed a bit beyond these limits and depending on your other gear and packing style. Regardless, there will be times when a 45 liter is a bit too small or a 60 liter a bit too large, but it comes down to a personal decision and how your trips typically take place; some of us are weekend warriors with others tending to head out only on longer trips. The other strategy is collecting multiple packs and picking from your collection depending on the trip at hand. For me, I like one pack that can do it all just to keep it simple (and cheaper), with my 4200 cubic inch (this includes all storage – not just the main compartment) ULA Circuit serving as my workhorse backpacking pack for all trips. With around 10 days the longest I will go at a stretch (this is about as much food as I prefer to carry at once), the pack will be at its limits early in the trip, but is perfect after a few days. For overnights or weekends in the summer where gear is minimal, my jack of all trades pack will have some extra space, but I will just allow my down bag to loft up inside and it’s always better to be in a situation where your pack is suited to carry more weight than you actually are carrying than the other way around. The other capacity consideration is in regards to weight. Backpacks with a beefier frame and more sturdy hip belts will allow you to carry more weight comfortably, but as we increase in weight capacity the weight of the actual backpack itself increases as well, forcing a balance to be struck. Again here we need to evaluate the length of our typical backpacking trip and normal proximity to water sources (water is heavy). One pack will not be perfectly suited for every condition. Whether you are just starting your collection of backpacking gear or are looking to upgrade an existing pack, this is also the time where it pays to evaluate all the rest of your backpacking gear, weigh it, and figure out how much food and water you’ll also usually be carrying before buying the pack itself. My preference again is to go with a lightweight pack that is suitable for carrying the full weight of all my gear, the full weight of my food even on day 1 of most trips, and all that combined with all the water I’ll be carrying. Sure, the occasional longest of trips might be a little heavy on my shoulders until I eat a day of food, but 95% of the time the pack will be near perfect. A little math at home here will pay off later on the trail. Features and Organization 25 years ago – when you’d find inspirational, beautiful brochures detailing a popular manufacturer’s complete line of external framed packs along with the latest Campmor catalog in your mailbox, packs seemingly had a compartment or pocket for everything. Dedicated sleeping bag compartment. Swiss Army knife pocket. Zippered storage for your MSR white gas fuel bottle. The list goes on. While organization is a key component to finding what you need quickly on the trail, there’s no reason to go overboard, or under when choosing a backpack. I like the big 4: Main storage compartment, outside pocket or storage, hip belt pockets, and dual side water bottle pockets. I’ve found this arrangement to be the best balance for me on the trail, and I then utilize further lightweight stuffsacks if additional organization is needed – rather than just throwing the complete contents of my first aid kit randomly in the main compartment of the pack for example. With this arrangement you are able to pack anything you’ll need only at camp inside the main compartment (sleeping bag, sleeping pad, etc.), pack anything you might need immediately at hand during the day in the outside pocket of the pack like rain gear – this pocket can be in the form of a lid or pocket on the rear of the backpack. You’ll also have easy access to small frequently used items, or emergency items in your hip belt and side water bottle pockets – things like a small camera, snacks, whistle, and water bottles themselves – all without having to take your pack off. Even if you're in the market for an ultralight backpack, you should be able to find these features even on the lightest backpacks. Additional attachment points are always nice to have on longer trips or for those times you might be carrying extra gear. This ability can come in many forms – bungee systems on the outside of the pack, ice axe loops, etc., with the main concern here being their existence without getting in the way or adding too much weight to the pack. Often, normal closure or compression straps can also be utilized to hold items you might want to secure to the outside of your pack like a bulky foam sleeping pad. Top loading hiking backpacks feature a large opening on top of the pack – either a roll top design which works well for compression and water resistance, or with a drawstring closure often covered by a “lid” or “brain” with a pocket. Panel loading packs, which operate a bit like a suitcase with long zippers, are also available if you feel you prefer easy access to all of your gear at once, however panel loading hiking backpacks will often be a bit more complicated and a little heavier. Although it may go without saying, other features such as a sternum strap, load lifters for framed packs to pull the load closer to your center of gravity and move more weight off your shoulders, a comfortable hip belt, and features like a padded backpanel are all things to check off the list. Other features such as ventilated backpanels, hydration sleeves and ports, or trekking pole holders for example should be sought after on a preferential basis. Backpack Materials Protecting the rest of your gear contained within, and other than shoes and trekking pole tips, backpacks face one of the roughest existences on the trail of all the gear we carry. However, going over-durable here can lead to an overly heavy pack, but we still need something that can withstand being dropped on the ground and rocks repeatedly, leaned against scraggly trees, and contact with brush and boulders without having to constantly repair or replace our pack. Often the simple eye test can give an indication of just how durable all the various fabrics utilized for backpacks may be. Silnylon and standard Cuben / Dyneema Composite Fabrics dominate the ultralight pack market, but are not particularly durable fabrics in regards to abrasion resistance. A water resistant ripstop nylon pack fabric A hybrid Dyneema fabric is also available, featuring a polyester face fabric for increased abrasion resistance while still taking advantage of the waterproofness and strength of the base Dyneema material (seams may however, not be sealed or taped in any water resistant pack). Heavier duty ripstop nylons and Dyneema gridstop are more popular fabrics and offer a great balance of weight and durability. The latter two options frequently feature a PU coating for waterproofing, which will degrade over time – no matter the case one should always further waterproof their critical gear by way of waterproof stuff sacks, or by using a pack liner of some type – usually just a larger version of a waterproof stuff sack or a trash compactor bag. A pack cover is another way to approach waterproofing, and some packs like the REI Co-op Traverse (view at REI) include a rain cover that can be stashed in the pack when not in use. In rainy conditions, an outside mesh pocket can be nice to have for drying gear, once the rain does stop. In all cases, if the bottom of the pack is reinforced with a double layer or heavier duty material this is always a bonus, with this location being the most susceptible to abrasion and wear. Spending a little extra time when it comes to choosing the best pack for you, and getting the fit dialed in, will go a long way toward carrying comfort on the trail during those long days and hikes. Straps and Belts A backpacking backpack designed for carrying heavy loads will frequently feature heavily cushioned shoulder straps and hip belts, while lightweight packs and ultralight packs will typically feature minimal padding in this regard. I usually carry loads up to around 50lbs on extended backpacking trips, and find that I typically prefer minimal padding on a hip belt, with medium padding on shoulder straps. With the minimal padding, I just feel more connected to the pack and frankly, I think that backpack fit is most important here. Some backpacking backpacks like the ULA Circuit, are worth consideration for their dual adjustable hip belt straps that pull inward. This allows both for a more ergonomic fit and adjustment. Make sure you can easily reach and adjust all straps on your pack, including your load lifter, shoulder straps, and hip belt straps all on the fly. Instead of more pockets than you can count and technical fabric and frame materials, the best backpacking backpack for you might just be the one that's simply the most comfortable and isn't a hassle to adjust on the trail. Choosing the Best Backpacking Pack: In Review Thankfully, as a required item for backpacking there are no shortage of lightweight, framed, frameless, heavy duty, ultralight, top loading, panel loading, and men’s or women’s backpacks – or various combinations of these designs – on the market today. No matter your take and approach on the subject, the best backpack for hiking on those extended trips might be the one that you end up thinking about the least while on the trail; one that carries all your gear across the various intended situations with ease, all the while without weighing you down and one that is sufficiently durable to last for countless backcountry adventures. For a current list of backpacks that you can filter and sort by many of the features we’ve discussed in this post, see this page at REI.com. For our current choices so far as the best packs out there are concerned, see our related article: Best Backpacking Backpacks: From Overnight to Thru-hike. -
Backpacking and Hiking Water Treatment Guide
Aaron Zagrodnick posted a blog entry in TrailGroove Blog
On any hiking or backpacking trip, the ability to procure drinking water during the hike is one of the most important logistical considerations for both pre-trip planning as well as while we’re on the trail. Finding the water is of course the first step, and having the necessary gear to properly process the water so it’s suitable to drink is the second part of the equation. Here we’ll look at the main types of water filters and backcountry water treatment methods that are best suited for backpacking and hiking, and elaborate on the necessary reading between the lines that needs to be done when choosing the best backpacking water filters or treatment options for backcountry use. An assortment of various types of backcountry water treatment options Backpacking & Hiking Water Treatment: What We Need to Treat & Filter Microorganisms and Biological Concerns While protozoan concerns such as giardia and cryptosporidium get the most publicity, concerns are best looked at in a categorical fashion. Starting with biological contaminants from smallest to largest, viruses (example: hepatitis, rotavirus, often smaller than .1 micron) are notoriously difficult to filter as they can slip through most common filter’s pore size. Luckily, viruses are mostly a concern where there are many other people – for example where you might find untreated sewage. However, it’s always important to remember the source of the water you’re filtering. Bacteria (example: E.Coli, Salmonella, average size greater than .3 microns) are a more common concern in the wilderness as they are spread by both humans and wildlife, but luckily they are larger than viruses and more easily captured by most common filters. Protozoa are a bit larger and include cryptosporidium and giardia, and a filter that will filter to 1 micron or smaller is recommended for removal. Concerns that are larger still include tapeworm eggs and unsightly, but not necessarily dangerous, critters of various types in your water such as insect larvae. On many occasions I’ve scooped water from crystal clear mountain streams and upon close inspection, have been quite surprised at what that scoop reveals to the eye – from sticks and stones to tadpoles and worms of various types – not to mention what you can’t see. I prefer to get my calories from my food bag while backpacking, and luckily these larger organisms are of course, very easily filtered. Water sources will vary in purity, but various types of backcountry water treatment and filtration methods are available and can be utilized. Each method offers pros and cons, and I often prefer to use methods / technologies in combination depending on the trip. Other Treatment Considerations Many other components can make up the water you’re drinking in the backcountry as well. Chemicals, pesticides and herbicides, heavy metals, tannins, silt, taste and odor, as well as natural particulates of various types will need to be considered. Some of these concerns will only affect smell and taste, others could affect your health. Visible suspended matter is removed by most filters, but tannins and taste / smell can pass through – in my experience even drinking tea colored water however, has been fine. If your water source is downstream of an area that has seen prior or active agricultural or mining use for example, chemicals and other various components introduced by man could be in the water source, especially as you move further downstream in the water supply chain. To reduce these types of contaminants and concerns we can utilize a purifier or filter that contains a carbon stage, or add a carbon element or step to an existing setup to assist in reducing many of these possible impurities. Physical Water Filters and Purifiers Most water treatment products designed for backcountry use that are reasonably lightweight, will not address all of the above concerns in one fell swoop. Thus, we need to evaluate our backpacking and hiking destinations, as well as our own personal comfort level to find the best compromise. For backpacking in the mountainous wilderness areas of the United States for example, the general consensus is that viruses are usually not of a great concern, and many times our water sources are fairly pure from man-made pollution as we’re getting it close to the source. In these cases bacteria and protozoa are usually the main concerns. Other backcountry trips may find us filtering water on the banks of a river far from the source, that has passed through many towns before we consume it, perhaps on foreign soil, and the full gamut of contaminants are more of a possibility. Water filters do just what they say; they filter the water to a certain micron level to remove bacteria and protozoa. Water purification by definition, including options like the First Need XLE will take this all a step further by also removing viruses, though not all products that are officially listed as purifiers will remove or reduce chemicals, heavy metals, tannins, debris, etc. – your water may be purified by marketing general standards, but it will not necessarily be “pure”. A classic pump filter works well for pulling water out of hard to reach and shallow sources. Popular water filters for backcountry water treatment should filter to an absolute pore size of .3 microns or smaller for adequate removal of bacteria, protozoa, and all things larger. Note the absolute part of the pore size equation, as filters listed with a “nominal” pore size will only on average filter to that level. Absolute is a guarantee, and is the number we’re actually interested in. If you prefer viral protection, you will need an option with a much smaller absolute pore size; as a result flow rate will likely suffer and these types of purifiers are rare. Alternatively some filters combine with other technology to treat the virus part using an iodine or ion exchange process. Backpacking water purifiers that remove viruses physically are rare but can be found in the MSR Guardian pump purifier. Other options combine a normal filter with a cartridge that contains an iodinated resin for added virus protection, while the Grayl purifier uses an ion exchange process to achieve this goal. Types of Backpacking & Hiking Water Filters Physical filtration can be achieved utilizing various types of elements and technologies. The most popular lightweight water filter technology today, hollow fiber filters work by passing water through a multitude of small tubes; tubes that are perforated by many, many, pores so small (rated to the micron) that anything larger than this pore size cannot pass through, trapping any living organisms or non-living matter larger than the pore size. Hollow fiber filters are popular for their light weight and versatility – you can pretty much find one in any filter configuration you prefer – be that as a gravity filter, inline filter, or pump. Hollow fiber filters can usually be backflushed to help restore flow rate, and flow rate will vary depending on pore size, surface area, and use. The most popular hollow fiber filters are in the .1 to .2 micron range making them sufficient for bacteria and protozoa, and this micron level is usually a good balance of protection, sufficient flow rate, and lifespan. Smaller micron, virus-rated filters also exist in this category as seen with the aforementioned MSR Guardian purifier, but flow rate will be slower due to the smaller pore size. Gravity filters, an example shown here using hollow fiber filter technology, use the force of gravity to move water through the filter. Hollow fiber filters cannot be allowed to freeze when wet (the MSR Guardian is an exception) or after they've been used, so on trips where it will freeze at night you’ll need to sleep with the filter in your sleeping bag or carry it in your pocket any time temperatures begin to flirt with freezing during the day – this goes for nearly all other filters using different types of elements as well. In addition to freezing, physical filters also need to be treated with some care in regards to drops and impacts, which could damage the element. Some hollow fiber filters like the Platypus GravityWorks (read our full GravityWorks review here), and the Katadyn BeFree have manufacturer supported integrity tests which are very helpful for a little peace of mind – unlike other gear, you can’t really tell if a filter is working properly or not, without this test. Other types of physical filter media will use a ceramic element like the MSR EX filter, and the Katadyn Pocket Filter, or utilize a glass fiber element like the venerable Katadyn Hiker Pro. Ceramic filters have the ability to be repeatedly field cleaned. Some filters are entirely self-contained and will need to be thrown away when their flow rate diminishes too much to be of practical use, while others setups will have a replaceable cartridge that fits into a housing. Approaches to Filtering in the Field No matter what filter technology you end up going with, physical filters are most often utilized in an inline, gravity, squeeze, or pump configuration. The traditional pump water filter requires you to pump the water through the filter element via a hose in the water source, and is a proven setup at both getting you water and providing an ample upper body workout. Pump filters have moving parts and increase the complication and weight, but these are also great for pulling water out of hard to reach places. The other methods will require you to fill some type of reservoir with dirty water first, by either submerging the dirty water container or bag in the water source or, if it’s one of those shallow or small sources you occasionally may need to use a separate vessel to fill the dirty container, like a mug (boil later to sterilize). An inline water filter connected to a hydration setup treats water as you drink. Gravity setups like the Platypus GravityWorks and the Katadyn Gravity BeFree let gravity do the work for you, by filling a dirty reservoir with water and by elevating, hanging from a tree branch or rock if possible, water passes through the filter element into a clean container. Inline setups such as the MSR Thru-Link splice into the tubing of your hydration reservoir and your own drinking force filters the water with each sip, while with squeeze setups like the Sawyer Squeeze, you can utilize a combination of gravity and squeezing force to move the dirty water through the filter and the filtered water into a clean vessel or drink directly. Other options integrate the filter into a water bottle (LifeStraw Go Series) or softbottle (BeFree), where much in the same manner as an inline filter with a hydration reservoir, your drinking or a combination of drinking and squeezing is what filters the water as you go. Straw type options like the Lifestraw Peak (view at REI) are also another strategy, treating water by directly inserting one end into a water source and drinking from the other side of the straw. A straw filter is limited in that you cannot process larger volumes of water and each sip takes more work, and straw filters are perhaps best reserved more for emergency usage. In whatever case, seek out the cleanest water possible to prolong the life of your filter and for the best flow rate. While many filters can be backflushed or cleaned, this is usually a losing battle over time. Although filters are rated by the gallon or liter in regards to their lifespan, and while it’s a great idea to evaluate this when choosing a filter, take this number with a grain of salt. Clean water is important for other treatment methods as well; in very turbid situations it’s a good idea to allow water to settle in a separate container (in for example, a Sea to Summit Bucket), then treat from the top. Luckily, this is more of the exception than the norm for most of us. Backcountry UV Water Treatment Ultraviolet treatment options like those offered by Steripen, come in various forms using either normal or rechargeable batteries, and utilize, as with many municipalities, UV light from a special lamp that’s inserted into your water container to neutralize many microorganisms by disrupting their DNA. This process usually takes about a minute and you’ll most likely be treating a liter of water or so at a time. Some other UV bottles have come (and gone) to / from the market that feature an integrated lamp, and yet others have been designed to float from the surface of your water vessel. UV water treatment uses battery powered ultraviolet light that's inserted in a container to treat many microorganisms. On the plus side, these UV treatment options are quite effective at neutralizing the things that physical filters have the toughest time with – viruses – and the technology is proven. However, many are not comfortable relying on an electronic and potentially fragile instrument for their main or only wilderness water treatment source. Additionally, UV light on its own is not sufficient for neutralizing all living organisms that could be present in your water – tapeworm eggs for example, or larger organisms and larvae that may or may not do any harm but may not necessarily be what you want to ingest, nor will a UV product remove anything from the water or improve its composition. If the water is dirty, you’ll be drinking dirty water. Steripen offers a filter with a 40x40 micron mesh screen that can help here, which is intended to reduce organic matter or particulates. Performance may also be insufficient in murky water, requiring pre-filtration. All said, this is an excellent technology as long as you’re aware of the limitations; I utilize a Steripen Adventurer Opti as a secondary treatment with a hollow fiber filter on any trip where I desire viral treatment. Chemical Water Treatment Chemical treatment usually utilizing chlorine dioxide (Aquamira) or Iodine (Potable Aqua) and on occasion some other chemicals like household bleach or other chemicals that produce chlorine, like Aquatabs can be effective, but like anything this category has its share of pros and cons. In contrast to physical filters and like UV treatment, chemicals are again effective against viruses, but often take longer (hours) to work on such concerns as cryptosporidium (4 hours) and these products will add a taste to your water; other products are not suitable for cryptosporidium whatsoever. Advocates for chemical treatments praise the ease of just adding the treatment right into their water bottles and allowing the treatment to take place as they hike. To be honest, most of my thought goes into making sure my drinking water source is either free of any chemicals or how to reduce or remove them should there be any chance of them being present, so chemical treatment is a bit counter-productive from my point of view, and options like iodine are not an option for pregnant women or those with any type of a thyroid issue. Iodine and chlorine (i.e. bleach) on their own, are not effective against cryptosporidium. However, this method is lightweight and over the years has been popular with ultralight backpackers, though decreasing in recent years with the increased availability of very light hollow fiber filters like the Sawyer Mini. In this category, other devices have seen the market over the years that create a solution with salt to create an oxidant solution that you subsequently dissolve in water; but as with other chemical treatments, with a 4 hour wait time these are not the quickest of options. An example can be found in the discontinued MSR MIOX. These devices seem to come and go from the market. Chemical treatment may also be integrated with some filters to move them into the purifier category. As with boiling, chemical treatment can be a good backup to bring as well or to utilize in conjunction with other methods. Hundreds of miles from the source, I took extra steps in my treatment process at this backcountry location. Boiling Boiling water is an excellent way to neutralize microorganisms that might be present, but it takes a while, requires a lot of fuel, and let’s be honest, on a hot summer day, who wants to drink steaming hot water when we could be drinking that crisp and cold water from a mountain stream? As such, boiling can be tough to utilize as a main water treatment method on most 3 season backpacking trips, but it’s an excellent method to keep in mind as a backup method should your filter or other method fail you. In winter however, melting snow for water may be your best and only option. Be sure to bring a big pot (my Evernew 1.3 works well solo) and a stove that will work well during continued usage in cold conditions like the MSR WindPro II – read our WindPro II review here. Opinions on how long to boil water vary widely; the CDC suggests bringing water to a rolling boil for 1 minute, or for 3 full minutes at altitudes above 6562 feet (be sure to check that 2 on the end of your altimeter!). Data suggests however that pathogens are neutralized at lower temperatures; in the end it depends on heat and time but luckily, both are achieved by bringing your water to a boil and after removal from heat. Carbon Filtration As we’ve seen, the technologies used above are all mainly designed to thwart microorganisms. If improving the taste and smell of your water, or if any agricultural and / or industrial contamination is a concern, look for a system that integrates filtration technology combined with a carbon stage that will improve and / or reduce, but not necessarily eliminate, these concerns. If desired, a carbon element can be integrated into an existing system using a modular approach to filter water further. This will increase the weight of your system, and possibly the cost of replacement elements, etc., but there is of course no free lunch. The Grayl UltraPress and Katadyn Hiker Pro are all examples of filters with integrated carbon filtration – or if you’re like me and have settled on a treatment method that does not address this concern, but you may occasionally head out on a trip where some of these concerns would be nice to cover, you can always splice in an add-on carbon element (I use an add on GravityWorks Carbon Element) for this purpose when needed. My Approach to Backcountry Water Treatment For a complicated issue, there are unfortunately no one size fits all solutions and in the end, when we’re concerned about not carrying extra weight, it all comes down to a compromise and what each one of us is most interested in removing from our water. Luckily there are many lightweight and effective options out there to choose from. For general backpacking we should expect to find an option that will treat what we’re concerned with for around a pound or less. About half a pound is usually doable, and lighter options of just a few ounces are very realistic to target. The best backpacking water filter or water treatment method very much depends on the task at hand. Most of my trips are very well served by standard hollow fiber filtration technology; as with all of us most likely, my preference is to backpack into areas where the water is already fairly good. As such I’m not usually concerned about viruses or pollution, (both a Steripen and carbon filter have a spot in the gear room for such destinations to use in conjunction with a hollow fiber filter), and I like to target the removal of bacteria, protozoa, and the removal of larger critters no matter their parasitical intent or lack thereof. The hollow fiber filter also has that added benefit of giving your water a good scrub; removing particulate matter. I really like a filter that has a manufacturer supported integrity test as well, so it essentially comes down to the cartridge for me. The Platypus GravityWorks cartridge fits all of the above criteria, and it just so happens the whole setup it comes with works well and is pretty darn convenient to use both on the trail as well as in camp. For a complete list of backcountry-ready, tried and tested backpacking water filters and treatment methods that you can sort and filter by all the main points we’ve discussed in this post, check out this page at REI. -
When it comes to backpacking stoves, there are several routes one can take and several different main categories of stoves exist – each with an array of pros and cons. Without a doubt however, no matter which way you go about it the backpacking stove is an important part of any overnight or multi-night gear ensemble. A backpacking stove provides hot meals and drinks, goes a long way towards keeping you warm on chilly mornings and evenings, and for backpacking and hiking a stove needs to be convenient, lightweight, and reasonably fast to use with readily available fuel. Canister stoves offer proven performance with a convenient fuel source. The Canister Stove A canister stove uses a pressurized gas canister for its fuel source, and this fuel can be butane, isobutane, or propane and is usually a mixture of these fuels. These canisters are available in different sizes for varying trip lengths, and if you'll be using the canister in colder temperatures, you want to avoid a canister containing regular butane as its vaporization temperature is quite high in the 30 degree range (translation: your stove may not work / performance will suffer / it may be difficult to use in colder temperatures). However, canisters containing a mixture of isobutane and propane are much more suitable as temperatures drop. Isobutane will vaporize down to about the 10 degree mark and even lower as you gain altitude, and propane vaporizes down to the arctic-like temperature of minus 44, but there is only so much propane in your usual backpacking canister mix. Canister valves automatically open and close when you connect and disconnect the stove for ease of use and packing, and note that you can mix and match brands here – you don’t necessarily have to match the maker of your stove to your canister brand. As long as the canister has a Lindal valve you are good to go. Popular blended canister fuel brands include MSR IsoPro as well as fuel canisters from JetBoil and propane / isobutane mixtures from Snow Peak. Either way canister stoves offer convenience: they are easy to carry, usually fuel efficient, simple to use, and the pre-packaged fuel is likely readily available at your local outfitter. While having the fuel contained and prepackaged provides that convenience, they are non-refillable and after a while you are likely to end up with a bunch of canisters that don't have enough fuel to get you through a trip, but aren't empty either. They are recyclable if empty and punctured, and Jetboil makes a specific tool for that purpose. A necessary accessory for any canister stove user should be a digital kitchen scale that measures to the gram – this way you can always calculate the exact amount of fuel inside a canister before a trip. Canister stoves excel at boiling water, but you can dial the flame down and simmer…or even bake…with practice and with the right approach. Upright Canister Stoves Among canister stoves, upright canister stoves screw directly into the top of the canister and can be quite light – with many of these stoves falling in the 2-3 ounce range. I’ve used upright canister stoves with isobutane / propane canisters on trips with lows in the high teens, but usage much below these temperatures will become difficult, especially considering that the longer you use a canister in a sitting, the colder it will become – colder than the actual outside temperature – due to evaporative cooling. In cold or cooler temperatures it’s good to keep a few tricks in mind. In cold temperatures you can place the canister in a bit of water inside a container like a shallow bowl if needed to keep the canister’s temperature up and maintain performance, and sleeping with the canister inside your sleeping bag is never a bad idea when temps get chilly to give you a head start in the morning. Soto WindMaster Upright Canister Stove with MSR IsoPro 110 gram Fuel Canister Other types of upright canister stoves feature an all in one, integrated canister stove system like many of the system offerings made by Jetboil and options like the MSR WindBurner that are designed to be particularly efficient, at the cost of upfront weight, while saving fuel. These systems may be a good option if your primary need is boiling water. I personally prefer a more typical upright canister stove and like to choose different pots – like those from the Evernew Ultralight Series – depending on the trip. In recent years several upright canister stove options that utilize a pressure regulating valve have made it to the market, often claiming to increase overall and cold weather performance. While these stoves won't replace an inverted or liquid stove for cold conditions, I have found them to have better and more predictable performance overall when compared to other options featuring a standard needle valve. Popular upright canister stoves include my current choice, the Soto WindMaster – find our full review here, and a couple classic examples can be found in the MSR Pocket Rocket 2 and the Snow Peak GigaPower. Integrated canister stoves like the Jetboil Zip are also quite popular. Remote and Inverted Canister Stoves Remote canister stoves keep the canister remote from the burner and feed fuel via a hose. This allows for two benefits: remote canister stoves let you really shield the burner with a large windscreen to block wind and hold in heat to save fuel while the canister remains outside the windscreen – in an upright canister stove this would make the canister too dangerously hot. Secondly, if said remote canister stove allows you to use the fuel canister in an inverted position, a solution to the colder weather fuel vaporization issues previously discussed is realized, as using the canister upside down feeds fuel in a liquid form where it's subsequently preheated and vaporized at the hot burner of the stove itself in cold and very cold temperatures. For a remote canister stove that allows for inverted use, I use the MSR WindPro II. You can find our WindPro II review here. MSR WindPro II and Remote Canister For all types of canister stoves I like a dedicated starter if I can get it, and always look for built in piezo ignition. A separate piezo starter can be used if your stove of choice doesn’t feature one, or a lighter will do the job as well. Piezo igniters can fail, but they can also be replaced. Of course, always have a backup ignition source in your separate fire starting kit, but the convenience of a piezo igniter has far outweighed any small amount of hassle in my experience. No matter if you're using an upright or inverted canister fuel stove, be sure to dispose of spent fuel canisters appropriately. Liquid Gas Stoves The bread and butter stove of cold weather camping and for mountaineers alike, liquid fuel stoves like the venerable MSR Whisperlite are reliable options that burn white gas, or even an array of liquid fuels including gasoline for some stoves like the International version of the Whisperlite. A liquid fuel stove will work well in very cold weather, but most liquid fuel stoves are heavier and more cumbersome to use in regards to the need to handle liquid fuel in refillable fuel bottles, priming the stove, complicated hardware with more moving parts and maintenance etc. However, if you’re into group or complex meals like baking on the trail, a liquid stove may be hard to beat (options like the MSR Dragonfly are specifically designed with simmering in mind). A liquid fuel backpacking stove is thus perhaps best for the cold weather backpacker, the backpacking chef, or those who desire a stove that will work across all conditions who might not mind the extra weight and the potential hassle of a fuel bottle for 3 season use. Alcohol Stoves Alcohol stoves are designed to run on denatured alcohol (available at many hardware stores, etc.), or for my use I’ve always run them on the cleaner highest proof grain alcohol (Everclear). The benefits of an alcohol stove are weight and simplicity, there aren’t any complicated mechanisms or moving parts – you usually just fill and light the stove. With simplicity comes reduced weight, and the stove can even be made from tuna cans, soda cans, and the like. Alcohol stoves can be subject to fire restrictions and require some extra care with the open flame and fuel. I’ve used alcohol stoves across many conditions and my favorite offering is the Trail Designs Ti-Tri system that works well to trap the limited heat that an alcohol stove produces while blocking wind, greatly increasing efficiency. Another venerable alcohol stove option can be found in one of the several Trangia burners that are available. Alcohol Stove from Trail Designs Regardless, if you go with an alcohol stove you will definitely want a windscreen of some type. Alcohol stoves usually compete with upright canister stoves; ultimately the choice is up to you regarding which benefits you find most appealing and on longer trips, the increased efficiency of a canister stove may begin to cut into an alcohol stove’s weight savings. Fuel for an alcohol stove can perhaps be easier to find, and alcohol stoves have been popular for thru-hiking and ultralight backpacking usage for some time. With an alcohol stove you can dial in the exact amount of fuel you need prior to a trip instead of having to take a full canister each time, and perhaps taking too much fuel and the extra weight. On the other hand with a digital scale and some partial canisters to choose from, you can get close with a canister as well. Wood Burning Stoves Ti-Tri Wood Burning Stove Many wood stoves exist on the market, with of course the simplest way to cook with wood being a small campfire – which I’m most likely to use when cooking in this manner – although I’ve utilized the combo wood or alcohol burning Trail Designs Caldera Ti-Tri system for this purpose as well. A wood stove won’t beat a campfire in weight carried, but will beat it in convenience and efficiency. Cooking with wood of course requires you collect wood and start a fire, and would have to be ruled out in areas where fire bans are in effect. Wood also leaves residue on pots and the stove, but a wood fire is hard to beat for ambiance, and fuel is free and you don’t have to carry your fuel in your pack during the day. Chemical Tablet Stoves Stoves that burn manufactured hexamine chemical tablets like those from Esbit are quite efficient and very lightweight. Like alcohol stoves, you will want a windscreen to maximize efficiency and block any wind here. These tablets and Esbit fuel can be a bit hard to find if you’re in a pinch, but you can of course stock up from online sources. Esbit stoves leave a residue on your cookware and produce fumes, and as I prefer cleaner or more natural burning fuel alternatives, my experience with Esbit or other hexamine stoves is limited, but I can see the appeal for emergency or backup usage. Some ultralight backpackers however find Esbit fuel appealing for its simplicity and light weight. Esbit stoves, like the Esbit Titanium Stove are small, light, simple, and easily carried. Many backpackers would consider alcohol, wood, and solid fuel tablet stoves alternative fuel stoves. Final Thoughts As with nearly any other backpacking gear category, there may be no best backpacking stove, but hopefully the above information can assist with determining which option(s) would work best for you. While I own them all, these days my general approach is to take an upright canister stove (the Soto WindMaster) for 3 season use. Only when needed in very cold weather or anytime melting snow will be needed will I reach for an inverted canister stove. That same inverted canister stove – the MSR WindPro II, would work just fine in the summer as well if the extra weight wasn’t a concern. But whether you go with a one stove to do it all approach or like to mix and match to specifically meet the needs of the excursion at hand, any backpacking stove should ideally be durable, reliable, and have the ability to heat water and cook your cuisine of choice in a reasonable amount of time, and through whatever conditions will be encountered during a trip. For a full list of backpacking stoves that you can sort by fuel type and many of the points discussed in this article, check out this page at REI.com.
-

The New Hardest Thing: The Trek to Everest Base Camp
Susan Dragoo posted a blog entry in TrailGroove Blog
Strong men and women are laid low by this place. Acute mountain sickness, the “Khumbu cough" (also known as the high altitude hack), gastroenteritis, the cold, the food...what makes them want to come here? What made me want to come here? Our friend Paul walks down the hall of tonight’s tea house, remarking on the sounds of hacking and coughing emitting from the guest rooms. “This place is full of crazy people.” And I can’t argue otherwise. I wondered, before I came to Nepal to hike to Mount Everest Base Camp, whether this might be my new “Hardest Thing.” My old Hardest Thing was made that way by high elevation and its effects, hiking the Bear Creek Trail in the Colorado Rockies at high altitude. This time, I thought I had it handled. A few years older but in better physical condition, I am taking Diamox to help and am much more aware of the effects of altitude. Starting the Trek to Everest Base Camp This is day eight of our trek, and we are in the village of Lobuche. At 16,170 feet, it is our last stop before we push on to Base Camp. It is late October 2012, and my husband, Bill, and I are traveling with a small group of Americans, led by both American and Nepalese guides. Andrew, the youngest member of our group at 30, was the third person to come down with the fever, chills, nausea, and diarrhea associated with acute gastroenteritis brought on by ingesting the wrong thing. Such an affliction is always unpleasant but here particularly so, as spending inordinate amounts of time in the less-than-pristine and always frigid (whether inside or outside) toilet is miserable. Neither Bill nor I have been struck with the stomach bug yet, but I have been dealing for several days with mild symptoms of acute mountain sickness, or AMS, the proper name for altitude sickness. It began with a headache at 14,000 feet and has gradually worsened, but so far isn’t severe enough to keep me from moving on. Joe, our American guide from Backwoods Adventures, is keeping a close eye on me (and all the others) to make sure we are healthy enough to continue. A severe case of AMS could be deadly and, at some point, a hiker experiencing symptoms must simply descend to cope. A Peek at Mount Everest on the Approach to Base Camp Getting this far is an accomplishment. We have hiked 32 miles since our arrival at Lukla, the starting point for the trek, and home to an airport that has the reputation as “The World’s Most Dangerous.” The unusually short airstrip is squeezed between the side of a mountain and a cliff with a nearly 2,000-foot drop. Volatile weather conditions increase the risk, so pilots flying from Kathmandu must choose their timing carefully. On our first attempt to fly out of Kathmandu, the plane turned back because the landing gear would not retract. Once the mechanical issue was resolved, wind conditions at Lukla prevented departure for several more hours. It was 2 p.m. when we finally left Kathmandu for the 45-minute flight to the village at 9,800 feet elevation. It was a relief to have feet on the ground after the harrowing flight and, after a late lunch, we started to walk. Over the five miles to our lodging in Phakding, we actually descended to 8,700 feet, hiking much of it in the dark. View of Ama Dablam along the Hike to Everest Base Camp Our path through the Himalayas follows a well-worn trail first established by real mountaineers who didn’t turn back at the base of Mount Everest. Trekking to Base Camp as a destination began in 1965 when a British mountaineer and former Ghurka officer, Colonel Jimmy Roberts, had the notion that people would pay for the privilege of following in the footsteps of Hillary and Tenzing through the Dudh Kosi River Valley, along the Khumbu Glacier, and to the base of Everest. And they did, with trekking now a big contributor to tourism in Nepal, one of the world’s poorest countries. Accommodations along the trail are in “tea houses,” which exist to provide bed and board to trekkers. While these lodges offer a distinct advantage over tents in the chill of late October, we would be seriously uncomfortable without our zero-degree sleeping bags in the unheated guest rooms. While hiking we have no difficulty staying warm, but each afternoon when we reach our destination we take refuge in sunrooms attached to the tea houses. Unfortunately our arrival seems to coincide with the daily appearance of clouds, which roll down the river valley and obscure the sun. Toward evening, yak dung stoves in the common rooms are fired up and guests gather around, trying to soak up heat for the night ahead. Warmth remains elusive the entire trip. Cold, in fact, is constant. A Rhododendron Forest Near Deboche After the easy first leg of our hike from Lukla to Phakding, we climbed 2,500 feet over six miles to Namche Bazaar – a hard day. The trail follows the Dudh Kosi valley north through pine forest, and was crowded with trekkers, porters, natives carrying insanely large loads, and yak trains carrying all manner of goods. Everything up here is carried by man or beast. There are no roads to these villages, and no wheeled vehicles that could reasonably convey loads up these steep, rocky, narrow trails. We have learned to step out of the way of the ubiquitous yaks – or dzopkyos (a cow/yak mix). “Yak attack!” has become our cry when we need to give them room on the trail. They appear docile but have fierce-looking horns. Our pace, it occurs to me, is life at the speed of yak, and for this place, that is plenty fast. Exploring Along the Way to Base Camp Thamserku, a 21,679-foot peak, rises to the east of Namche Bazaar and came into view at the village of Mondzo, where we stopped for tea. The trail crosses the river numerous times along our 40-mile path to Base Camp, typically on steel suspension bridges fluttering with prayer flags. Here we used one of the steel structures to cross to the river’s east bank; the remains of the old wooden bridge destroyed by floods in 1985 are visible upriver. Along the trail, the villages are interspersed with forests of rhododendron, magnolia and fir. Prayer wheels decorate the village entrances and mani stones are everywhere – alone or in piles – beside villages, at crossings, along paths and on mountains. Ama Dablam stands sentinel over the Dudh Kosi River Valley. Namche Bazaar is the main trading center and tourist hub for this region and there we stayed two days to acclimatize at the 11,306-foot elevation. Our stay at Namche included a hike to the Everest View Hotel which, according to the Guinness Book of World Records, is the highest hotel in the world at 12,729 feet. As the name suggests, it also offered our first view of Mount Everest, which reaches more than 29,000 feet above sea level. Its summit cone is almost obscured by other mountains, but is distinctive because of the constantly blowing snow created by high winds at its peak. Here, 22,349-foot Ama Dablam dominates the scenery, its ghost-like shape making it hard to forget. We saw it ahead of us for several days as we walked up the valley. Then, suddenly, it was behind us. Acclimatizing and Staying Warm Over the next several days we made slow progress – the trek is timed intentionally to provide plenty of time for acclimatization. Fitness is one thing, having enough oxygen is yet another, and both are critical to success here. From Namche to Phortse to Pangboche, then Pheriche, where we took another rest day, at 14,000 feet. The houses and stone walls of Pheriche scatter along the broad valley of the Khumbu Khola, a tributary of the Dudh Khosi which drains from the Khumbu Glacier at the foot of Everest. Pheriche is home to a high altitude research center at the Himalayan Rescue Association clinic, where we heard a sobering lecture on the effects of high altitude. With an extra day here for acclimatization, we hiked to a ridge between Pheriche and Dingboche, affording spectacular views up and down the river valley. Eat, hike, sleep, try to keep warm, repeat. Everything has become difficult as we have ascended. Eating enough is a challenge. High altitude suppresses appetite but at the same time, the body needs more and more calories. And the food becomes less and less palatable. Producing food for western tastes on yak dung stoves at 14,000 feet must be difficult. And protein is hard to get. We were warned to avoid eating meat on the way up because of contamination concerns. Seeing halves of pigs carried up the mountain, I could see why. Susan and Bill Dragoo pause on the final approach to Mount Everest Base Camp. The push for Lobuche, gaining more than 2,000 feet of elevation in five miles, was another hard day. We followed a wide trail north along the bottom of the valley, a desolate landscape, the trail going directly up the gravelly terminal moraine of the Khumbu Glacier. At the top of a ridge, the path bears left and is covered with memorials to lost climbers and sherpas – piles of stones and masonry pillars, prayer flags everywhere among the wispy clouds and thin air. I am walking very slowly now. My headache recurred last night and Joe advised me not to overexert, which could exacerbate the AMS. Any exertion at this altitude is acutely felt. I have control over so little – my body responds as it will to the lack of oxygen – but I am trying to be very compliant so I can make it to Base Camp. It is cold inside the “Mother Earth House” lodge in Lobuche, and it will be an even colder night. We have an early start tomorrow, to Gorak Shep then on to Base Camp. It will be a long day. Hiking on to Mount Everest Base Camp The first section of the trail from Lobuche follows the gap between the glacial moraine and the mountain wall. To the right, the Khumbu Glacier gurgles under a blanket of rocks and gravel. The landscape grows more desolate, and the trail is marked only by cairns of stones and the dung of yak trains. Soon Kala Pattar comes into view, an 18,192-foot mound of dark mountain rubble which provides perhaps the best view of Mount Everest in the Himalayas and which several of us had hoped to climb. At this point, I have my doubts as I trudge. Gorak Shep is a small collection of lodges providing basic needs – food and a space to sleep. We stop there and make our sleeping arrangements and continue to Base Camp, a draining scramble starting at the north end of Gorak Shep. My headache is no worse and I am thankful. I walk at a steady pace, optimistic now that I will make Base Camp. Soon we are there. Base Camp is a semi-permanent village of tents and prayer flags at the bottom of the Khumbu Icefall at 17,519 feet. Everest is not visible from here – it lurks somewhere beyond the icefall. We stay on Base Camp’s edges. There are crowds of people. It is an emotional moment for me, the culmination of this trek. We snap photos and return to Gorak Shep, a place which seems like – and in some ways, is – the end of the earth. Susan and Bill Dragoo at Mount Everest Base Camp After a cold night and a headache (I did not attempt to summit Kala Pattar), we begin our descent, which seems like a lark, as oxygen becomes more and more plentiful. On our return to Lukla, we walk through an enchanting rhododendron forest near Diboche, climb to Tengboche Monastery, and visit an old Buddhist nunnery, but become more and more eager for warmth, hot showers, and good food. On Day 14, we walk back into Lukla and I decide, yes, this was definitely my new Hardest Thing. And that’s why I did it. Mount Everest Basecamp Trek: Need to Know Information Nepal is a small, land-locked strip of land tucked between Tibet and the northeastern border of India. Its capital city is Kathmandu, with a population of 1.6 million. Mount Everest is the highest mountain on Earth, with its summit about 29,032 feet above sea level. The mountain is part of the Himalaya Range in Asia. Best Time to Go Spring or fall to avoid the summer rainy season. October and November have the best weather for trekking and comprise the high tourist season. The trek itself takes about two weeks and there are travel days before and after, so schedule about three weeks for the whole experience. Getting There Several reputable tour companies offer guided treks to Mount Everest Base Camp. Getting to Nepal from the U.S. takes about two days. Our route took us from Los Angeles to Seoul, South Korea, then to Bangkok, Thailand, where we stayed overnight. The next day we flew to Kathmandu, Nepal, staying two nights before flying to Lukla for the start of the trek. Maps National Geographic Everest Base Camp Trekking Map Books There are many available. Two good choices are Lonely Planet’s Trekking in the Nepal Himalaya and Cicerone’s Everest, A Trekker’s Guide. About the Author Susan Dragoo is a writer and photographer living in Norman, Oklahoma who would rather be hiking just about any day of the year. Editor's Note: This article originally appeared in Issue 21 of TrailGroove Magazine. You can read the original article here for additional photos and content. -
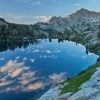
Sawtooths & Spires: Backpacking the Sawtooth Mountains
David Cobb posted a blog entry in TrailGroove Blog
The people of Idaho know what a gem they have in the Sawtooth Range, but few people elsewhere in the world have a clue it exists. Recently my travels took me to Stanley, Idaho which lays claim to being the gateway to the Sawtooths, and from here it’s an easy drive to numerous trailheads in the Sawtooth Range. I have photographed this mountain range many times around its periphery, but this time I wanted to backpack through the heart of these mountains. With the help of a shuttle, who would shuttle my car while I was backpacking, I could make a linear trip from one end of the Sawtooth Range to the other. Stanley is a small town, but it does have a grocery store and a shop where gear can be purchased. It also has the Stanley Bakery which serves the best breakfast around for hundreds of miles. With the owner’s recent purchase of the Sawtooth Inn and Restaurant just a few blocks from the bakery, the local dinners are not to be missed either. Backpacking the Sawtooth Mountains & Sawtooth Wilderness This 217,000-acre Wilderness was signed into law and protected by congress in 1972. The land is filled with granite spires (with 50 over 10,000 feet) and over 400 alpine lakes. There are hundreds of miles of trail and more off-trail routes to secluded valleys and isolated lakes. During the month of September the Sawtooths are usually dry, with temperatures in the 70s for highs and 30s for lows. Of course snow can fall at any time in this range, and I’ve been in the foothills of these mountains when the mornings were in the low teens. It’s pretty easy to get to the high country in the Sawtooths, the town of Stanley already sits at 6,260 feet and so by walking 5 miles from the Iron Creek trailhead you’re already at a high alpine lake. My walk began at Iron Creek – an early evening start that allowed me to reach a classic Sawtooth lake for my first camp. For the majority of my hike the trail I walked for 55 miles would undulate between timberline and alpine with an occasional dip into a deep valley. After leaving the lake behind, my high valley trail passed numerous tarns, rubble, and a couple small alpine lakes. Walking around the backside of Mount Regan, I soon left the high country and descended into a lowland sage-covered prairie to ford the raging North Fork Baron Creek. In early season this crossing is potentially hazardous, but in late season it’s only a shin-deep wade. A few switchbacks later I’d descend to the lowest point on the hike when I crossed Baron Creek. From here, I began another climb towards a large hanging valley of the Baron Lakes area, which is bordered by the jagged Monte Verita and Warbonnet Peak. I climbed to 9,160-foot Baron Divide for views of my upcoming travels (in the Sawtooths passes are called divides), and then took a 1,700-foot descent down into the forested Redfish Valley where I began my 2,000-foot ascent to the Cramer Lakes under Sevy Peak and the Arrowhead and 9,480-foot Cramer Divide on the shoulder of the Temple. At the lakes I found a scene artist Albert Bierstadt would have loved, with a picturesque waterfall and a backdrop of serrated peaks. Above the lakes to the divide is a walk though glacial moraine amongst fallen boulders and glaciated stone. All the hiking is under the watchful eye of The Temple, a magnificent spire of a mountain. Once I topped Cramer Divide, I recognized that the Sawtooth Range abruptly changes from jagged peaks to more rounded mountains. The land looks softer and more approachable. A quick drop to a beautiful lake brought me to meadows filled with huckleberries. I wish I had camped here, since this was the most beautiful lake I had seen on my hike. My route took me to Edna Lake with its views of majestic Glens Peak. After two more climbs and two more 9,000-foot-plus passes, my path descended into the Yosemite-like Toxaway Valley. A walk west brings you to spectacular Toxaway Lake, but east lowers you into a wide, low, forested plain. After a climb over the shoulder of Parks Peak I descended for the last time to the shoreline’s calm waters of Pettit Lake. My shuttle had moved my vehicle during the hike (as planned) and I was pleased to find my automobile right where expected. Final Thoughts on Hiking the Sawtooths A walk through the spires of the Sawtooths is strenuous and impressive. In late summer be prepared for all sorts of weather. Even though most months bring ample sunshine, I was pummeled by rain for one night on my route. This land has abundant amounts of wildlife and large mammals abound: sheep, goat, bear, cougar, deer, elk, and even a few moose make their way through this wilderness so keep an eye out for them. Bark beetle and fire has devastated the lower lands, but near timberline the trees look healthy and are devoid of much disease. Outside of Idaho the Sawtooths are a lesser known wilderness area, but the land is enchanting and some of the most beautiful I’ve visited. If you start planning a trip here, I have a few more suggestions for you listed below. Sawtooth Mountains Need to Know Information Free permits are available at the trailhead and there’s a lot of information online. Camping is allowed most places within the Sawtooth Mountains. Best Time to Go Early summer can have heavy runoff and the stream crossings can be treacherous, and mid-summer can get crowded in the backcountry. I prefer the warm days and cool bug-less nights of early September, but you’ll need to check for possible trail closures due to fire. Getting There Stanley, Idaho is the gateway to the Sawtooth Range, and the Iron Creek road to the trailhead is about 3 miles west of Stanley off of highway 21. My end point at Pettit Lake on Pettit Lake Road is about 20 miles south of Stanley. Maps and Books I used the Sawtooth & White Cloud Mountains Trail Map. Also available is the National Geographic Trails Illustrated 870 map. In regards to books, Trails of the Sawtooth and White Cloud Mountains by Margaret Fuller, published by Trail Guide Books offers hiking suggestions, maps, and trail descriptions. See the Hiking Idaho Falcon Guide for more hiking ideas in the state. All images in this article © David M. Cobb Photography. Editor's Note: This article by contributor David Cobb originally appeared in Issue 11 of TrailGroove Magazine. You can read the original article here for additional photos and content. See more of David’s photography at dmcobbphoto.com. - Earlier
-
A Hike of Water & Sand: Backpacking Coyote Gulch, Utah
David Cobb posted a blog entry in TrailGroove Blog
Water and sand, water and sand, water and sand – it’s been a few years since I visited the canyon country of Utah and I forgot about the mix of water and sand here that can permeate one’s hiking shoes. I should have worn sandals. I read about walking the wet canyon bottom, but I stuck with my hiking shoes anyway. This time I arrived to explore Coyote Gulch, a photogenic but crowded canyon which cuts across Grand Staircase National Monument and the Glen Canyon National Recreation Area of south-central Utah. After bouncing an hour down the 33 miles of dirt-covered Hole-in-the-Rock Road, my hike began at the Hurricane Wash trailhead. You can obtain a free permit here to cover your hike, if there are still some available. My goal for this trip was to explore the Coyote Gulch area thoroughly from Hurricane Wash, connecting with Coyote Gulch and walking it to its convergence with the Escalante River Canyon. I’d then retrace my steps for awhile up Coyote Gulch and jutting right when Hurricane Wash juts left. I’d take this route back up the gulch until it meets up with the Red Well Trailhead, walking the road from here back to my car, and creating a large 30 mile letter “Y” of a hike. A Coyote Gulch Backpacking Trip Begins The hiking was easy enough at first, as the trail crosses sandy mounds of desert and dry wash beds. A few groups of backpackers were leaving as I walked in, but I was to see many more hikers before the day was through. This is not the place to go for solitude; as a matter of fact I saw more people on this backpacking trip than all my 60-70 Utah canyon hikes put together (excluding Virgin Narrows in Zion National Park). That was ok with me. I had hiked many other canyons in the Escalante region, but this was still on my list to explore and photograph. As I walked onward, Hurricane Wash slowly deepened and the walls narrowed as I approached Coyote Gulch. A spring generated a small stream which grew deeper as I hiked downward, and it was here along the trail I began to find poison ivy. Since I’m horribly allergic to the stuff, I watched where my arms and legs were at all times. Water was never a problem on this hike, but because there is so much of it, I also felt more mosquitoes and chiggers than any time in canyon country. Once Hurricane Wash converged with Coyote Gulch, the canyon widened and so did the creek. Here campers and tents were seemingly around every bend. Lizards scurried across last year’s fallen leaves, and you’d swear they were rattlesnakes – that took a little time to get used to. Coyote Gulch deepened and opened up to huge alcoves. From here to the meeting of the Escalante River, you can choose to try and keep your feet dry or just walk the sandy bottom of the creek (good luck keeping your feet dry). In a couple of miles the route passes by Jacob Hamblin Arch, and after a couple more miles you’ll walk through Coyote Natural Bridge. If you take the higher slickrock route (instead of the bowed canyon cascade route) you’ll get a good view of Cliff Arch. Along the way, you’ll pass a panel of Fremont Indian pictographs too. In the lower part of Coyote Gulch the waterfalls begin, and with that the hike begins to lower off ledges and down benches. I wanted to spend time with these photogenic cascades and take advantage of some of the morning light bouncing off the canyon walls. The lower part of the canyon seemed more flower-filled too which added to the ambiance. Somehow I followed a rock cairn towards a ledge. Here I got off-route, until a Good Samaritan backpacker came along to direct me back up canyon. The trail at this signed junction actually goes south uphill between cliff faces. A few hundred foot slog in sand gives you a view of the large Stevens Arch across the Escalante River. Further uphill will bring you to a trailhead and also a junction with the Escalante below. A longer hike can be taken from here, but for me this was trail’s end. And a reverse route was begun. Stevens Arch The Hike Back to the Trailhead I always like reversing my route in canyon country for the different perspective. I took a different route at times or walked the other side of the canyon for a change of scenery. Once I reached the confluence of Hurricane Wash and Coyote Gulch I continued my walk up Coyote Gulch to its beginnings. Every time I thought the canyon was about to peter out I’d round the bend and there would be another 500-foot alcove shading me from the sun. Once the trail passes through a gate at a barb-wire fence you start hiking through cow country. Cow pies litter the water and splatter the sand, and within a few miles the water turns to dust. From here it’s a dry hike back to the Red Wall Trailhead along sandy-bottomed washes and over slickrock. I followed the road from here for about 4-5 miles back to my car. Backpacking Coyote Gulch: Need to Know Information Permits are available at the trailhead. Good lightweight footwear helped make my feet more comfortable, and get ready for wet and sand, wet and sand, wet and sand. Best Time to Go I recommend taking this hike in spring or fall. If you’d like more water along your walk, then go for spring; but if it’s the fall color of cottonwoods that you’re after, choose autumn for your seasonal hiking. Getting There From State Route 12 just east of the town of Escalante in south-central Utah, take the Hole-in-the-Rock road (may be impassible if wet) 33.5 miles to the Hurricane Wash Trailhead. Car shuttles can also be arranged ahead of time through local outfitters if you’d like to drop your car off at one end and shuttle to a starting point. Maps I used the National Geographic Trails Illustrated Canyons of the Escalante #710 Map. For getting to and from the trailhead and exploring other Utah hikes, an atlas like the Delorme Utah Atlas & Gazetteer can be useful. Books There are many hiking and canyoneering books covering the Escalante region of Utah, you might want to check out the Falcon Guide: Hiking Grand Staircase-Escalante & Glen Canyon Region by Ron Adkison. All images in this article © David M. Cobb Photography. Editor's Note: This article by contributor David Cobb originally appeared in Issue 9 of TrailGroove Magazine. You can read the original article here for additional photos and content. See more of David’s photography at dmcobbphoto.com. -
 kiansmart5 joined the community
 -
 tbglodt joined the community
 -

Hiking and Exploring the Wichita Mountains of Oklahoma
BSuess posted a blog entry in TrailGroove Blog
Oklahoma is generally not high on most lists of hiking destinations. Common perceptions of the state are rooted in the Dust Bowl: flat, arid plains; dust storms; and a generally inhospitable place to live. Much of Oklahoma still fits this bill, though it is less arid than expected, and the farms and ranches are productive again. It does not seem like the place for hikers to go in search of interesting terrain, wilderness and beauty. Emerging from the unyielding flatness of the Oklahoma plains, the Wichita Mountains are a revelation of surprising beauty, craggy mountains and untamed wilderness. When nearing the outskirts of the Wichitas, the flatness of the fields gives way to rolling foothills punctuated by an occasional rocky outcrop. Once in the heart of the range, rugged domes and high peaks composed of pink, weathered granite proliferate, revealing an unexpectedly ragged mountain fastness. Yet, the mountains, amazing as they are, are not the only treasures in the Wichita Mountains. The Wichita Mountains National Wildlife Refuge contains the bulk of the range itself and nearly all the publicly accessible land. Consequently, these mountains are home to one of the largest bison herds on public lands as well as elk, deer, prairie dogs, armadillos and the other usual denizens of the plains, plus an unusual herd of feral longhorn cattle. Taken together, the mountains and the wildlife combine to form an exceptional hiking destination. First Hikes in the Wichita Mountains I first discovered the Wichita Mountains at the beginning of a four-year stint at graduate school in Dallas. Growing up in northern California, I had not quite realized how important mountains and the wilderness were to me. My first semester in Texas was difficult as I came to terms with my self-imposed exile in the flatlands. When asked about where to go, Dallas residents all pointed me to the Texas Hill Country, which, though interesting and supplying some hiking opportunities, failed to satisfy my hunger for wilderness. By accident, I stumbled across a brief reference to the Wichita Mountains on the internet. Though doubtful of their mountain qualities I made the three hour drive north to Lawton, Oklahoma the following weekend. As I approached, the peaks loomed on the horizon. It was a dramatic moment, the realization that a mountain oasis existed not far from the Dallas Metroplex. Not only were the Wichitas a wildlife refuge, they were also a hiker’s refuge. Although the area was not vast compared to a national park or a national forest, the mountains were so rugged that there was immense opportunity for exploration packed into a relatively small area. Over the next four years I returned to the Wichitas again and again, piercing ever deeper into the heart of the mountains, discovering unexpectedly wonderful sites. Though there were many great memories built during these journeys, the one that stands out was a backpacking trip during the elk rut. All afternoon and through the night, their unique bugle could be heard as I set up camp and went to sleep. That night, as the elk bulls continued to call out into the darkness, a lone bison walked nonchalantly through my camp, only a few feet away from me. As I lay there looking up at the stars, I was amazed that such a land could be found in Oklahoma. The Wichita Mountains are a small mountain range. Rather than being a single block of mountains, the Wichitas a series of several separate batholiths. The western half of the range consists of numerous isolated granite islands protruding from the flat Oklahoma farmland. Most of this area is privately owned, though there are two spots that are accessible to the public. Quartz Mountain State Park is the larger with the more interesting landscape. The park boasts a few developed trails, a number of very good opportunities for off-trail exploration, and Baldy Point, one of the finest climbing areas in the Wichitas. Great Plains State Park also offers public hiking. Unfortunately, most of the park is occupied by a lake and only the southern fringes have any mountains of note. Thankfully, there is a developed trail here that explores this small slice of the park. Hiking the Eastern Wichitas The eastern half of the Wichita Mountains is remarkably different. Rather than isolated plutons punctuating the land, the eastern range is a large collection of peaks, canyons and valleys. Almost the entire area is contained within the Wichita Mountains National Wildlife Refuge (WMNWR) and the U.S. Army’s Fort Sill Military Reservation. Although Fort Sill is closed to the public, hikers and backpackers will find ample opportunities in the WMNWR to explore the part of the Wichitas with the highest concentration of peaks, exposed granite, amazing rock formations and wildlife. Within the WMNWR itself, much of the land is set aside for use only by the refuge’s animal denizens. Still, there are three portions of the park that are open for public exploration. The first of these is the Mount Scott area, at the extreme east end of the park. No trails exist within this area but it consists of open granite dotted by the occasional juniper and post oak, trees that are common throughout the entire mountain range. Although this area is essentially trail-less, there is a road to the top of Mount Scott, the second highest peak in the WMNWR. The views from the summit are spectacular and take in most of the refuge and beyond. The Dog Run Hollow area, the second section of the WMNWR that is open to the public, is of more interest to hikers. This occupies the central part of the refuge. Unlike the Mount Scott area, there is a well-developed trail system providing access to some interesting destinations. The Dog Run Hollow Trail is a large, five-mile loop. Connector trails allow for a few different route options. The most interesting part of the Dog Run Hollow Trail is the east end, where the trail follows the rim of Cache Creek’s small but rocky canyon. During high water the creek tumbles down pretty cascades before flowing into Forty-Foot Hole. At the hole, the creek passes through a small gorge with sheer cliffs. The name is derived from the fact that the cliffs extend forty feet below the surface of the water, making a surprisingly deep pool. Beyond the trail system, the Dog Run Hollow area also has plenty of room for cross-country exploration on the west side of Cache Creek. This includes another, larger canyon called the Narrows, a favorite area for rock climbers. Charon's Garden Though the Mount Scott and Dog Run Hollow areas offer good hiking and scrambling opportunities, the Charon’s Garden Wilderness is the jewel of the Wichita Mountains. Here one finds all the best attributes that define the Wichita Mountains: high peaks, narrow canyons, caves, unusual rock formations, wildlife, and human history all gathered together, amplified and arranged in spectacular fashion. Although the Wichitas’ pink granite is ubiquitous throughout the mountain range, here it is manifest on an unequaled scale. The area is so rugged that it is easy to see why it was set aside as a wilderness, preserved in its primeval state: it was considered too inhospitable to be of any use to farmers and ranchers. However, what was unwelcoming to those who earn their living from the ground is a paradise to those who draw other kinds of sustenance from the land. The Charon’s Garden Wilderness offers hikers and, to a lesser extent, backpackers, a chaotic jumble of peaks and canyons to explore. Though the area is small, it is such a maze of rock that there is the opportunity for multi-day exploration without exhausting all of the sights found in the wilderness. There are two developed trails in the Charon’s Garden Wilderness. Both trails depart from the Sunset Trailhead on the area’s north side. The most popular route is the Elk Mountain Trail, a 1.1-mile trail that climbs to the broad summit plateau of Elk Mountain, the wilderness’s tallest peak. Though relatively short, the trail is only the beginning of the journey on Elk Mountain. The summit is expansive, with lots of potential for exploring the enormous boulders and delicate vernal pools. The Rock Rooms are a series of caves created by massive boulders stacked together in a draw on the south side of Elk Mountain. Some enter the caves and descend through the darkness from the summit plateau several hundred feet down to an exit at the base of the mountain. The second trail to penetrate the wilderness is the 2.2-mile Charon’s Garden Trail. This path skirts the western foot of Elk Mountain before passing through the Valley of the Boulders, which also contains cavernous rooms between the massive house-sized boulders. High above the trail brood the enormous Apple and Pear, a pair of boulders, true to their namesakes. Beyond the boulder fields, the trail parallels Post Oak Creek, the only watershed in the Charon’s Garden Wilderness. The route finally ends at the wilderness area’s southern trailhead. Along the way, the path passes by Post Oak and Little Post Oak Falls, the only notable waterfalls in the Wichita Mountains. Though these trails offer scenery far exceeding anything one would expect from this part of America, they are really just appetizers to the real adventure of the Charon’s Garden Wilderness. The only way to truly explore this wilderness is to depart the trail and scramble over the cliffs and boulders, climb down into the draws filled with thickets of juniper and oak, and ascend the peaks that dot the wilderness. There, one finds the true essence of the wilderness in the Wichita Mountains. Though human feet seldom journey into the hinterlands beyond the trails, the feet of bison, deer and elk are no strangers to these lands. They, along with geologic wonders like the appropriately named Crab Eyes and the numerous peaks, ensure there is no lack of destinations to explore. Although the number of official trails in the wilderness is limited, the Refuge makes the expectation of cross-country travel explicit. Backpacking is allowed in the wilderness, but camping is permitted only in a broad valley between the heart of the wilderness and Sunset Peak, a lone mountain occupying the northern part of the region. While there are use-trails, there are not official trails accessing the camping area. Bison and longhorn cattle often frequent this valley, adding significantly to its scenic quality. The Crab Eyes, twin rocks perched precariously on a 100 foot tall column of rock, are easily reached from the camping area as well. Hikers and backpackers are not the only people who have fallen under the spell of the Charon’s Garden region. Rock climbers have developed numerous routes in the wilderness and elsewhere in the Wichita Mountains. Indeed, the Wichitas are considered one of the finest climbing destinations east of the Rocky Mountains. The granite slabs and walls draw climbers from around the area and across the country. Trails blazed by climbers to reach climbing areas are eagerly used by hikers as well. Final Thoughts on Oklahoma's Wichita Mountains After I finished school in Texas, I returned home to California. Now surrounded by more familiar hiking haunts, I strangely found myself longing for my small granite refuge in Oklahoma. The tiny mountain range had cast its spell on me and helped me to redefine my definitions of wilderness, of beauty and what I considered spectacular. Places in California that I had disregarded in favor of the grand towers of the Sierra Nevada had a new appeal to me. My time in the Wichita Mountains had blessed me with an appreciation for the beauty found in lands not so tall or vast, but still rich with a glory and wonder of their own. I suspect this spell of the Wichitas will be with me as long as I live. Hiking the Wichita Mountains: Resources For getting to and from the trailhead and exploring other Oklahoma destinations, the Delorme Oklahoma Atlas & Gazetteer can be a useful resource. See the Hiking Oklahoma Falcon Guide for more information on hikes in the state. Editor's Note: This article by contributor Bubba Suess originally appeared in Issue 9 of TrailGroove Magazine. You can read the original article here for additional photos and content. -
A Spring Hike on the Buffalo River Trail of Arkansas
Susan Dragoo posted a blog entry in TrailGroove Blog
A cool, rainy weekend in early April provides the perfect backdrop for a hike on Arkansas’ Buffalo River Trail. Moist spring weather in the Ozarks means the lush hardwood and pine forest is bursting with wildflowers, ferns and all manner of growth, keeping hikers engaged in identifying each plant and marveling over the delicate and diverse shapes and intense colors. Cloudy, humid weather intensifies the deep, vernal greens enveloping the trail, and likewise accentuates the rainbow shades of countless blossoms. The Buffalo River Trail (BRT) runs along its namesake stream in northwest Arkansas for 62 miles in three non-contiguous segments. The Buffalo River is a “national river,” protected and managed by the National Park Service. The area is replete with hiking trails, and is also popular for canoeing and kayaking, camping, fishing, and horseback riding, it’s also known for its scenic bluffs, and its numerous waterfalls and historic sites. No matter how you choose to explore the area, any outdoor enthusiast will have a multitude of exploration opportunities to take advantage of. Hiking the Buffalo River Trail For hiking, the most popular segment of the BRT, and one that is well-used for backpacking, lies in the river’s “Upper District” and runs 36.3 miles between Boxley and Pruitt, staying mostly along the highlands south of the river. From Boxley, the trail heads north through several large campgrounds, including Steel Creek, Kyle’s Landing, Erbie, and Ozark. Backcountry campsites are also plentiful along the trail. It’s reasonable to backpack the BRT in a weekend, or break it up into several day hikes. I recently spent an April weekend there with my hiking buddies, who had day-hiked the segment from Boxley to Kyles Landing the previous autumn. For our spring hike, the plan was to camp at Ozark Campground, located between Erbie and Pruitt, and hike two segments, one 7.5 miles from Kyles Landing to Erbie, and one 8.7 miles from Erbie to Pruitt. This required placing cars at both ends of the trail for the first segment. Getting there, in and of itself, was an adventure. Traveling the rough dirt road to our first trailhead with all eight of us piled into one vehicle for what seemed like triple the five and a half long miles was very uncomfortable, but also quite comical and undoubtedly memorable. This approach, of course, is not recommended. At Ozark Campground our first night, I quickly spied my favorite wildflower of the eastern deciduous forest, the mayapple. Under its umbrella-like foliage grows a single flower which becomes the “apple” of May, although sometimes the fruit does not appear until early summer. Mayapple colonies look like a flotilla of green umbrellas hovering over the surface, and the flowers require some effort to see, usually involving lying on one’s belly for a good look. The Kyles Landing-to-Erbie segment started with a nearly 500-foot ascent to the top of Buzzard Bluff. Although there is some additional climbing farther down the white-blazed trail, it is neither as vertical nor as extended as this one. At least we got it out of the way. Even with recent rains, stream crossings were either dry or very shallow as we progressed along the trail. The dogwoods were blooming with fervor and their toothed flowers provided a lace-like framework for nearly every vista. Soon we spied the odd wood betony blooming amid the moss and reindeer lichen. With fern-like leaves and deep crimson or pale yellow swirled petals, wood betony resembles a pinwheel. And, lucky for us, the delicate wild iris, definitely a rival for my favorite, was blooming in abundance. Near the 2.5-mile mark, we came across a spur to the 48-foot Twin Falls, also known as Triple Falls, definitely worth the short side trip. Although there are three cascades, it is called Twin Falls for the two water sources that feed the falls from above, one a creek and the other a spring. Back on the main trail, we spied the wake robin, a form of trillium, its dark maroon bud peeking out from enfolding green arms. And soon appeared the shooting star, looking like a pure white columbine. Ferns and wild phlox encroached upon the muddy trail, creating a look of enchantment beneath the moss-covered bluffs. As we crossed Sawmill Hollow Creek, an old stone highway bridge appeared, looking charming but completely out of place in the natural setting. Over slippery small cascades and through deadfall we continued, ending with a walk through the historic Parker-Hickman Farmstead, with a log house built in the 1840s, before ending the day at Erbie Campground. The Last Day & Reflections on the Buffalo River Trail Our second day, the Erbie-to-Pruitt leg of the hike required us to add a few extra miles at the end. Automobile access to Pruitt Landing was closed because of road construction, so our plan was to hike from Erbie through our camp site at Ozark Campground, to Pruitt, and then return the 2.5 miles to base camp. The scenery was much the same, walking along a wooded hillside through lush foliage. The trail wound around a wildlife pond, its still waters reflecting the graceful limbs of the surrounding dogwood trees, filled with blossoms. As we approached Pruitt, our view of the river opened up, the turquoise water and a black-streaked bluff accented by two red canoes. After a brief respite at the Pruitt picnic area, we returned to Ozark. While our spring hike offered a highly sensory hiking experience on the BRT, autumn is its rival, with the bright foliage of the hardwoods and a crispness in the air, versus the humid atmosphere of the vernal months. No matter when you choose to hike the BRT, the trail offers a unique experience with a little history along the way. And after hiking its forested trails, crossing its cascading waters, and gazing from its rocky bluffs, the Buffalo River Trail leaves a hiker with a certain sense of quiet and solitude that it seems only the hills and hollows of the Ozarks can offer. Hiking the Buffalo River Trail (BRT): Need to Know Information The BRT’s two other sections are Dillard’s Ferry to South Maumee, an 11.4-mile trail in the Buffalo’s Lower Disrict, and the Woolum to Tyler Bend section, which starts at Woolum and runs just over 11 miles in the Middle District. Woolum is also the end point of the 165-mile Ozark Highlands Trail, a trail that can be thru-hiked starting at Lake Fort Smith. Another less-known trail often intersects with the BRT but provides a different perspective. The BRT mostly takes a high route along the bluffs but the Old River Trail (ORT) follows a historic farm road along the river for 13.2 miles, crosses the river multiple times, and passes through numerous old farmsteads. It is open to equestrian users as well, running from Ponca to a horse camp at Old Erbie. Abundant camping is available throughout the Buffalo National River area. Lodging is also available in and near Jasper and Ponca, as are canoeing outfitters and shuttle services. Best Time to Go Spring and fall are the best times to hike the BRT, as mentioned above. Mild winter days also offer excellent hiking opportunities. Summers are hot and humid in the Ozarks and thus less comfortable for hiking. Warm weather considerations in the area include poison ivy and ticks. Getting There From Interstate 40, take Exit 81 and travel about 70 miles to Pruitt, Arkansas. Ozark Campground is located on County Road 129. Books and Maps More information is available in Tim Ernst’s guidebook, Buffalo River Hiking Trails. You can find a National Park Service map here, and National Geographic offers their Trails Illustrated Buffalo River maps. For getting to and from trailheads and exploring other hikes in the state, the Arkansas Delorme Atlas & Gazetteer can be useful. For more reading on the Buffalo River Trail, see Backpacking the Buffalo River Trail: Great Heights. Editor's Note: This article originally appeared in Issue 51 of TrailGroove Magazine. You can read the original article here for additional photos and content. -
Waterfall Hikes in the White Mountains of New Hampshire
eliburakian posted a blog entry in TrailGroove Blog
The White Mountains in New Hampshire are renowned for having the best hiking east of the Mississippi River. Treeline in New Hampshire is around 4,000 feet, and there are forty-eight mountains in the state that rise above this level. Most people have heard of Mt. Washington, infamous for the “worst weather in the world” and mountain climbers of all levels train in the Whites for major expeditions. In addition to the beautiful peaks however, there are a ton of small and large waterfalls throughout the region. During the process of putting together a book about waterfalls in New England, I realized something. These are the nooks and crannies of our beloved forested and rocky landscape. Whereas the spine of the White Mountains provide the grandeur of the sweeping vistas, waterfalls provide an intimate, and often revealing portrait of the northern forest. The rivers and streams are the lifeblood of the land, and one quickly realizes the power that water has in shaping it. These short loops can be enjoyed by young and old and in most seasons. They are not the “best” waterfalls in New Hampshire, but represent a little tour of the types of waterfalls present in the region. In my journeys to the waterfalls of New England, I quickly realized many benefits to waterfall hiking. First, they’re photogenic. In the spring the water displays its power and in later summer and fall, low water allows the adventurous hiker the opportunity for a closer look as much of the rock may be dry. Also, many waterfalls have swim holes, perfect for hot summer days and many waterfalls are just a short hike, or none at all making it a great option for those with limited time. And best of all, the cloudy or windy or even rainy days, just the days you don’t want to be high on a mountain, often end up being the best days to experience the magic of waterfalls. Let these loops serve as a starting point in exploring the varied falls, cascades, caves, chasms, pools, gorges and many other features that make hiking to waterfalls in New Hampshire enjoyable time and time again. Appalachia Waterfalls Hike The Appalachia trailhead on Route 2 is the launching point for many routes in the northern Presidential Range. Tough trails climb up Mt. Madison and Mt. Adams. But not far from the trailhead lie a number of beautiful waterfalls, and an easy 2.6 mile loop can be made to visit a number of these. From the parking lot head straight and then at the next two junctions stay left on the Valley Way and then the Maple Walk until you hit the Fallsway Trail. All along the trail are beautiful falls and cascades. Just downstream from the trail junction is Gordon Falls. Turnaround and follow the Fallsway Trail up along Snyder Brook, visiting Lower and Upper Salroc Falls and then to Tama Falls. This is about 0.75 miles from the trailhead and a solid 500 feet of climbing. From Tama Falls, turn around and shortly take a left onto the Valley Way, following this downhill until it meets the Sylvan Way, where you’ll head left. Follow the Sylvan Way a little over 0.5 miles and you’ll get to the quiet and secluded Cold Brook Falls. When you’re ready to head back to the car, follow this down stream and head on the Link Trail back to the parking lot. Arethusa Waterfalls Arethusa Falls is one of the most well known waterfalls in New Hampshire, and it’s one of the biggest. At over 150 feet, the 700 foot climb to the base is well worth it. In the spring, the falls are a raging torrent of large sheets tumbling down an almost vertical wall, whereas in the fall and low water you can get right up to the bottom of it. Most of the people who climb to the falls don’t make the minimal extra effort to follow Bemis Brook lower down the mountain along the Bemis Brook Trail, where there are a number of smaller, but incredibly beautiful waterfalls which are more intimate and sculpted than the gigantic falls a few hundred feet above. This 3.0 mile round-trip partial loop leaves from the parking area in Crawford Notch. Follow the trail into the woods then at the first junction head left along the Bemis Brook Trail. You’ll pass by the Fawn Pool, the staircase Bemis Falls and the beautiful series of 4-10 foot falls that comprise Coliseum Falls. The trail heads steeply from here to a junction with the Arethusa Falls Trail, which, in 1 mile will take you to the base of Arethusa Falls. You can take the Arethusa Falls Trail back to the parking area. Arethusa Falls is in Crawford Notch State Park. While there, be sure to check out Ripley Falls, just up the road as well as the beautiful AMC Highland Center. Right next to the center is the Willard Trail to the summit of Mt. Willard, which provides an incredible view of the glacially sculpted valley. Eagle Cascade This is the longest hike here. At 6.0 miles and 1,500 vertical feet, you earn your reward on this hike. You’ll visit a beautiful winding cascade, a fantastic ridge with rocky outcrops and amazing views, and a deep cold swim hole at the end of a tiring hike. You are way more likely to experience solitude on this hike as well, as the others are located in more popular areas. From the trailhead on Route 113, follow the Baldface Circle Trail for 2.2 miles before turning left on the Eagle Cascade Link Trail. This trail climbs fairly steeply and in 0.3 miles you’ll reach the plunging Eagle Cascade, which may be a graceful ribbon or a large pouring sheet depending on the stream flow. You’ll cross over the stream and climb steeply again for another half of a mile until you reach the Bicknell Ridge Trail. Here, high up on the side of the Baldface mountain range you’ll get sweeping views to the south and east. This is a fantastic place for a lunch. When ready, follow the Bicknell Ridge Trail back down to the junction with the Baldface Circle Trail and head right. In just over half a mile, you’ll want to turn left onto the short spur to the Emerald Pool, a deep aqua colored swim hole surrounded by 10-20 foot vertical rock walls. Follow the spur back to the main trail and then head back to the car. Route 113 goes through Evans Notch from which a number of great hiking trails leave. There are a bunch of waterfalls near here too including Brickett Falls, Bickford Slides and the Rattlesnake Flume and Pool, which is just over the border in Maine. Flume Gorge / Flume Pool Loop Hike One of the most popular tourist attractions in the White Mountains, the Flume Gorge / Flume Pool Loop is still well worth the visit. It also costs money, so make sure you give yourself plenty of time to enjoy it. Since it does get crowded, I’d recommend visiting right when they open in the morning as well as on a weekday. The Flume Gorge lies in Franconia Notch. Surrounded by the Kinsman Range and the Canon Cliffs on the West, and the rugged treeless Franconia Range on the east. The power of water to shape the land, in both its wet and frozen form, are blatantly obvious on this short hike. There is no “right” way to do this, other than making sure you do the full loop. However there are multiple short excursions and diversions along the way, and this is one place where the kids will have fun too. You’ll start behind the visitor center. If you go counterclockwise, you’ll take a covered bridge over the Pemigewasset River, pass by Table Rock and then head right into the Flume Gorge. Here a wooden walkway takes you through an extremely narrow canyon with huge vertical walls. At the top of the gorge you’ll see Avalanche Falls, which turns 90 degrees in its plunge to the floor below. On your way you’ll also see Liberty Gorge Cascade, cross over a gorgeous covered bridge and gaze down upon the sculpted pool before returning to the visitor center and your car. Keep in mind that this is just one option in Franconia Notch, where you’ll want to spend as much time as you can visiting the incredible waterfalls, hiking trails, and treeless peaks. Hiking Lost River Gorge Like the Flume Gorge above, this is another hike where you’ll need to pay. I had never visited it because of that, and when I finally did I was surprised at how much I enjoyed it. This hike is less about the waterfalls than it is about boulders and caves and the power of the river. It’s a one-way boardwalk and is perfect for even young children, yet people of all ages will have a great time exploring the different geologic features. So this one is highly recommended for the family! The trail leaves from behind the visitor center and the path is obvious. You’ll hike down through the woods before getting on the boardwalk and heading back upstream. You’ll pass through features such as the Cave of Odin and Paradise Falls, and you’ll get views of some tall peaks in the distance. Note that just up Route 112 from the Lost River is Kinsman Notch where you can stop at the beautiful Beaver Brook Pond and hike a few hundred yards up the Beaver Brook Trail toward Mt. Moosilauke to see some beautiful cascades down Beaver Brook. Waterfall Hikes of the White Mountains: Need to Know Information The Flume Gorge and the Lost River Gorge require an entrance fee and are only open to the public during certain hours. Check with their websites for specific up-to-date information. The waterfalls will be most dramatic in the spring and during the snowmelt, but I find visiting in the fall is wonderful as well since you’ll get the beautiful foliage and the lower water flow allows you to explore and get much closer to the waterfalls. Some trails in the White Mountains also require a daily or annual parking pass. Getting There The Appalachia waterfalls hike leaves from a trailhead on Route 2 just west of the town of Gorham. The Eagle Cascades are located off of Route 113 near Evans Notch and the Arethusa Fall trailhead leaves from Route 302 in Crawford Notch. The Flume Gorge is in Franconia Notch off of Route 3 and the Lost River Gorge is on Route 112 near Kinsman notch. Maps There are numerous maps of the White Mountains so I’d suggest checking a few out. If you plan on doing any amount of hiking in the White Mountains, be sure to pick up the AMC White Mountain Guide, which contains information and maps for almost all the hikes in the region. Books For more waterfall hikes, check out my book, a FalconGuide titled Hiking Waterfalls in New England as well as Waterfalls of the White Mountains: 30 Hikes to 100 Waterfalls by Bruce, Doreen and Daniel Bolnick. If you are in Lincoln, NH, stop by the Mountain Wanderer store owned and operated by Steve Smith. This store has all the maps and books you could ever want and Steve knows more than anyone about hiking in the White Mountains. Editor's Note: This article by contributor Eli Burakian originally appeared in Issue 22 of TrailGroove Magazine. You can read the original article here for additional photos and content. -
I stood, breathless and exhausted, on the top of the divide, looking down at the pristine and untrailed cirque that lay ahead. My route bared before me, for a moment continuing on across the three passes that lay ahead seemed achievable. Then my eyes lifted to the glaciated massif of 7,600-foot Mount Mystery on the opposite wall of the basin, and my shaking legs sent an unmistakable message: I would make it no further. Olympic National Park offers hikers rugged terrain and stunning views. To the Basin: An Olympic National Park Backpacking Trip I had set out solo the day before from the Dungeness River Trailhead, in the northeast corner of Olympic National Park, with an ambitious loop planned. My goal was to enter Royal Basin via a high traverse and then trek cross-country beyond the basin through the wild high country of the eastern Olympic Mountains. All told, the route covered 27 miles and a whopping 11,000 feet of elevation gain (and loss) in three days. While certain to challenge me, the route promised the dual rewards of solitude and unparalleled adventure in one of the most difficult-to-penetrate mountain ranges in the lower 48. The trip began innocently enough, following the well-trodden and relatively flat trail along the Dungeness River through lush old-growth forest. Moving briskly through the easy riverside terrain, it wasn’t long before I reached the Old Way Trail that would guide me to the top of Gray Wolf Ridge. The ridge hovers around the 7,000-foot contour, forming the northern flank of Royal Basin, but is wide and smooth enough to be less technical (in contrast to nearly every other ridge in the vicinity) and provides an alpine conduit into the heart of the basin. The shift in grade from flat to calf-screamingly steep was instantaneous as I turned onto the Way Trail, the beginning of a 5,000 foot climb from river to ridgetop. Apparently, the scant eight miles from the trailhead to Royal Lake via the ridge – which from a glance at the map hardly seemed realistic – would be made possible by eschewing switchbacks. With each step, I forced my leg to land flat to avoid doing hours of calf raises and lifted as much of my pack weight as possible with my arms and trekking poles. By the time the trees receded into meadow, still 1,000 feet below the summit, my body felt as if it had suffered through 15 miles of hiking rather than just two. With the summit in sight, though, I pushed ahead, determined to make it to the top before stopping for lunch or taking in the view. I was greeted at the top by a gnome sitting on a toilet – by far the strangest and, delirious with exhaustion and celebration, funniest mountaintop trinkets I have encountered. But I certainly envied the gnome’s boundless panorama. Puget Sound, the Strait of Juan de Fuca, and the southern reaches of the Salish Sea stretched out before me, punctuated only by the San Juan Islands and the mountainous coast of Vancouver Island. To the east, the glaciers of Mount Baker and the Picket Range stood out against the hazy blue horizon, while to the west the tip of Mount Olympus poked out from behind the jagged peaks of the Bailey Range. My reverie in the endless landscape was broken when, looking ahead and comparing the landscape to the map, I counted one bump too many in the ridgeline. The summit I had reached was not a summit at all! Instead, it was merely the shoulder of the first of three peaks along Gray Wolf Ridge. My celebration quickly turned to anxiety, as the ridge climb had not been nearly as straightforward as I expected and the traverse was looking equally challenging. Each peak dropped over 1,000 feet to a saddle, meaning that my tired legs had much more climbing to face. Worse, I was running low on water and there was no sign of snow along the ridge. To top it all off, by the time I reached the true first summit, legs wobbly, it was already late afternoon. It was clear that continuing along the ridge was not a viable option, but rather than turn back to The Way Trail, which would have doomed my trip only hours into it, I decided to drop off the ridge below the first saddle and head downhill for Royal Creek and the trail. The ensuing bushwhack was a backpacker’s nightmare. Exhausted and without water, I descended 3,000 feet first over loose rock and then, after reaching the tree line, through unkempt rainforest. By the time I reached the trail, a highway running through the forest compared to the endless debris of fallen trees that I had been scrambling over, I was too unhappy even to celebrate making it down. I simply put my head down and forced myself to march the five miles of trail up to Royal Lake as the sunset faded to dusk. I reached the lake, my original endpoint for the day, at 9PM. Exhausted and frustrated, I pitched my tent in a hurry. Setting up my stove to cook dinner seemed a laughably difficult task at that point, and in any case I was too dehydrated to have much of an appetite. Instead, I munched on trail mix and Oreo’s before crawling into my tent and passing out. I broke camp early the next morning, knowing that my second day was the most ambitious portion of the route and that I would be moving slowly after the abuse of the day before. To form a loop between Royal Basin and Constance Pass, from where maintained trail led back to the Dungeness River trailhead, I would have to first climb over the shoulder of Mount Deception at the head of Royal Basin. Once down the other side, the plan was to contour around the base of Mount Mystery until I could find a way into the notch on its southern flank known as Gunsight Pass. From there, the map presented a maze of closely-spaced contours that I could traverse to intersect Constance Pass. A glance at the map seemed to indicate that none of this would be possible, although my research into the trip (the same research that had failed to adequately prepare me for the traverse of Gray Wolf Ridge) had assured me that it could be accomplished in a single day. With my quads still throbbing, I turned uphill once again following the trail from Royal Lake to the upper portion of the basin. As I passed through a series of astoundingly beautiful meadows, Royal Creek running alongside the trail, the morning was filled with the sound of marmots chirping. At the head of the basin, rivulets poured from remnant snowfields on the northern face of Mount Deception into a turquoise-colored tarn. Looking up, trying to pick out the least vertical path up to the divide 1,000 feet above, the immensity and steepness of the landscape hit me in full. I had come to the right place for a rugged adventure, but I was no longer certain I was prepared for this level of ruggedness. Moving sluggishly, I picked my way up the steep talus field, stopping every now and then to watch the ominous rock falls coming down the main face of Mount Deception. Shapes became apparent on the ridgetop, and my first thought was that I would have to fend off mountain goats when I reached the top. Thankfully though, the shapes took on human forms and I crossed the group of three as they descended into Royal Basin. Apparently, they had attempted to reach Gunsight Pass via the Mystery Glacier the previous day and failed, the steep terrain proving too unstable to climb. In response to my plan to traverse around the base of the mountain, their leader grimaced and expressed little confidence in the route. With my resolve already as weak as my legs, this was anything but encouraging. I pushed on, determined at least to reach the top before making any decision. The view as I crested the divide was almost enough – almost – to push me onward. Mount Mystery stood in full splendor directly across from me, along with the Mystery Glacier and its invitation into Gunsight Pass. The basin itself was dominated by a muddy lake at the glacier’s base, the grey water flowing steeply out of the basin and leading my eyes to the craggy peaks hidden deep in the interior of the Olympic Mountains. My intended route around the base of Mount Mystery was also clearly visible from the pass – even from a mile away and 1,000 feet up, the area that I had planned to contour around looked steep. The Decision Point & a Hike Back to the Trailhead Looking wishfully at the map and the basin before me, it was obvious that to go on would be painful at best. Once I began the descent, there was no reasonable way back to trail except to reach Constance Pass, which meant crossing a significant portion of uninviting terrain culminating in Gunsight Pass. The weight of these concerns, combined with the heaviness in my legs, was enough of a signal that I had reached the end. Disappointed to let go of my grand loop, but content with my decision, I made the steep descent back into Royal Basin from where a switchback-rich trail could deliver me back to the trailhead. Need to Know Information Royal Basin is one of only a few areas within Olympic National Park that requires reservations for overnight camping. The park begins accepting reservations in March, but note that summer weekends often fill up. All overnight trips into Olympic National Park require backcountry permits, available at the Wilderness Information Center in Port Angeles. Getting There From Highway 101, turn onto Louella Road opposite Sequim Bay State Park. Turn left onto Palo Alto Road and follow this for 17 miles as it enters Olympic National Forest, crosses the Dungeness River, and ultimately ends at a well-established trailhead just before a concrete bridge over the river. Best Time to Go Royal Basin becomes free of snow in early to mid-July most years, although snow can persist on the pass over Mount Deception into August; you can call the Wilderness Information Center for current conditions. Late September and early October offer colored leaves and misty mornings, but cold nights and unpredictable forecasts. Reservation permits are required for backpacking from May 1 to September 30. Maps and Books Trails Illustrated 216 Olympic National Park map. An overview of the attempted route is briefly described in Olympic Mountains: A Climbing Guide, and you can find additional information about hiking in the park in this guidebook. Editor's Note: This article by contributor Michael Graw originally appeared in Issue 32 of TrailGroove Magazine. You can read the original article here for additional photos and content.
-
Backpacking Washington's Scenic Pasayten Wilderness
Mark Wetherington posted a blog entry in TrailGroove Blog
While much of Washington is a veritable backpacker’s paradise, its three national parks and the areas of national forest closest to the Seattle megalopolis seem to absorb the bulk of the crowds. The Alpine Lakes Wilderness, with its spectacular scenery and name-brand destinations like The Enchantments, and Mount Rainier, with its life-list Wonderland Trail, deservedly draw hordes of eager backpackers. But for those willing to travel a bit further east, incredible backpacking and ample opportunity for solitude await in the Pasyten Wilderness of the Okanogan-Wenatchee National Forest. At over 500,000 acres, the Pasayten Wilderness offers plenty of backpacking and hiking opportunities including a stretch of the Pacific Crest Trail. Backpacking the Pasayten Wilderness Located to the east of the North Cascades National Park Service Complex, which needs no elaboration for its beauty and wealth of backpacking options, the Pasayten’s more than 500,000 acres offer another opportunity to experience a remarkable landscape. Without having to worry about getting coveted backcountry permits and sticking to an itinerary for campsites – regardless of the weather, energy levels, or how good the fishing is – the Pasyaten allows for a truly wild and free-flowing experience in a spectacular landscape. The western portion of the wilderness, similar to the North Cascades in its ruggedness, offers fantastic multi-day backpacking trips and is traversed, north to south, by the Pacific Crest Trail. The eastern portion offers several similar landscape features – such as alpine lakes and forested drainages – but also serves up grasslands, arctic tundra, and some fascinating historical features. While it’s hard to go wrong with a trip in the Pasayten, an approximately 60-mile loop leaving from the Iron Gate Trailhead in the far eastern part of the wilderness provides an excellent sampling of what the area has to offer and passes by several spots sure to make for lasting memories. Other than a Northwest Forest Pass for the trailhead and a self-issued wilderness use permit, there are no bureaucratic hurdles to pulling this trip off. Only the weather and the amount of time you can dedicate will dictate your plans. Late July is an excellent time to hike this loop, with abundant wildflowers (and mosquitoes), and is rivaled only by late September with its golden larches (but chillier nights). Although I hiked this loop as a three-night, four-day trip you could easily spend twice as much time and not get bored. To fully enjoy this trip, it is strongly recommended that you spend no less than five nights. You could certainly cover the same amount of ground in a shorter time frame, but your ability to really savor the places you are passing through would be significantly diminished. The Iron Gate Campground (primitive, no water services) makes a great spot to park and jump off into a grand tour of the Pasayten Wilderness. Situated at just over 6,000 feet, this trailhead lets your vehicle do much of the elevation gain and keeps your legs fresh for the easy jaunt into Horseshoe Basin. At only six miles and roughly 1,000 feet of climbing from the trailhead, Horseshoe Basin and its expansive rolling terrain – technically classified as arctic tundra – is one of the most incredible locales in eastern Washington. Several mountains rise up from the edges of the basin, making for a tempting diversion for those so inclined to walk up their summits, or at least the higher slopes of their ridges, for spectacular panoramas of the wilderness and surrounding areas. From Horeshoe Basin, head west via the Boundary Trail (part of the Pacific Northwest Trail, which connects Glacier National Park to Olympic National Park), passing through some absolutely blissful stretches of forest scenery. When the larches are turning shades of yellow and gold before dropping their needles, some sections of this trail are intensely enchanting. Although forested, the forest is fortunately not devastated by the impacts of forest fires which mar other sections of the Pasayten (including, unfortunately, a significant chunk of this loop). With infrequent, but often impressive, views of the rugged mountain landscape, including the massive Teapot Dome, this fairly level section of trail allows you to make good time to the next “highlight” of this loop: the buildings associated with the defunct Tungsten Mine. Natural landscapes have a captivating and enamoring quality, which is undoubtedly a major reason why myself and others choose to spend so much time in them, but I’m sometimes almost equally fascinated by the man-made structures that linger in wilderness areas long after their original purpose is gone. The buildings at Tungsten Mine are exceptionally charming examples of such structures and, as expected, fascinated me to no end. A bunkhouse with a stunning front porch view and plenty of room to get out of any undesirable weather (and a woodstove to warm up with) and a much larger, but deteriorating, building with a long dining table and several adjacent rooms are the main attractions. An outhouse also stands and is in rather good shape. Surrounding these buildings are various remnants of the mining and domestic activities of the men who lived and toiled here nearly a full century before. Continuing on from Tungsten Mine, you make a moderate climb up to Apex Pass (7,300 feet) and then contour over towards Cathedral Pass. The views after Apex Pass are nothing short of remarkable, and they weren’t exactly leaving much to be desired previously. Quintessential mountain scenery and a great trail make the three miles to Cathedral Pass particularly enjoyable. Descending from Cathedral Pass, the Pasayten continues to offer up great camping, great fishing, and great scenery. When the larches are golden and the sky is blue, this place is the very definition of “sublime”. The next stretch of trail is one to be cherished. Absolutely outstanding views of mountains near and far and lovely high country walking define the next stretch, but once you descend into the Remmel Creek drainage (and eventually the Chewuch River) you will be entering burned areas that can detract somewhat from the hiking experience. While the trail was in good-to-reasonably-good condition when hiked in 2018, trails in burned areas are subject to frequent – and almost always unpleasant – changes in condition. Fortunately, after passing through the burn area, you’ll find beautiful settings for camping and excellent opportunities for fishing, with the opportunity to summit a peak or two if desired. Continuing on the main Chewuch River Trail, you will be in nearly continuous burn – some recent and rather severe – for a frustratingly long time. Depending on your ambition and schedule, a campsite near Horseshoe Creek provides one of the few reasonably comfortable and aesthetic spots to stay for a night. Paralleling the Chewuch River, the trail continues downstream through burned forest which, on the bright side, allows for views of the mountainsides and the river. On the too bright side, if the sun is shining and the temperatures are warm this can be a dusty, hot, and Vitamin D saturated walk. The Basin Creek Trail junction was, as of 2018, virtually indistinguishable and it is advisable to continue further downstream to the Cathedral Driveway Trail to continue this loop. You climb 1000 feet in just under two miles, with the initial stretch being rather steep. Just after crossing Windy Creek, you reach a junction with the Windy Creek Trail, which climbs to the base of Windy Peak. The climb itself is fairly moderate, but it is entirely in a burned area and seems to go on forever, despite being less than five miles long and gaining around 2000 feet of elevation. It is best to get an early start on the day that you will be passing through here; the sun can be relentless and there are no appealing places to camp. Fortunately, Windy Creek provides easy access to water so staying hydrated isn’t a problem. A chilly Pasayten backpacking campsite Finishing the Hike From the junction with the Windy Peak Trail, a few hundred feet shy of Windy Peak’s summit, you have a few choices. If you haven’t yet got your fill of lakes, you can explore by taking a left – you would then head back around to Sunny Pass (a mile south of Horseshoe Basin; you would’ve passed through on your way in) and then retrace your steps to the trailhead. If you’re wanting an absolutely breathtaking high country stroll, then take a right and enjoy unbeatable alpine walking before descending into a charming basin and eventually reaching a junction with the Clutch Creek Trail. Several decent options for camping are in the basin before reaching this junction. The Clutch Creek Trail traverses a nice sloping mountainside dotted with sagebrush before beginning a long, and sometimes overgrown, descent to cross Toats Coulee Creek before making a spirited climb back up to the trail that connects to the trailhead. In Conclusion All told, this approximately 60-mile loop is a challenging but exceptionally rewarding hike. While the long stretches of burned forest take their toll on the scenery, the superb alpine walking, wonderful lakes, and historic buildings more than mitigate the drudgery of hiking through burns for most of a day. The lack of permits also allows you to craft your own adventure. Doing this hike as an out-and-back to a basecamp of your choice would be a memorable hike as well, especially if you gave yourself a layover day or two to explore the nearby peaks. It should go without saying that lack of permits doesn’t mean lack of responsibility – be sure to become informed about the area and practice Leave No Trace. Need to Know Information The Pasayten Wilderness has the same wilderness regulations as other wilderness areas (no motorized or mechanized equipment, limits on group size, etc.) and following Leave No Trace is important. No permits are needed, but a Northwest Forest Pass is required to park at the trailhead. Call the Methow Valley and Tonasket Ranger Districts (this loop traverses trails maintained by both) on the Okanogan-Wenatchee National Forest for current information on conditions. Getting There From Tonasket, WA drive 16 miles to Loomis, WA. Continue from Loomis on County Road 9425, then turn left after two miles onto Forest Road 39/Toats Coulee Road. Take this road for 14 miles until you see the signed turnoff for the road leading to the Iron Gate Trailhead. This rough dirt road climbs for six miles to the trailhead. Call ahead for road conditions – sometimes most vehicles if driven carefully can negotiate it, other times you will want a high-clearance vehicle. Best Time to Go July and mid-summer can be a great time for wildflowers; late September or very early October for fall colors. Maps & Books The Green Trails maps "Horsehoe Basin" and "Coleman Peak" cover this area and are sufficient for on-trail backpacking and some off-trail navigation, however availability of these two maps can be hit or miss. For backpacking in the area you will want to take more detailed USGS topos for the area. Portions of this loop are described in the guidebooks Backpacking Washington: From Volcanic Peaks to Rainforest Valleys by Douglas Lorain & the author of this article Mark Wetherington, as well as Backpacking Washington: Overnight & Multiday Routes by Craig Romano. Editor's Note: This article originally appeared in Issue 40 of TrailGroove Magazine. You can read the original article here for additional photos. -
Ruffwear Approach Dog Pack: A 15 Year Review
Aaron Zagrodnick posted a blog entry in TrailGroove Blog
While bringing along man’s best friend on our backcountry adventures comes with many advantages, especially when backpacking it also comes with an extra set of dog-specific gear. Dog food, a section of foam pad, dog jackets, bowls, leashes, and perhaps even a sleeping bag for your dog all serve to increase the weight carried. The solution of course is to have the dog carry some of their own gear or other gear to help offset some of the weight – most importantly of course without overloading the dog. Ruffwear, maker of dog specific gear that often fits well with an outdoor lifestyle offers 2 solutions – the $150 Palisades pack which they’ve designed specifically for multi day backpacking trips, and the cheaper Approach pack at $100 that they market more for full day hiking. However, over the past 15 years I’ve found the smaller Approach pack to be all one needs for any length backpacking trip, and as a nice bonus this model is also lighter and cheaper. Ruffwear Approach Dog Pack Design The Approach pack contains 2 saddlebags that each have a large, zippered main compartment as well as a smaller zippered pocket. The bags are attached to an adjustable harness system with strategic padding, and the top of the pack features lashing loops, a metal leash attachment, and a convenient grab handle. The pack is currently offered in two colors and 4 sizes based off chest girth. Reviews on sizing vary: the medium is perfect for my 45lb cattle dog even though she was, according to the sizing guide, in between the small and a medium. I would suggest using the sizing guide to start, and then if in doubt, use the general characteristics of the dog to finalize the decision process. Simply put, is the dog a small, medium, or large dog? Either way, the harness provides a lot of room for adjustment up or down. The pack uses heavy duty zippers, and heavy, rip stop nylon fabric with an even heavier duty fabric on the bottom half of each saddlebag. I’ve found the fabrics to be highly water resistant, but the zippers and seams are not. While Ruffwear previously offered a dedicated rain cover as well, I just go with a pack liner approach (gallon Ziplocs or rolltop dry bags) for gear that must stay dry. As an example, the medium sized pack can (barely) fit an 8 liter Sea to Summit roll top dry bag on each side. The backpanel and sides are minimally padded, but enough to provide a little protection from bumpy objects in the saddlebags...some care when packing is still in order however. The pack is designed to carry the weight more forward on the dog and features a light loop and reflective trim for nighttime visibility. For the medium pack reviewed here, Ruffwear lists the pack at 1.15lbs / 18.4 ounces, but I was pleasantly surprised to measure 16 ounces on my scale. 14.5 liters of storage are spec’d on the medium. Storage will however vary depending on the size you go with, and ranges from 6 liters for the extra small all the way up to 24 liters for the large. The Ruffwear Approach has plenty of capacity, a water-resistant construction, and in my case the fabric has stood up to years of use across many backpacking trips. How Much Weight Your Dog Should Carry Before hitting the trail, it’s important to do a little math. Dogs simply aren’t by nature, a pack animal. While Ruffwear suggests that a dog carry no more than 25% of their body weight, I’ve found this number to be much too high. Any backpacker knows that carrying this much weight isn’t that much fun, and 20% max...hopefully lower...is usually a more reasonable number for happiness and comfort on higher mileage trips. I target even less for my dogs: 10-15% of the dog’s body weight including the weight of the pack usually keeps the dog happy (after all, they can’t talk to tell you if it’s too heavy), while still allowing the dog to take a reasonable amount of weight out of my pack – several pounds even for a small to medium dog. Many also fall into the potential trap of only packing dog gear in the dog pack. In the end, I always pack the Approach with a combination of dog gear and my own gear that 1) equals about 10% of my dog’s weight, 2) can be split evenly between the two saddlebags, and 3) is comfortable for the dog. Going over your gear list and doing a little work with a digital scale is key to this approach. Just make sure if your dog is a runner, that you don’t pack any critical group gear in the dog pack, and utilize that leash attachment point! Dog food is one item that can be weighed out precisely and molded perfectly to fit the saddlebags, but I prefer to keep all food items separate and I like to not worry about food smells on the dog pack itself. Dog food is always changing in weight throughout a trip as well and will require constant rebalancing between each side. I prefer items that are light, but of a static weight. The pack even features lashing points on the outside where you could attach stuff sacks or lash a foam pad, but with maneuverability in mind it’s much easier to simply carry my dog’s foam sleeping pad on the outside of my own pack. On the Trail Once you have the pack adjusted, which can be a bit tedious the first time, no further adjustments on the trail are needed unless your dog changes in weight, and any excess strapping is easily tucked away. The dual quick release buckles make taking the pack on and off relatively painless, and once on the freedom of movement that the pack allows is excellent, I haven’t found that the pack inhibits the motion of a dog on the trail or when sitting or laying down. With the leash attachment point on the pack, leashing even a dog who doesn’t quite have the heel command down yet is still comfortable for the dog since the whole system is harness based. The grab handle is one of my favorite features of the pack – it makes it so easy to assist and guide the dog over fallen logs on the trail or through rocky areas. If you do plan to use a dog pack, I’d suggest introducing it to your dog at a young age when possible (without weight) until vet approved. At any age, providing extensive positive reinforcement when the pack is introduced and testing with normal walks at home goes a long way towards a great trail experience, along with being diligent to not overload the dog. And even with these steps every dog is still different...I’ve had dogs where I ended up never using the dog pack again as I just couldn’t take that dejected stare any more, and others that can’t wait to put it on and seem to completely disregard its presence on their back. In the end, it’s up to each dog and each dog owner to determine the right direction to go when it comes to a pack, as well as weight carried. Conclusion While the Ruffwear Approach dog pack is perhaps a little heavy at around a pound, in reality it’s not that bad. If this were a pack for people it wouldn’t be an ultralight offering, and it wouldn’t be the heaviest either – it’s designed with some cush and durability in mind. As your dog scrapes the full saddlebags against rough granite rock and fallen logs across the trail repeatedly throughout the day, the extra durability is appreciated. With 4 pockets, organization comes easily and even though the Approach pack isn’t the largest pack Ruffwear offers, I’ve found the saddlebags are very much large enough to meet the weight percentage targets when packing for a backpacking trip. With sufficient at home adjustment and proper saddlebag balance, the pack is very comfortable for the dog – provided that you don’t overload the pack. The Ruffwear Approach dog backpack retails for $100 and is available in 2 colors and 4 sizes. You can find it here at REI Co-op as well as at Backcountry.com, and additionally you can take a look here at Amazon. Editor's Note: This review originally appeared in Issue 39 of TrailGroove Magazine. Read the original article here for additional photos, pros and cons, and our rating of the Ruffwear Approach dog pack. -
Some years ago I was eating breakfast with my wife, Lyn, at the Vermillion Valley Resort when a group of unusual looking people sat down at an adjacent table. They were wiry and weather beaten and gave off a raised-by-wolves vibe. They proceeded to eat enormous platters of food, which they washed down with beer. They turned out to be thru hikers from the nearby John Muir Trail (JMT). After they told us a little about their trip, I said to my wife, “I want to do that! – or, at least, I want to look like that.” Since then, I have hiked the JMT three times. I would like to share some tips and tricks I have learned that will be helpful to anyone attempting the trail for the first time. I will focus on information unique to this trail and throw in some general thru hiking advice. I assume you know how to backpack, or you wouldn’t be reading this. John Muir Trail Hiking Logistics Because (in my opinion) the JMT is the best long trail on the continent, it is very popular, so scoring one of the few permits awarded is difficult. You must plan ahead and apply 168 days before the date you plan to hit the trail. After you apply, you will be put in a lottery for your start date. If you lose, your application will be rolled forward every day until you win, which you probably won’t. Your chances are something like 5%. Now the good news: Your chances of scooping up a cancellation are quite good if you know this trick: cancellations are posted at 11:00 A.M. every day. If that doesn’t work, you can get to the JMT through the national forest just outside Yosemite National Park and still hike 80% of the JMT. Rush Creek Trail leads to the JMT and is easily accessible from Silver Lake on the June Lake loop off of highway 395. National forest permits are much easier to get. But beware: All of this information as well as the information below may change due to the aftermath of wildfires. Most people prefer to begin at the north end of the JMT in Yosemite Valley because the elevations are lower at that end. The south end is 211 miles away on top of Mount Whitney. If you start there, you begin by gaining 6,000 feet on the first day. As to timing, August is the best month because there are fewer bugs, probably no snow on the trail, and the stream crossings are lower. Many people who plan to hike the whole trail send a resupply box ahead to one of three rustic resorts located along the north half of the trail. These places also have small stores where you can pick up almost anything you forgot to pack. The first is Red’s Meadow, but it is the least practical because it is only about five days in. Next is Vermillion Valley Resort (VVR) about two days short of the mid point. They are very kind to thru hikers (The first beer is on the house.), and you can get a shower. Close to the half-way point is Muir Trail Ranch (MTR). The beauty of this detour is the hot springs in nearby Blayney Meadow. They are very therapeutic. Red’s is smack on the trail, and VVR and MTR require short side trips. At VVR you can rummage through boxes of food and gear that other hikers have abandoned. You will find a surprising amount of quality stuff. There is an interesting feedback loop related to the question of whether or not to resupply. The lighter your pack, the faster you can travel, which decreases the number of days on the trail, which decreases the amount of food you need, which decreases your pack weight, which…If you can carry a 35 to 40-pound pack 15 miles a day, you probably won’t need to resupply. It is worth a shot because you can scoop up abandoned supplies and because, as they say, “The trail provides.” This expression is based on the thru hiker subculture that almost guarantees that people with extra supplies will help those who have run short. Do not count on finding abandoned supplies in the bear boxes scattered along the southern half of the trail. There are signs discouraging this that people tend to obey. I’ll assume you know about safety and first aid supplies, but let me make a few suggestions. There is very little cell service on the JMT, with Whitney summit being an interesting exception. For this reason, I pack a good first aid kit and a PLB1 Beacon. If I ever push the little red button on this gadget, somewhere a helicopter will take off. You should know what lightweight gear you like, but I have two suggestions. The air is usually quite dry in the Sierras, so you can use a single wall tent and rarely be bothered by inside condensation. I take a very light sleeping bag, but I also pack lightweight down jacket and pants. In case of a cold snap, I wear my down outfit to bed. If you prefer a real map, as opposed to a phone app (such as Gaia GPS), a good map set from Tom Harrison Maps can be found here, and National Geographic offers a map guide as well. Muir pass is the only pass you needn’t worry about getting stuck at. You can spend the night in the amazing Muir Hut. When choosing a base camp for your early morning ascent of Whitney, you want the highest flat spot with water. What about transportation logistics? Specifically, how do you get back to your car? Shuttling a car to the other end of the trail takes at least half a day, however self-shuttling for your JMT hike is a good way to make your thru-hike possible. Other options exist and hikers could piece transportation together using bus lines, ride services, and shuttles. Final Thoughts on Hiking the John Muir Trail The John Muir Trail offers an unforgettable hiking experience, and stretches some 214 miles through California’s Yosemite and Kings Canyon National Parks while passing through several wilderness areas along the way. The youngest person to hike the whole trail was Sara Harris, age 6, and the oldest person to complete the trail was the author of this article, George Graybill, age 80. For more information on hiking the JMT, you can check out the John Muir Trail Guide and the John Muir Trail Data Book.
-
Summit Serenity: Climbing Mount Saint Helens
Mark Wetherington posted a blog entry in TrailGroove Blog
Sitting atop the summit of Mount Saint Helens, with views of over a hundred miles in every direction, a passage from a novel came to mind as I sipped a cup of coffee and gazed at distant peaks. Seemingly appropriate when applied to an exceptionally clear autumn day observed from atop a mountain, an experience that makes one feel full of life. It felt like the “most beautiful day in a thousand years. The October air was sweet and every faint breath a pleasure.” As Annie Proulx wrote in the book, Barkskins. Climbing Mount Saint Helens offered challenge as well as unforgettable views. A Mount Saint Helens Climb Begins My climbing partner Kerra and I had begun the hike up Mount Saint Helens at 5 a.m. sharp, leaving our camp under a starlit sky with an archetype of a crescent moon making its way toward the horizon. We had camped just below 4,800 feet in elevation and had approximately 3,500 feet of elevation to gain on our way to the 8,365 foot summit of one the Northwest’s most famous stratovolcanoes. Kerra and I had meet two years prior when we were both hiking the Loowit Trail, which loops around Mount Saint Helens and is one of the most dramatic hikes in terms of scenery-per-mile that I have had the pleasure of hiking. We kept in touch after that hike and had since ice climbed in Montana and backpacked along the Oregon Coast. When Kerra let me know she had a spot on a permit to climb Mount Saint Helens in early October I jumped at the chance to climb a mountain that I had already circumambulated the base of, which would be a hiking “first” for me. Although I do not consider myself a “peakbagger”, as I’m often most content simply ambling along in the woods and spending my time looking at up peaks from lakes while I flyfish, the opportunity to summit Mount Saint Helens had a distinct and irresistible appeal. Approximately the first half of our climb was by headlamp and we reached the snowline after less than an hour or ascending. The amount of snow on the mountain, which was fairly substantial for so early in the season, was fortunately more of an aid than a hindrance. As we climbed, the final dark hours of night transitioned into the ethereal predawn glow, and then into a beautiful and clear morning with brilliant blue skies. The colors of the sunrise were vivid and the sight of the sun rising near Mount Adams was absolutely breathtaking. Kerra, who had summited Mount Saint Helens three times previously, remarked several times on how helpful the hardpacked snow was. It allowed us to travel above the ashy and sandy slopes on the final summit push, which can make for frustratingly slow going in summer conditions. Additionally, the ash and sand are easily whipped up by the winds which usually blow across the summit, which can make hanging out atop the mountain a less than enjoyable experience. Fortunately for us, not only was the wind so light and infrequent as to be almost unnoticeable, but the ash and sand were covered up by snow. This allowed us to stretch out up top, make some warm drinks and breakfast, and enjoy the view for almost two hours before starting our descent. Given our early start and the permit limitations that keep the number of climbers to a steady, but not overwhelming, stream we ended up having the summit to ourselves for almost an hour. The summit view was made even sweeter by the fact that I could see Mount Adams, thirty miles away in a straightline distance but seemingly so close you could reach out and touch it, which I had also hiked a loop around. Several other mountains were visible that had trails around them – such as Mount Rainier and Mount Hood – which provided ample inspiration for future adventures in Washington and Oregon. Looking into the crater of the volcano, the surrounding mountains, and the intriguing waters of Spirit Lake (which are filled with floating dead trees that were blown into the lake by the May 1980 eruption) made the time fly by. We were still able to enjoy beautiful views on the way down, although the snow was starting to soften up and we encountered several groups of hikers headed up. The trip to the top of Mount Saint Helens was a rewarding and novel adventure. Reflections After the Summit While the mountains in Montana, the state where I reside and do most of my backpacking, has amazing mountain ranges which provide a lifetime of backpacking, you are almost always hiking in the mountains rather than around them. While this experience is incredible in its own way, a hike involving something like Mount Saint Helens is something different to experience. My take on this could be partially due to the novelty of the experience, hiking around mountains provides a sense of scale and majesty that is different from trips which venture into the heart of mountain ranges, even if you do climb a peak along the way. Need to Know Information A permit is required to climb Mount Saint Helens. Please the permit information page on the website of the Mount Saint Helens Institute for current regulations. Getting There Travel on Forest Road 90 and near Cougar, WA turn north onto FR 83. Drive north on forest road 83 to forest road 81. Make a left onto forest road 81 and drive 1.6 miles and turn right onto FR 830. Follow this to the trailhead. Best Time to Go Mount Saint Helens can be climbed year-round, although winter ascents require technical skills and equipment. Summer can be uncomfortably hot as the climb provides little shade and the rocks can radiate heat they absorb from the sun and windblown ash and dust can be irritating. The weather can be less reliable, but late fall can be a perfect time for a climb. Maps and Books The Green Trails Map for the Mount Saint Helens National Volcanic Monument is an excellent resource, National Geographic offers their Trails Illustrated Mount St. Helens and Adams map, and this guidebook provides detailed information about hiking in Mount Saint Helens National Volcanic Monument. -
Arizona Wonderland: Hiking Chiricahua National Monument
Mark Wetherington posted a blog entry in TrailGroove Blog
Along with towering mountains and alpine lakes, awe-inspiring rock formations are one of the quintessential landscape features of the American West. From Devil’s Tower in Wyoming, to Delicate Arch in Utah, to Half Dome in California, iconic formations draw hikers and sightseers to far-flung public lands to witness the majesty sculpted by nature. In the Southwest, rock formations are by and large the main attraction. National parks, monuments, and other public lands contain enough arches, canyons, cliffs, hoodoos, and other formations that hikers can stay captivated for a lifetime without ever going to the same spot twice. While Arches, Canyonlands, Zion, and Bryce Canyon National Parks in Utah have a staggering concentration of incredible rock formations and hikes they’re probably not places to go if you’re seeking solitude or are on a more fluid schedule, as reservations made well in advance are a near necessity. Visiting these phenomenal national parks should certainly be high on the list for hikers and backpackers, but there are several other worthy destinations in the Southwest for those looking to see more eye-popping formations than people during their hikes. Chiricahua National Monument Located in southeastern Arizona, roughly two hours from Tucson, Chiricahua National Monument is an excellent choice for hikers seeking an uncrowded wonderland of rocks to explore. While the monument, which is managed by the National Park Service, is relatively small – less than 12,000 acres (with over 10,000 managed as the Chiricahua National Monument Wilderness) – it makes for an excellent destination if you’re looking to spend a few days hiking or trail running among amazing rock formations in a lonesome part of the Grand Canyon State. Whereas the bulk of formations in Utah and other parts of Arizona are sandstone, the formations in the Chiricahua National Monument are rhyolite and the result of volcanic activity that began 27 million years ago. The human history of the area is as fascinating as the geology, with the Chiricahua Apaches having lived in the area for hundreds of years before being forced out by the US Army in the later 1800s and placed on reservations as part of the broader efforts of the government to remove Native Americans from their homelands. No backpacking is allowed at the monument, but the expansive and adjacent Chiricahua Wilderness in the Coronado National Forest provides ample opportunities for multi-day trips, as well as fantastic birdwatching. The Bonita Canyon campground is open all year and is a nice campground, although some of the sites are rather close together. Water is available at the campground as well as food storage boxes and other amenities generally associated with campgrounds (other than showers). The national monument is far from anything, so arrive with as much gas as possible and all the food and beverages you will need. Although strong hikers can easily breeze through the 17 miles of trail in a single day, the landscape these trails pass through compels you to slow down and savor the scenery. For example, at only 1.1 miles, the Heart of Rocks Loop could be rushed through in little more than 20 minutes, but its setting is intriguing enough to easily take an hour as you pause to admire the formations. Several great loop hikes provide options for the varying amounts of time hikers have to spend in the park. The largest loop, at 9.5 miles, passes by virtually all the highlights of the monument. The elevation changes are not extreme, but this loop will give even fit hikers a nice bit of exercise. A Hike in Chiricahua National Monument I was able to spend two days of hiking at Chiricahua National Monument in mid-November, which is prime hiking season. The scorching heat of summer is gone and, while the campground and visitor center are located at 5,400 feet in the high desert, nighttime temperatures weren’t yet frigid. Daytime highs were in the mid-60s and nighttime lows bottomed out just above freezing. Perhaps the only drawback of visiting this time of year was that the days were on the short side, with sunset around 5 p.m. However, one benefit of an early sunset is earlier opportunities for stargazing, which my hiking partner and I took full advantage of during our second night of camping at the monument. The views of the night sky from the campground are fairly limited, so we planned our day so that we would not return there until we were ready to go to sleep. After a leisurely morning, we drove up the scenic road that winds its way up Bonita Canyon to the trailheads and took our time walking the Echo Canyon Loop. From the loop, we could see Sugarloaf Mountain, our destination for later that afternoon. The Echo Canyon Loop, 3.3 miles, passes through beautiful formations, with the Echo Canyon Grotto being especially wonderful. The pines, yucca, and cacti along the route provide botanical highlights in addition to the wonders of the rocks. Upon our return to the trailhead, we made the short drive to the trailhead for Sugarloaf Mountain and loaded up our packs with our cooking gear, dinners, and warm clothes to wear while we stargazed from the superb vantage point of the lookout, perched at 7,310 feet. We took in a magical high desert sunset all to ourselves and then watched the stars come out. Our views stretched east to New Mexico, south to Mexico, and eastward in Arizona across the Willcox Playa with other sky island ranges jutting up from the flatness. We gazed upward for a few hours after dinner and then made the short hike of less than a mile back to the parking lot and drove back to the campground. The next morning, we made use of the free shuttle provided by the National Park Service that takes hikers to trailheads and allows you to hike mostly downhill back to your car at the visitor center. This allowed us to hike an outstanding point to point hike and pass by the Heart of Rocks Loop and enjoy some excellent vistas from the trail of the Chiricahua Mountains and a spectacular perspective on the formations in the monument. The lower reaches of our hike, in oak forest that provides ample shade, were an excellent way to keep stretching our legs before hopping in the car and leaving the monument – a visit that wrapped up a week of backpacking, hiking, and camping in Arizona that was one of the most perfect road trips I’ve ever had the pleasure of undertaking. Need to Know Information No permit is required to visit the park and no entry fee is charged. Campsites in Bonita Canyon Campground can be reserved through recreation.gov and reservations are a good idea for weekends. Campsites are currently $20 per night. For more Arizona hiking destinations to explore on your trip, check out our TrailFinder Page. After the hike, and while Arizona lacks many primitive hot springs that abound in neighboring states, you can find two commercial hot springs outside the town of Safford, and Isabel's South of the Border Mexican restaurant in nearby Willcox, AZ is a great place to refuel. Getting There From Willcox, Arizona travel southeast on Highway 186 for 32 miles. There are great views of the Dos Cabezas Mountains and the Willcox Playa along this lonesome stretch of highway. At the junction of Highway 181, you make a left (east) onto the signed road the leads to Chiricahua National Monument. The visitor center is four miles east of this junction, the campground a short distance past that, and the trailheads approximately eight miles further on the paved dead-end road. Best Time to Go September to May is best, with November to April being perhaps most ideal due to the pleasant temperatures for hiking. However, the higher elevations of the monument do receive snow and frigid temperatures can settle into the area. Maps and Books I found the map from the visitor center to be wholly sufficient for hiking in the monument. Junctions are well-signed and the trails are exceedingly easy to follow. For getting there and to and from other Arizona hiking destinations, the Benchmark Arizona Recreation Map is a great start. The trails of the monument are described in various guidebooks focused on hiking in Arizona, adding insight into natural history, geology, and human history of the area as well. See Hiking Arizona (a Falcon Guide) and Chiracahua Mountains: History and Nature. Green Trails offers their Chiricahua Mountains map. -
How to Choose the Best Backpacking Tent Stakes
Aaron Zagrodnick posted a blog entry in TrailGroove Blog
If you’re not thinking about your tent stakes on your next backpacking trip, it’s probably a good sign that you’ve chosen the right ones. If your stakes aren’t a good match for the ground and conditions at hand however, you could be in for a difficult shelter setup process and perhaps even for a long night. With a myriad of lightweight tent stakes on the market to choose from, there’s likely a specific tent stake for every condition you’ll encounter, as well as others that will perform well across a variety of conditions without specializing in any particular one. The best backpacking tent stake may not be the same for every trip, and is one that meets our own individual approach in regards to durability, ease of use, effectiveness, weight, and price. From left to right: Sheperd's hook, MSR Carbon Core, MSR Groundhog, and 2 examples of aluminum tubular stakes. Tent Stake Materials Tent stakes can be made from a variety of materials from high grade aluminum like the popular MSR Groundhog stakes, to titanium, plastic, and carbon fiber…or a combination of these materials as you can find in the MSR Carbon Core offering. For backpacking purposes, tent stakes are a bit of a conundrum; they need to be both lightweight, and very strong. Heavier weight titanium and aluminum offerings will generally be the most durable and are the best choice if you’ll be setting up camp in heavily used compacted tent sites, where you might have to coax the stake into the ground by hammering them in. On the flipside, you’ll need to handle ultralight tent stakes of the carbon fiber variety for instance, with a little more care. Most of us end up with something of a compromise between the two extremes, like the popular tubular aluminum design that has been found in the (now antiquated) Easton Nano and more currently in the aluminum MSR Core models. Stakes made of stiffer more brittle material can fail by breaking, sometimes in rather spectacular fashion by becoming a flying projectile along with a resounding ping sound, while other stakes will bend instead of, or prior to breaking. Tent stake design varies widely, and the best tent stake will vary depending on the conditions at hand. Backpacking Tent Stake Design Other than specialized options like snow and sand stakes, design of the stake is mostly related to how well it will hold in the ground vs. ease of use. Popular varieties include the aforementioned MSR Groundhog Y-shaped stakes, needle style stakes, V-shaped stakes, and tubular stakes. Y stakes and V-stakes offer very good holding power and are usually quite strong, but with their sharp edges they can be difficult or painful to use on the hands. Additionally, while these are some of the strongest stakes out there, when they do fail, the failures I’ve observed have been breakages. This is offset a bit by the one piece design however – there’s nothing to come apart. Tubular stakes like the Easton Nano that still remains heavily used have a two piece design, where the top is glued / epoxied onto the aluminum tube, and these stakes will bend in my experience, prior to breaking when too much force is used on hard ground. However, being a two piece design, they can also come apart (but at the right angle can still be used for the rest of a trip). Like many things, they will often fail in this manner right away or last quite a while, so it’s not a bad idea to test at home first. With all stakes, but with these two piece types of stakes especially, it pays to first move the stake side to side to loosen before removal from difficult ground. Ultralight shepherd’s hook stakes don’t offer as much holding power as the varieties we’ve covered so far, and can spin in place if you’re unable to get them all the way in, but they are often quite sufficient and are my favorite stakes for frozen ground, where the thin, needle like profile allows for easy insertion and removal, and in frozen ground any stake you can get into the ground will hold very well. Nail stakes would be another option here, and can also be used to first create a pilot hole for a larger stake like an Easton or Groundhog. It’s a bit of a double edged sword in this regard: thin stakes can’t be hammered into harder ground without bending, but the thin profile may keep you from having to do so. Ultralight titanium shepherd's hook stakes weigh in the ~.2 ounce range No matter the design of the stake you choose to go with, longer stakes will always offer more holding ability while of course being a bit heavier. The standard stake length is usually around 6 inches, and generally this is a good choice and balance of weight to holding power for most situations. Going with a longer stake like the 9” MSR Core aluminum option for soft ground, or in areas of heavy forest duff in order to get into the better soil underneath can be helpful on some trips or for larger tents and shelters that place a lot of tension on the guylines. Other Considerations One at times overlooked aspect of a tent stake is color. From experience, I can tell you that going with a neutral colored, earth-toned tent stake will quickly lead to you having to buy more tent stakes in short order. Bright colors are the way to go here, or if needed you can attach a loop of brightly colored, or even reflective cord to an existing stake. Additionally, a great trick for those grey titanium shepherd’s hook stakes is to mold a section of heat shrink tubing in the color of your choice to the hook of the stake, although many now come partially painted for visibility. Weight wise, no matter the stake you decide to go with or whatever design you prefer, for backpacking use we still need to keep it light. In almost all circumstances we can find a lightweight tent stake that will meet our needs and still weigh under an ounce each, with many options being right around the half ounce mark…and some lower like the MSR Carbon Core stakes or many titanium shepherd’s hook stakes. Even on the heavier end of these weights, it’s possible to pick up a full set of decent stakes that will hold your tent down, without weighing you down on the trail. Clockwise starting at 2 o'clock, a comparison of ultralight titanium shepherd's hook, Easton Nano, MSR Carbon Core, and MSR Groundhog stakes My Approach Over the years, I’ve found that there is no one tent stake to rule them all. As such, over time I’ve accumulated a small collection of stakes, and will mix it up based on the type of trip, the type of shelter I’ll be using, and the weather. Frequently, I may even mix and match different stakes for a single trip as well. For 3-season backpacking use my go to tent stake has been the MSR Carbon Core for the past several years (find our full review here). Despite its two piece design (and price), this is a great option if you like the weight of ultralight titanium shepherd’s hook stakes, but would like a better hold in less than ideal ground conditions. These ultralight stakes, at .2 ounces per stake, can weigh under 2 ounces for a set, and offer good holding power for most ground, sufficient durability with a little thought, and as a bonus the whole design and top is easy on the hands. Since these stakes are expensive however, I will often mix in some titanium shepherd’s hook stakes for a shelter that needs a lot of stakes or for those additional tie-outs, and during winter or cold conditions when I know frozen ground will be encountered, I will go a full set of shepherd’s hook stakes which are much easier to use in frozen ground with their thin profile. If I know I’ll be encountering very soft ground, or if I’ll be using a shelter that puts a lot of tension on guylines like the Tarptent Hogback, I will then go with larger and heavier stakes I have on hand (something like the MSR Core) all around, or will use them on select guylines where the most tension will be seen, combined with lighter stakes in other areas. In conditions where you need it, a longer stake is the way to go. I do not use any snow stakes – in these situations I will use a freestanding tent, and when needed, use snow anchors made from snowshoes or trekking poles instead. Choosing the best backpacking tent stake is a compromise between weight, durability, and holding power. Final Thoughts In the end, every tent stake has its own share of pros and cons, and so many different options exist precisely for this reason. In this regard – while I’m always trying to simplify and pare down my overall collection of gear to keep things simple and keep only what I really need, different tent stakes are one category where it’s always nice to have a variety of choices on hand, so that you’re able to mix and match for a customized best approach on different trips or even on the same backpacking trip when desired. For a nice list and wide variety of currently available tent and shelter stakes to choose from, take a look here at Backcountry and here at REI.com. -
10 Ways to Sleep Warmer on Your Next Backpacking Trip
Aaron Zagrodnick posted a blog entry in TrailGroove Blog
It's always hard to enjoy a backpacking trip when you don't sleep well, and sleeplessly shivering throughout the night is one way to guarantee a rough next day. Here's a list of 10 tips, ideas, and considerations that should help the next time your backcountry trip coincides with those colder nights. On this frigid morning, my coffee froze in my cup before I could finish it. Luckily with the right gear I slept warm the night before. A Nalgene Bottle Trapping your heat utilizing your sleeping bag and insulating yourself from cold ground using a warm enough sleeping pad is highly efficient, but sometimes nothing beats the comfort of a heat source other than your own, like a hot water bottle. Though heavier than disposable water bottles, the venerable multi-use Nalgene weighs just 3.8 ounces in the HDPE Ultralight version and withstands temperatures up to 248°F with your standard Tritan version withstanding 212°F, while hitting the scales a couple ounces heavier. Either way, you’re all clear when it comes to heating up some water before hitting the sack. An Ultralight HDPE Nalgene will stay hot for several hours with your standard Tritan retaining heat even longer – insulate either with something like a spare wool sock or an item of clothing that can take the heat, then tuck inside your sleeping bag (make sure the lid is securely closed!). Just remember to bring enough stove fuel or you might be in for a cold breakfast the next morning. Disposable hand warmers can work too, but for me…Nothing beats the versatility of a Nalgene – I can reheat the water for coffee in the morning and of course it works pretty well for carrying water on the trail, as well. By taking extra stove fuel and filling with hot water, a Nalgene Bottle can provide a nice boost of warmth for most of the night. Down Booties For cold feet, down booties beat socks and are a great set-and-forget item to just throw inside your sleeping bag before a trip. Available in various levels of complexity, I’ve found the sock-like variety (no sole) to be the best choice – you’ll just still have to rely on your shoes to walk around camp at night. But they do one thing and do it well – keep your feet warm. At less than 2 ounces a pair, the Zpacks Down Booties are hard to beat, but if you’d like some type of integrated sole check out Western Mountaineering booties as well as options from Feathered Friends. Eat Up and Stay Hydrated On a past Utah bikepacking trip, little water was to be found – In fact not until 70 miles into the trip. As such, I’d packed a ridiculous amount of water, enough to last until the end of day 2. But that doesn’t help much when you lose 3 liters to a leaky connection the first night. Camp for night 2 was near water, but I still found myself crawling into the tent without adequately rehydrating and without the appetite to take in enough calories. Temps dropped to the 20’s, and I shivered throughout the night in a sleep system that normally keeps me warm into the teens. So stay hydrated and eat well, but avoid drinking alcohol – the effect of alcohol is only psychological when in fact it hurts your chances at staying warm throughout the night. It's probably a good idea to hold back on the caffeine as well, and it could even keep you from falling asleep in the first place. A hot meal, warm drink, and a slow to digest snack before turning in for the night will all go a long way here. Campsite Selection It’s all about the elevation. Cold air sinks, but it also gets colder by about 3.5 degrees for every 1000 feet you gain, and often windier as you ascend in elevation as well. So camp lower, but not next to the river. By simply camping on a small rise you can easily raise your nightly low temperature by a few degrees. Select a safe location with natural wind blocks like trees or terrain. Just don’t climb so high that you’re exposed to significant wind or find yourself rising into a different temperature zone entirely. Additionally, we all know how hard it is to get out of your sleeping bag when you have warmed up but it’s still freezing cold the next morning. Selecting a campsite that will receive direct morning sunlight can make a huge difference – so all else being equal going for the west side of that meadow surrounded by tall trees, or an east-facing slope can help. Look to the trees as well – a forested camp can help to cut the wind and is often also warmer. This can especially help with a single wall shelter by reducing condensation compared to a grassy meadow. See our backpacking campsite selection article for more. This was a relatively mild evening, but 50mph wind gusts could have made for a chilly night without the proper preparation. Wear it! If you have it, wear it! Too many times cold sleepers leave their layers in their pack. So wear everything you have…a jacket will make a huge and instant difference, but don’t forget extra socks, dry rain gear, gloves, extra....anything. A sleeping bag with just a little room to layer in this manner will help. Wearing what you have will help maintain your body temperature before you even get in your sleeping bag, and it's so much easier to stay warm than to get warm. Stay Dry Hiking in rain or snow all day, sweating in your rain gear, a sleeping pad soaking up some of that rain that fell into your tent during setup, and even worse a wet sleeping bag can combine to make for a miserable or dangerous night. The first step starts with taking every extra precaution to make sure your sleeping gear, insulation, and any spare clothing you have stays dry at all costs. Water-resistant pack designs and pack covers / liners help, but don’t stop there – pack your clothes, sleeping bag, and unless it’s closed cell foam and too bulky, throw your sleeping pad all in a lightweight dry sack as well for multiple layers of protection. Once in camp, (see Campsite Selection as well as Eat Up and Stay Hydrated) setup a dry shelter and change into dry clothing immediately before the body heat you’ve been generating from hiking wears off. An August trip. In the mountains, a sudden snow storm and cold front can happen nearly any month of the year. Loft and Down Distribution If you’re using a down bag with continuous baffles, it can be easy to forget they’re there. Designed to control the down yet allowing you to shift it as needed…it can also let the down end up in the wrong place – beneath you. Start at a zipper with the bag unzipped and shake to work the down to the top of the bag – heat rises. Down sleeping bags are only as good as their loft. Make sure to arrange your down so it's not all underneath you before you hit the sack. A Vacuum Bottle If you think taking a Nalgene is a luxury, bringing a vacuum insulated bottle along is definitely taking it a step or two further…along with the associated weight. So while this tip may be best suited for car camping or lower mileage jaunts where weight is not the primary concern, it’s hard to argue with the heat-from-within effect that a piping hot beverage can provide. Unfortunately, it won’t be too warm on the outside, but the contents will stay hot throughout the night if you need it. I use an insulated 20 ounce Klean Kanteen bottle, although due to weight mostly for winter day hikes and morning trips to the trailhead. But if you're willing to carry the weight, a vacuum bottle is hard to beat. On winter backpacking trips, a vacuum insulated bottle can make for a good investment. Exercise When all else fails, warm up by generating more body heat – with exercise. Although not a preferred activity at 3 a.m. for most of us, 60 seconds of situps in your bag can help to generate enough heat to at least get you a little sleep – until the next round. Don’t forget this tip before getting in your bag either – jumping jacks work well. A Warmer Sleep System In the end, while these tips and strategies can all help on that unexpected exhausting long day or on a colder than anticipated night, the best and most efficient way to stay warm is to take the right sleeping pad and insulation (bag, quilt, etc.) in the first place. If you find yourself consistently cold at night and having to resort to extra measures, adding a little more weight in this department is your best bet. And if it helps you sleep better at night, not to mention the safety factor, your time on the trail will be much more enjoyable. A sleeping bag liner (view options at REI) is one way to add warmth to your sleep system, but this method is generally heavier and more bulky to pack than just having a warmer sleeping bag to begin with. These days, there are many high quality, lightweight insulated sleeping pads on the market. Evaluate the r-value of your current sleeping pad, and either upgrade to a warmer model or for a cheap solution, simply bring a layer of closed cell foam, like a Z Lite Sol pad or similar (even a torso length addition will add needed insulation) to combine with your existing pad for as little as a few bucks and a few ounces. A 20 degree bag isn’t a 20 degree for everyone – if you’re consistently cold, it’s ok to admit it! A warmer bag will be well worth the weight and investment. Take a look at our full sleeping bag and sleeping pad guides at the aforementioned links for more info on choosing the best solution to keep you warm at night and don't be afraid to upgrade to a sleeping bag with a lower temperature rating. Other than downright warm weather, if temperatures will just be chilly at night, the basic approaches presented here should go a long way towards helping you sleep warm. However in cold temperatures adding in a few of the extra tips mentioned can make all the difference. I find that as temperatures at night drop below freezing, it's time to start taking your sleep system more seriously. In freezing temperatures and in very cold conditions or when winter camping, you may want all the help you can get. Hopefully, these ideas will add up to keep you warmer at night on your next backcountry trip when the temperatures drop. What are your favorite ways to stay warm at night? -
Bikepacking the White Rim Road, Canyonlands National Park
Aaron Zagrodnick posted a blog entry in TrailGroove Blog
For this trip, my brother and I met up in the Island in the Sky District of Canyonlands National Park. My brother is more of a biker than a hiker, and as such our goal was to bike the White Rim Road that runs throughout the district and loop back to our starting point, a mountain bike ride totaling 103 miles. We’d brainstormed a few ways to tackle the trip, from trying it in one very long day to taking things very easy over many days. Eventually, we settled on 2 nights…we'd be carrying our gear and camping along the way. Due to my inability to make it out of town before dawn the day of the trip, we started a bit behind schedule. I didn't arrive in Canyonlands until mid-afternoon, and as such it was a race against the light. We shook hands and immediately finalized loading our bikes, tanked up on water, and hit the road. To the White Rim Turning onto Shafer Trail, we were quickly chilled as we descended over 1000 feet in just a few miles, testing our brakes and our ability to stay on the road – the amazing view off to the side trying to lead your wheels toward a sheer drop at every glance. With us and the sun both descending, light faded quickly and the La Sal Mountains to the east faded from view. The rest of the day’s (or night’s) ride would be by headlamp, and we rode on past countless sheer drops off to our side, our headlamps unable to illuminate the bottom of the canyons when we tried to see where the black depths might lead. The moon rose. We continued on side by side, focused on the beams of light in front of us as the night progressed. We arrived late at our campsite – setting up the tent a quick dinner was had and we found ourselves soon asleep under a star-filled sky in the Utah backcountry. It’s always an odd sensation arriving somewhere in the dark, then waking up the next day to have the sun reveal the true lay of the land – almost like flying from one side of the country to the other. A shock to the senses. There’s not much to say about day 2 except that we basically got on our bikes and rode for 9 hours. Eventually, we arrived at our campsite on the Green River as the sun was setting, both tired and out of water. The river didn’t look particularly appetizing, but thirst always wins. We filtered water, the water welcome but just above freezing, so cold it hurt your hands to hold your water bottle and it hurt your teeth to drink. But drink we did. The Green River The Ride Out Day 3 we awoke to temps in the 20’s, our water mostly frozen. This close to the river, the sun remained hidden behind the canyon walls and likely wouldn’t illuminate our campsite until late into the morning. We were gone before that happened, back on the road, riding and walking our bikes through sand, eventually finding ourselves outside the park boundary. At an intersection, we turned right and ascended up and up switchbacks, our ride now on the final leg. Eventually we made it, and began the ride along the now straight gravel road, then the paved park entry road back to our vehicles. A tailwind turned to a headwind, hill after hill was ascended, the visitor center always somehow one more hill ahead. However, after battling the hills and wind the ride did end, and luckily I’d stashed a few gallons of water back in the truck to quench my thirst. Handshakes were again exchanged; a few celebratory pictures taken. Long drives ahead, I headed north on Highway 191, my brother turned right, each with victory in hand. Although climbing these switchbacks required quite the effort, it was far from mundane. Gear Selection & Considerations This was my first time bikepacking, and overall, I found that my lightweight backpacking gear transitioned over to the task very well. I left my ULA Circuit at home, and replaced it with an REI Flash 22. This was a mistake in some respects, as the Flash 22 is so large that it tempted me to carry too much gear on my back, and even packing it full of my lightest things, after a day of riding my back was pretty sore the next day. Luckily, ibuprofen came to the rescue as I was nearly unable to ride. Next time, I’ll pack more on the bike and as little as possible on my back. Still, the Flash 22 was definitely not large enough to carry all my gear and water, so I put as much weight as possible in 2 bags from Revelate Designs: The Pika seat bag and the Sweetroll handlebar bag. I was tempted to go with the Viscacha, which is the larger version of the Pika seat bag, but I was worried about clearance between the bag and the back tire. As it turned out, even with the Pika, I was getting interference between the bag and the rear wheel on the big bumps as the back suspension came close to bottoming out, unless the seat bag was adjusted perfectly. The problem was that after an hour of riding or so the adjustment would seem to shift and again you could hear the sound of the tire contacting the bag. Perhaps more experience with the bag could alleviate this problem. You could go with a hardtail bike on a trip like this, but we both agreed by the end of the trip that full suspension is the way to go. The road isn’t always nice and smooth by any means, and you’ll be able to go faster over the bumps with a full suspension bike, and do so more comfortably. I wore Pearl Izumi X-ALP MTB shoes, a helmet, and gloves. Definitely go with a full-fingered glove, as all the shifting and braking will start to eat away at your fingertips if you go with fingerless gloves as I did. I also took a repair kit in a Topeak Aero Wedge bag that I strapped to the frame of my bike, a pump I threw in the Flash 22, and other than that and the bike itself my normal backpacking gear worked fine. A successful trip and tens of thousands of calories burned. Need to Know Best Time to Go Spring and fall are your best bet to avoid the heat and the cold. Getting There Drive to the Island in the Sky District of Canyonlands National Park outside of Moab, Utah via Highway 313. You’ll need to pay at the kiosk (or visitor center if the kiosk is unmanned) to enter. You can park at the Shafer Canyon Overlook just past the visitor center on your left, as the park asks that you don’t park at the visitor center itself due to limited parking spaces. If you’re riding White Rim clockwise as we did, ride back the way you came for just over 1.5 miles and take a right on Shafer Canyon Road to start your trip! Alternatively, you could ride counterclockwise from here, or if you have two cars you could shuttle out the road ride from the Mineral Bottom Road switchbacks (you can park at the top) back to the visitor center area. We rode the entire loop, and it’s great to say we did…but it sure felt like a long, never-ending ride back to our cars after we climbed the Mineral Bottom Road switchbacks. Information Obtain a permit well in advance of your trip here. The physicality of mountain biking over 100 miles and water are probably the biggest obstacles. We packed over 24 hours of water to start the trip and then resupplied at our campsite along the Green River the 2nd evening. The Green River here is really silty, we filtered via a .1 micron filter and a carbon element, then hit it with a Steripen Adventurer Opti for good measure as well. I thought we might find water before the Green River in potholes, etc. but there was no water to be found. Technically, it’s not a hard ride, although some sandy and steep sections may need to be walked. Physically it’s a challenge simply due to the weight of carrying gear and the distance. Keep an eye out for 4-wheel drive vehicles you'll likely encounter on the road. Maps You can find a pretty good map of Island in the Sky and the White Rim Road along with some additional info for free here. We took Trails Illustrated 310. -
Choosing the Best Backpacking & Hiking Shoes or Boots
Aaron Zagrodnick posted a blog entry in TrailGroove Blog
Both a prerequisite for the enjoyment of any day hike and critical for the success of any extended backpacking trip, our choice of a hiking shoe or boot is one of the most important gear related choices to make and dial in prior to any outdoor excursion. Not only does the best hiking boot or shoe depend on fit and our own individual preference, but the best options will also vary widely by season – although many options can also be workable across more than one season, or even with a few caveats year round. A selection of lightweight, breathable trail running shoes. Most hiking shoes should last you at least 500+ miles, more for hiking boots. Footwear for Early Spring and Late Fall Characterized by cool to temperate weather conditions with moisture being frequently encountered from many angles including precipitation, light snow, river crossings, and just overall soggy or muddy conditions (i.e. “mudseason”), feet will likely stay pretty warm on their own – as long as they’re dry. Thus a waterproof / breathable option (Gore-Tex, eVent, proprietary membrane) can be very suitable for these conditions and shoes with these technologies are offered in a wide array of styles. Water resistant trail running shoes, like the Altra Lone Peak waterproof line can be one way to go if you prefer a trail running shoe, or for conditions where you’ll be moving fast (including trail running) and only light moisture may be encountered. Alternatively another option to take a look at would be the Salomon X Ultra line (view at REI), which is offered in low and mid-height versions using Gore-Tex (also offered in non-waterproof versions for milder weather). Many of the best hiking boots will feature a Gore-Tex waterproof breathable lining. Slick conditions will frequently be encountered, and snowy conditions are par for the course in mountainous areas from remaining winter snow in the spring and new snow as winter approaches in the fall. Thus a little ankle support from a mid-height boot can offer some reassurance...which will also help further to keep snow and mud out. And admittedly on any soggy backpacking trip with a waterproof / breathable shoe, it’s always nice to hike through the mud all day and still have clean feet at the end of the day when it’s time to crawl in the sleeping bag. Some hikers who, like myself, prefer to hike in trail runners whenever possible do have success pushing trail runners into these seasons and cool to cold, wet conditions by adding waterproof breathable socks, and while this technique has worked for me in the past, at some point I simply find it more comfortable to bite the bullet and wear hiking boots of the waterproof variety when I head out in these conditions. Summer Hiking / Backpacking Shoes With hot and mostly dry hiking, except perhaps for the occasional water crossing or summer rainstorm, summer is ruled by footwear of the non-waterproof and very breathable variety. Trail running shoes vs. boots is up to you and your preference for mobility and light weight vs. ankle support and protection, as well as pack weight, but in these conditions a breathable shoe will keep your feet more comfortable throughout the day, increase comfort and reduce the likelihood of blisters and hotspots, and dry faster overnight. While our shoes or boots may get wet from the occasional water crossing or rainy day…once things dry up and with warm to hot temperatures, the simple act of hiking dries the shoe as we go along during the day. In contrast a traditional hiking shoe made from leather and / or utilizing waterproofing layers will hold sweat or outside moisture in, and in rather miserable fashion sometimes day after day while backpacking. Usually summer is also the time where our higher mileage backpacking trips are planned, and staying light on your feet helps greatly in this regard. Popular lightweight options include trail runners such as the Altra Lone Peak and the Brooks Cascadia, and for a boot option the non-waterproof version Merrel Moab Mids can frequently be seen on the trail. Best Winter Footwear Options True winter hiking and backpacking are where things start to get specialized, keeping feet dry and warm is key, and keeping your feet dry doesn’t mean your feet will necessarily be warm at this stage. Here we know we’ll be encountering deep snow, and waterproof mid-height to higher winter boot options will be sufficient at keeping snow out as long they are compatible with another key piece of winter gear – your gaiter choice – and for cold conditions two things can be helpful: a vapor barrier liner and going with an insulated boot. Insulated boots are typically insulated with Thinsulate, proprietary insulation, or even space age type materials like Aerogel, and are typically rated by a temperature rating (usually quite generous), and / or an insulation weight spec such as 200 gram, 400 gram, etc., but in all regards the addition of insulation moves this option into a quite specialized category. Even in these conditions, I prefer to avoid a traditional hiking boot with extensive full grain leather, etc. – these boots are often too heavy and considering the leather combined with waterproof membranes, lack breathability. A 200 gram insulated waterproof breathable boot for backpacking. Many hiking boots will feature a gaiter ring or attachment point towards the toe. Preferences will vary, but generally in cold conditions the more sedentary you’ll be the more insulation you’ll need – if you are a wildlife photographer or heading in for a day of icefishing, you will probably want the heaviest insulated boot you can get, or you may need to go with a specialized option for something like backcountry ski touring or mountaineering. For lightweight hiking, backpacking, and snowshoeing purposes however, I’ve found 200-400 gram insulated boots to be perfect for higher output hiking and snowshoeing activities , but as part of a footwear solution. This involves adding in a VBL, gaiters, and a warmer sock solution while making sure the boot is sufficiently sized to accommodate good circulation and the additional gear. Either way, in these bitter cold conditions, test your setup on day hikes first, test both on the move and not, and adjust as needed. The Lightweight Big 3 Over time I’ve found that for the great majority of year-round backpacking and hiking purposes, having 3 types of footwear options on hand can handle almost any condition very well. A lightweight, breathable trail running shoe is my go-to option from mid to late spring through early to mid fall and for anything from the easiest day hike to the longest backpacking trip. In fact, I find I lace these up as soon as I can in spring and hold out as far as I can into the fall; the light weight combined with the breathability and quick dry times make these a comfortable option for the majority of the hiking season and for backpacking with a reasonably lightweight pack. For cooler springtime and fall conditions, stepping up to a mid-height, waterproof / breathable hiking boot adds warmth, keeps your feet dry during these times when additional moisture will be encountered and dry times are increased anyway, and the extra height provides a little ankle support on slick, uneven terrain (you can't always tell where your foot will end up in snow), and will help to keep light snow out. For true winter conditions, a lightweight, insulated winter hiking boot will be well appreciated as temperatures fall into the teens and further to below 0 temperatures. A 200-400 gram insulated boot (depending on activity level) has worked well for me even in extreme cold, and in these true winter conditions I always utilize a VBL and gaiters, providing additional warmth and keeping the interior of the boot dry. If you’ll however, be sitting around a lot, or opt to skip the VBL on day hikes, you will want to swing your choice towards boots of the heavier insulated variety. Keeping the rest of your body dry and warm is also critical in this type of weather (and goes a long way towards keeping your feet warm as well) – but that’s another article. From trail runners all the way to winter boots, out of the box fit is just one part of the equation. While most of the shoe comfort will be built into the shoe, you can also customize fit and performance using a few lacing techniques that can help take a good shoe to great. For more on lacing take a look at our lacing tips guide which offers a few techniques to help customize your fit. One Footwear Option to Rule Them All? With all the previously discussed options in mind, without a doubt hiking shoes are not only a personal choice, but they are for the most part, specifically suited for individual situations. But what if you want one hiking or backpacking shoe that would work well across many, if not most seasons and conditions? While I’m a big lightweight trail running shoe fan anytime I can possibly get away with wearing them – if I had to pick only one shoe for all conditions, and as much as I might grit my teeth on summer hikes or even stay home when temps fell below 0, I would have to choose a venerable mid-height, waterproof breathable lightweight hiking boot for these conditions. The mid-height waterproof / breathable boot is perfect for shoulder seasons and in light snow, and provides sufficient warmth in these cool, but not cold conditions while keeping feet mostly dry. These boots are a bit too hot for me for summer hiking, but with a few changes of socks are totally workable for warm, but not too hot, mountain hiking. While an uninsulated boot will be too cold for true winter hiking, they can be used for quite cold temps combined with a liner sock, a VBL setup, and another warmer sock as long as the boot is sized appropriately. Combined with gaiters, this setup will be appropriate for many warmer winter hiking conditions. The lightweight waterproof breathable mid-height boot is an extremely versatile option across the seasons. Conclusion As we've detailed, the best hiking shoes vary by season, terrain, weather, and your personal preferences. Just like the usefulness and performance of an otherwise nice vehicle can be compromised by a set of cheap tires, keeping the right hiking treads on your feet will ensure you’ll be able to make the most out of any hiking and backpacking trip – and if you take care of your feet in the outdoors, they’re sure to take care of you. No matter the solution you choose to go with, fit is of course as important as design, and once you’ve dialed in your own outdoor footwear system – be it a collection of shoes and boots perfect for each season and scenario or an option or two that’s workable across many, all we have to do is lace up and hike. For a list of hiking / backpacking shoe and boot choices, including everything from trail runners to winter boots and beyond that can be sorted and filtered by the options discussed above, check out this page at REI. -
 RimWalker joined the community
 -

Luna Peak: Hiking the Heart of the Wild North Cascades
seano posted a blog entry in TrailGroove Blog
The Cascades have a reputation for long and brushy approaches, and the Pickets, a subrange in far northern Washington, have a particularly bad reputation in both respects. Even after escaping the dense vegetation, reaching many of the summits would feature more technical climbing than hiking. Together, these two factors have deterred most hikers from even contemplating a trip to this rugged and scenic area. The Pickets' reputation is not entirely deserved: Whatcom Peak at the far northern end is an alpine hike and a short third class scramble from the trail at Whatcom Pass, and the southern Pickets have become downright popular in the last decade, with a well-beaten climbers' trail and crowds on summer weekends. Still, the central territory between Mounts Challenger and Terror remains seldom visited and therefore unspoiled. Hiking Luna Peak At 8,311 feet, Luna Peak is the highest point in the Pickets, lying east of their main north-south spine. Luna is not an easy peak. Visiting Luna involves hiking a long trail, fording a stream, and surviving a few miles of savage bush-whacking up into the alpine. While it can be done as a dayhike, most people will take 4-5 days. Those willing to pay the price are rewarded with solitude, near-pristine wilderness, and one of the most spectacular panoramas in the continental United States: the precipitous, heavily glaciated eastern cirques of the northern and southern Pickets. The usual approach comes from the southeast, via Ross Lake (formerly the upper Skagit River) and Big Beaver Creek. Starting from the Ross Lake trailhead, you are immediately faced with a choice: pay for a boat shuttle, or hike 7 rolling miles along the lakeshore. While this hike is scenic enough, with views of Jack Mountain and the Hozomeen Peaks across the lake to the east, it adds considerable distance to what is already a long outing, and the water taxi is reasonably affordable when shared by a group. From the dock or footbridge, a well-used and maintained trail meanders along the north bank of turquoise Big Beaver Creek, gradually gaining elevation from the lakeshore at 1,618 feet toward Beaver Pass 2,000 feet above. Along the way, the trail passes through miles of shadowy old-growth forest. Occasionally, a marsh or avalanche path will afford views of steep Stetattle Ridge and Elephant Butte to the south, or Mount Prophet and its subsidiaries to the north, but the trail is mostly a green tunnel, with giant trees towering above and a carpet of ferns and moss to either side. Amazingly, most users of this trail never visit the surrounding peaks, and catch only fleeting and confused glimpses of the Pickets as they cross the low, wooded pass to Little Beaver Creek or Hannegan Pass. There are several established campsites along the way, with the most useful one helpfully labeled "LUNA." Most parties will want to camp here to prepare themselves for the crux of the trip: locating "Access Creek" and crossing Big Beaver Creek. While one might think that finding a stream junction would be easy, one would be mistaken. The two creeks join each other in a broad, marshy flat, with dense alders overhanging their banks. One method is to mark the creek junction on a GPS and travel by IHR (Instrument Hiking Rules). Do not be surprised or dismayed if it takes an hour or more to travel the first quarter-mile after leaving the trail; some parties have taken the wrong creek, or even failed to find the creek altogether. From Luna Camp, proceed about a mile farther up the trail, somewhat past Access Creek, before plunging blindly into the marsh with the goal of crossing Big Beaver Creek and locating Access Creek's north bank. If you find yourself going over and around logs, carefully pressing devil's club aside, stepping past what looks like giant mutant spinach leaves, and route-finding through a bog, you are doing things right. Eventually, after brief but fierce combat with some alders, you will emerge on one bank of the Big Beaver, to be faced with 20-30 feet of water and a mirror wall of alders on the opposite bank. After crossing Big Beaver Creek, be sure to locate Access Creek before leaving the valley floor. Then head west along its north bank, pushing through sparse forest and dense blueberry bushes as you climb above the bog. The easiest path follows an indistinct ridge, then continues out of sight of the creek, but within earshot. This section can be miserable for the impatient, especially after a day's easy travel on the Big Beaver Trail. Even above the marsh, progress is slow with no views, and many of the open areas are choked with spiny brush and devil's club. Enjoy the profusion of life and the absence of any signs of human passage. Around 4,000 feet, the south bank opens up in a patchy boulderfield, while brushy slide paths on the north begin to frustrate progress. Although you can cross at the lower end of the boulder fields, strips of alder and blackberries are troublesome, and often force you well above the creek. The best route probably stays on the north bank until past most of the alder patches on the south. The view finally opens up near the head of the valley, where Luna's precipitous east face rises 4,000 feet in less than a mile. You can either camp here near the stream, or continue to a higher camp above Luna Col for a better morning view and a shorter summit day. To reach the col, head south-southwest up the left-most steep gully at the head of the valley. In early summer some traverse the snow climb with technical gear. Later, it melts out to steep dirt and scree resulting in tedious hiking. At the top of the chute, the north side of the southern Pickets comes suddenly into view, a reward justifying the past two days' labors. From the MacMillan Spires to the Crescent Creek Spires, peaks rise 4,000 feet from MacMillan Creek in a wild jumble of rock, snow, and ice. Beyond Luna Col, the route sidehills across steep heather in a mile-long gradual ascent to the saddle between Luna and glacier-clad East Fury. At the saddle, Mount Challenger and its southern glacier emerge to the northwest, with Luna Lake and its mud-puddle sister lying far below at the head of Luna Creek. The creek has earned a reputation as one of the worst bushwhacks in the north Cascades, with miles of devil's club and impenetrable alder thickets separating Luna Lake from the Big Beaver trail. While Luna looks like a simple boulder-hop from the saddle, it hides a final surprise. Upon reaching what appears to be the summit, the peak reveals a final, exposed narrow ridge leading to its true, eastern summit. However, there are better views from the ridge's western end anyway. Looking west, the whole spine of the Pickets extends in a savage panorama of rock buttresses and hanging glaciers. Northeast, the twin Hozomeen Peaks rise on the other side of Ross Lake. Southeast, you can trace your long route from the trailhead, twelve miles away as the crow flies, along the Skagit River, Big Beaver Creek, and Access Creek. Luna Peak: In Conclusion Few places this remote, inaccessible, and unvisited remain in the lower 48. Only a handful of people touch Luna's summit each year, and their light touch leaves no trace. Therefore the reward of your journey comes with an obligation to leave no trace as well. This is one of a dwindling number of places in the continental U.S. that remain essentially untouched by humans. Need to Know Information Backcountry camping permits are required and can be obtained free at the Marblemount Ranger Station (360-854-7245). Getting There A water taxi service from Ross Lake Resort is offered to and from Big Beaver Creek. To reach the taxi, park at the Ross Lake Trailhead and hike down the trail and across the dam. Best Time to Go August or early September depending on snow conditions. Maps Either use CalTopo to print custom maps, or Trails Illustrated #223 North Cascades National Park. Books Covering trails in the area, you can refer to Hiking the North Cascades, a Falcon Guide as well as Day Hiking North Cascades. Editor's Note: This article by contributor Sean O'Rourke originally appeared in Issue 28 of TrailGroove Magazine. You can read the original article here for additional photos and content. -
Nalgene Ultralite - Best Backpacking Water Bottle Ever?
Aaron Zagrodnick posted a blog entry in TrailGroove Blog
When hitting the store for a backpacking water bottle we may be inclined to at first reach for our favorite color bottle or the bottle featuring the most appealing printed design on the side. While there’s nothing wrong with that when it comes to having a water bottle around the house or at work, when it comes to choosing a hiking or backpacking water bottle other performance factors should be considered. With weight being paramount in the backcountry, the prototypical standard, Tritan Nalgene bottle may not necessarily weigh you down, but there’s a better option in the same company’s lineup. Wide-mouth (left) and narrow-mouth HDPE Nalgene bottles The Ultralite HDPE Nalgene The Ultralite HDPE Nalgene bottle – the old school, slightly opaque white bottle that was par for the course several decades ago when backpackers wore fluorescent jackets and shorts with rag wool fingerless gloves, may just be the best water bottle of all time. While this bottle is not as ubiquitous as in years past, the HDPE / Ultralite Nalgene – made from food grade high density polyethylene plastic, is much lighter than its Tritan cousin (both are BPA-free, as you’d expect these days). At 6.3 ounces the Tritan adds nearly half a pound (each) to your pack, while the Ultralite adds a much more respectable 3.9 ounces. While nearly a quarter pound is still significant for ounce counters like myself, it’s worth the weight. As opposed to reusable bottles, some backpackers may opt to take soda or bottled water bottles to save weight. Re-used plastic water bottles are a decidedly lighter weight option weighing a couple ounces, instead of a few. However and as soda bottles, etc. are not designed to be reusable water bottles, disposable water bottles can’t take boiling hot liquids – and having a bottle that does allows you to make anything from hot coffee or tea for example, and also allows for throwing a hot water bottle inside your sleeping bag on chilly nights. Plastic bottles of this type also break, as I can attest to, and when one breaks a few days into a 10 day stretch, it’s inconvenient to say the least. Collapsible bottles will beat the Nalgene Ultralite in weight as well, but not longevity, usability, or durability. The Nalgene Ultralite HDPE has been a mainstay in the outdoor water bottle market for decades. Nalgene Ultralite vs. Tritan Water Bottles As we previously discussed, the HDPE is lighter than the Tritan, a big selling point and being softer than a Tritan Nalgene, the Ultralite HDPE handles drops better in my experience. The HDPE is equally suited for hot and cold beverages, and although both the Ultralite and Tritan can handle boiling water, the HDPE offers a little more peace of mind I suppose – the HDPE can handle water or hot beverages up to 248 degrees Fahrenheit (good for boiling water on below-sea-level backpacking trips I suppose). The Tritan on the other hand, tops out at 212F. And, when it comes to figuring out how much water to boil for dinner, any Nalgene bottle features graduated measurements in ounces or ml on the side of the bottle, which helps to get that meal dialed-in. To top it off, you won’t lose the tethered lid, and the bottles are especially secure in the leak department. Then venerable Nalgene Ultralite in the narrow-mouth version While the more modern Tritan Nalgene may admittedly, win in style factor and is the more popular option – found everywhere in stores, on the trail, and in coffee shops and schools, I’d argue that its more plain cousin is by far the best choice for hikers and backpackers. Most importantly – it’s lighter in weight. The Tritan Nalgene is a downright heavy water bottle approaching half a pound empty and even approaches the weight of some stainless steel bottles. The HDPE Ultralite Nalgene is not necessarily what I’d term “ultralight” (although compared to insulated water bottles on the market, it might just be), but it strikes the perfect balance between durability and weight. Sometimes, old school just can’t be beat. Perhaps the only con to this bottle is that it might be a tight fit in your car cup holder, but I might ask, is that an issue with the bottle, or the car? The narrow-mouth is easier to drink from, but the wide-mouth is easier to fill. Final Thoughts I'll still grab my stainless steel vacuum insulated bottle for coffee on the way to the trailhead or in addition to the Nalgene Ultralite on trips in the middle of winter, and stainless steel water bottles are great when weight isn't a concern. However on 3-season trips the Nalgene Ultralite is the only water bottle I pack along on every backpacking trip, hitting the sweet spot between a disposable plastic bottle and heavier options on the market. The Nalgene Ultralite HDPE bottle is available in a wide-mouth bottle (easier filling) and a narrow-mouth bottle (easier drinking) in the standard 1 liter size that fits in the side water bottle pocket of any backpack on the market worth its weight. The bottle can also be found in 16 ounce and jumbo 48 ounce options. You can find the normal and most popular wide-mouth option here at REI and here at Amazon. -
Hiking and Backpacking Jargon: Headlamp Lumens (Light)
Aaron Zagrodnick posted a blog entry in TrailGroove Blog
Lumens are a unit of measurement used to determine the total amount of visible light emitted from a source. In the backpacking and hiking world, you can use the lumen value to compare the amount of lighting you’ll get from various nighttime illumination sources such as a headlamp. Lumen Considerations / How Many Lumens Higher lumen values typically come at the cost of shorter runtimes and decreased battery life. Brighter lights are also generally heavier and more expensive. For general nighttime trail navigation, I’ve found that at least 30-50 or more lumens are needed to follow good trails with relative ease, with around 50-100 being preferred for more vague and / or unfamiliar trails. However, lights that have the flexibility to switch between several modes of brightness can be especially helpful while backpacking. While in camp very low levels of lighting of just a single lumen or less can be great for reading or finding a tent zipper without disturbing fellow campers. However, this all comes down to personal preference. Additionally, very low levels of light will allow you to keep your own night vision somewhat intact. On the other hand, there will be times where you may need to briefly light up an area to make it through a particularly difficult section of trail or to check out an unfamiliar noise in the night. For these circumstances a higher level of lighting in the 200+ lumen range can be especially welcome. Many headlamps feature separate spot and flood LEDs, and in many cases one or the other can be selected by the user, or in this case (the Black Diamond Spot) both can be selected simultaneously. Beam Pattern Don’t forget to consider the beam pattern. A light with a flood beam is great for close up work, but won’t project very far into the distance. A spot beam projects far, but only illuminates a small area. Consider a light that allows you to switch between flood and spot using a diffuser or a light that compromises and has a flood beam with a center hotspot – my choice for the best of both worlds. More Lumen Related & Headlamp Information See our full article on How to Choose the Best Backpacking & Hiking Headlamp for more on headlamp selection. For a list of backpacking and hiking-ready headlamps on the market, see this page at REI Co-op. Editor's Note: This article originally appeared in Issue 6 of TrailGroove Magazine. You can read the original article here. -
Backpacking & Hiking Jargon: Piezo Igniter (Stoves)
Aaron Zagrodnick posted a blog entry in TrailGroove Blog
A piezo igniter is a push-button stove ignition system that is often integrated directly onto upright canister stoves for convenience and ease of use. The system works via use of a striker that hits a piezo-electric crystal, which generates electricity even when slightly deformed. When the ignition button is pushed the resulting electrical charge generates a spark. With the integrated ignition system there’s no need to hunt down your lighter or use matches – simply open your stove’s gas valve slightly and push the button to start your stove. This is especially beneficial on early morning wake up calls when a cup of coffee – and as fast as possible – is in order. With moving parts and a mechanism that can simply wear out however, piezo ignition systems can and do fail in the field on occasion (I subsequently always take backup methods); whether the convenience and slight extra weight is worth it is up to each one of us. On this example (MSR Pocket Rocket Deluxe) the piezo igniter is integrated directly on the side of the stove, and simply pushing the lever will light the stove with the valve simultaneously slightly open. Forms of Piezo Igniters for Backpacking Piezo igniters come in two forms – those attached and integrated into the stove and those that are a separate all in one item like the MSR handheld piezo igniter. Separate igniters have limited use; they can’t for example start a fire and are only designed to work with lighting stoves or items utilizing canister fuel. They can however be convenient, and don’t result in a singed thumb like you can sometimes get with a lighter. Editor's Note: This Jargon installment originally appeared in Issue 38 of TrailGroove Magazine. You can read the original article here.


-
Popular Contributors
Nobody has received reputation this week.
-
Current Deals
Premium Members: Get a free Gaia GPS Premium Subscription for a year ($60 value) to use with the GaiaGPS smartphone app. Full details here on the Premium Gear Deals and Search Page
REI: Great Deals Up to 50% Off at REI.com!
Zpacks: Lightweight and roomy, the Duplex Tent weighs just 19 ounces and sleeps two people with two doors and two vestibules. Learn more here at Zpacks.com
Backcountry: Up To 50% Off at Backcountry.com!
Amazon: Click Here to View All Backpacking & Hiking Gear with Free Shipping (Over 10000 Items)
Subscribe
Join 15k+ Subscribers
Member Statistics
-
Total Members5,435
-
Most Online809
Newest Member
HarperWking
Joined